Full Zone Cloudflare Activation
Updated on Feb 9, 2018
With Cloudflare's module version 7.0.0 for cPanel, full DNS Zone setup was introduced and with it, more options to enable for your websites without having to create a new registration on Cloudflare's website. This will also make it so your content will be served via Cloudflare's edge nodes thus using Cloudflare's infrastructure and minimizing the bandwidth generation of your domain for your hosting account.
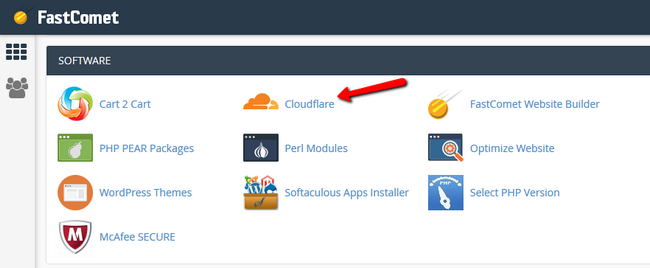
To start off, please access your cPanel and navigate to the Cloudflare icon located in the Software section. Alternatively, you can use the search bar in the top right corner in order to find the module.
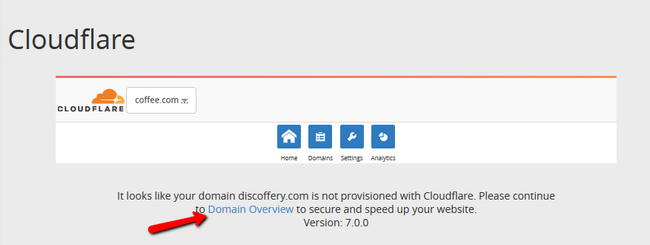
Select the domain for which you wish to enable Cloudflare and click on Domain Overview.
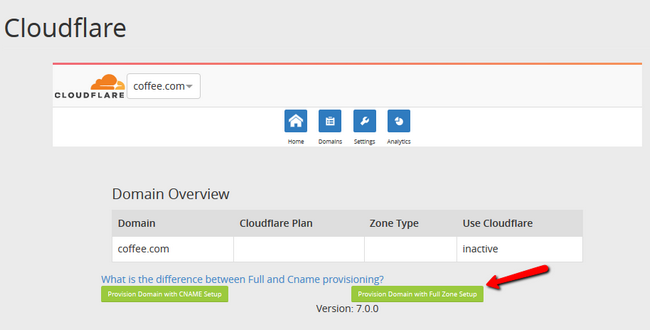
Currently your domain will be marked as inactive in the "Use Cloudflare" bracket. To initiate the activation process, click on the Provision domain with Full Zone Setup Green button.
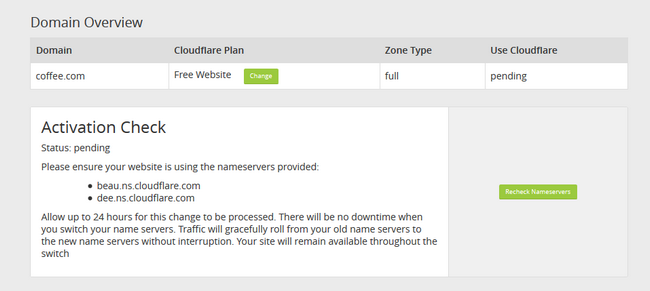
During the activation check step you will be provided with a new set of Nameservers which you must apply to your domain.
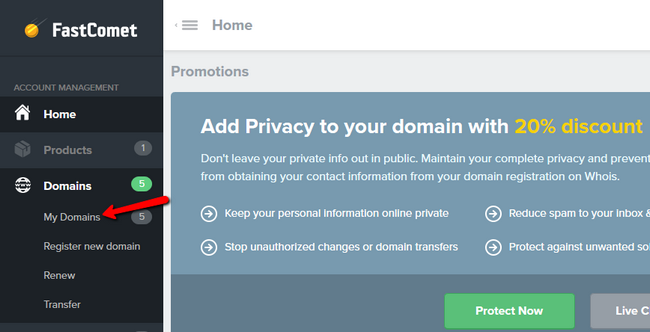
You can easily change your current Nameservers for the domain if you have the domain purchased or transferred to us as you will be able to access it via your Client Area. To do so you must go to Domains → My Domains.
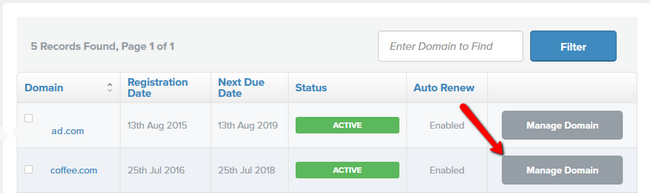
Now select the domain in question and click on the Manage Domain button.
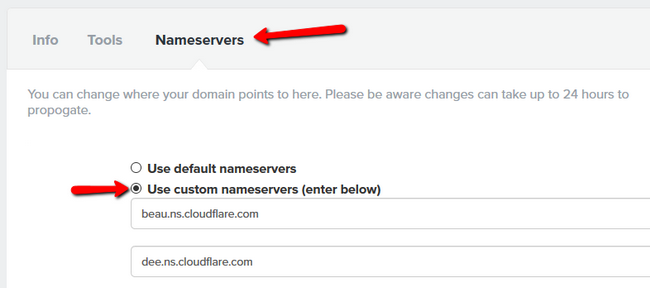
Click on the Nameservers tab and then change your current nameservers with the ones provided by Cloudflare. In our case that would be beau.ns.cloudflare.com and dee.ns.cloudflare.com. Don't forget to click the Change Nameservers button at the bottom of the page.
Now all you have to do is wait for the propagation of the change. You will receive an email from Cloudflare when the process has been completed paired with some additional guidelines from the Cloudflare team. In this email you will also have your previous Nameservers, in case you want to re-apply them in the future.
Note that only a few of the many DNS records will be activated via Cloudflare by default, you will have to check if you need to enable some specific ones manually by switching them to an On position here.
Now that you have activated full zone Cloudflare for your domain you can start configuring it to your needs by clicking on the Settings icon.

Here you will find useful tools like security options that can help you mitigate bot attacks, auto minify for your content to speed up your website and cache expiration setup for better content delivery. Under each option you will see a Help drop-down which will provide you with further information about the functionality of set option.

With this you have completed our tutorial for activating the Full Zone Setup of Cloudflare via cPanel for your domain.

Optimized SSD Web Hosting
- Free Domain Transfer
- 24/7 Technical Support
- Fast SSD Storage
- Hack-free Protection
- Free Script Installation
- Free Website Transfer
- Free Cloudflare CDN
- Immediate Activation