How to Add a Navigation Menu in WordPress
Updated on Jun 21, 2023
Your navigation menu is one of the most important aspects of your WordPress site. It's the element that provides information about your website's content as well as a clear path to your most important pages. However, the WordPress menu system is more complex than it appears. With that in mind, we'll show you how to add a navigation menu in WordPress in this post. When done correctly, it will provide the best experience for both you and your visitors.
This post includes:
What is a Navigation Menu
A navigation menu shows a list of links to key areas of a website. The links typically displayed as a horizontal bar of links at the top of each page on a website. Navigation menus help visitors find what they want by giving your site structure.
WordPress makes adding menus and sub-menus a breeze. Links to your most important pages, categories or topics, blog posts, and custom links like your social media profile can be added. Your WordPress theme will determine the precise location of your menu. Most themes will provide several options for creating different menus that can be displayed in various places.
For example, most WordPress themes include a primary menu that appears at the top. Some themes may also include additional menus.
How to Create Your First Custom Navigation Menu
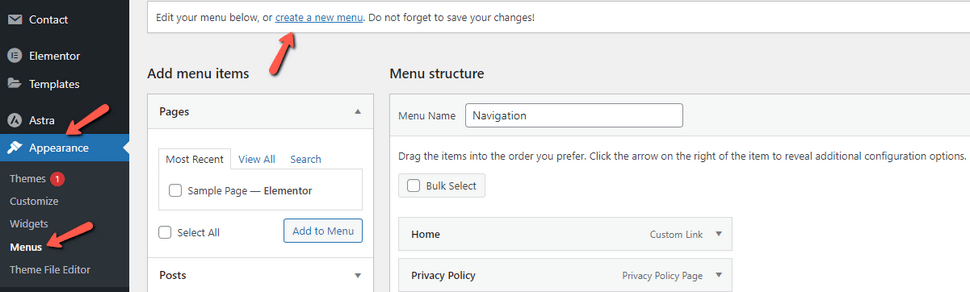
To create a navigation menu, visit the Appearance → Menus page in your WordPress admin dashboard. Then, click on Create a New Menu.
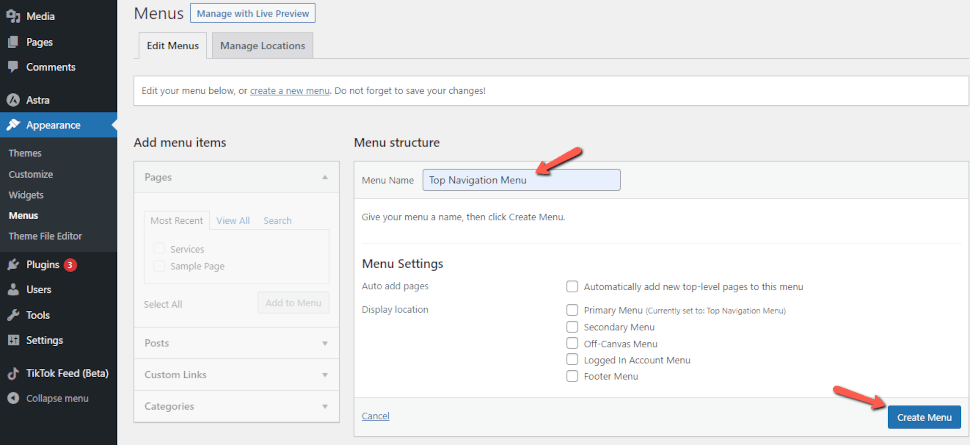
Afterward, give your new menu a name, like Top Navigation Menu, and click the Create Menu button.
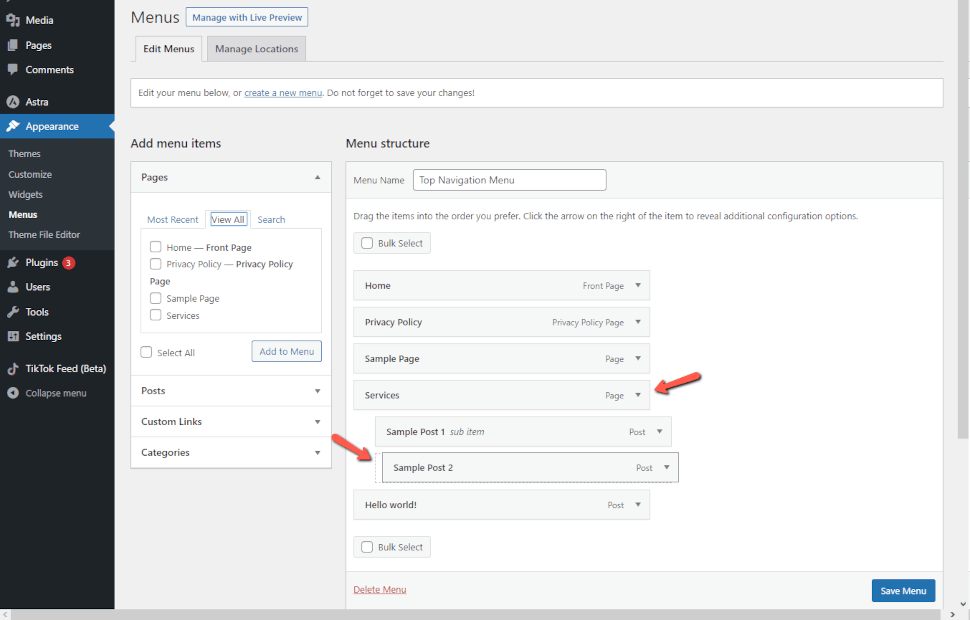
Next, you can choose the pages or posts to add to the menu. You can select specific pages or posts from the selection on the left. Click the View All tab to see all your site's pages. Same for the posts. After that, click the box next to each page you want to add to your menu, and then click on the Add to Menu'button.
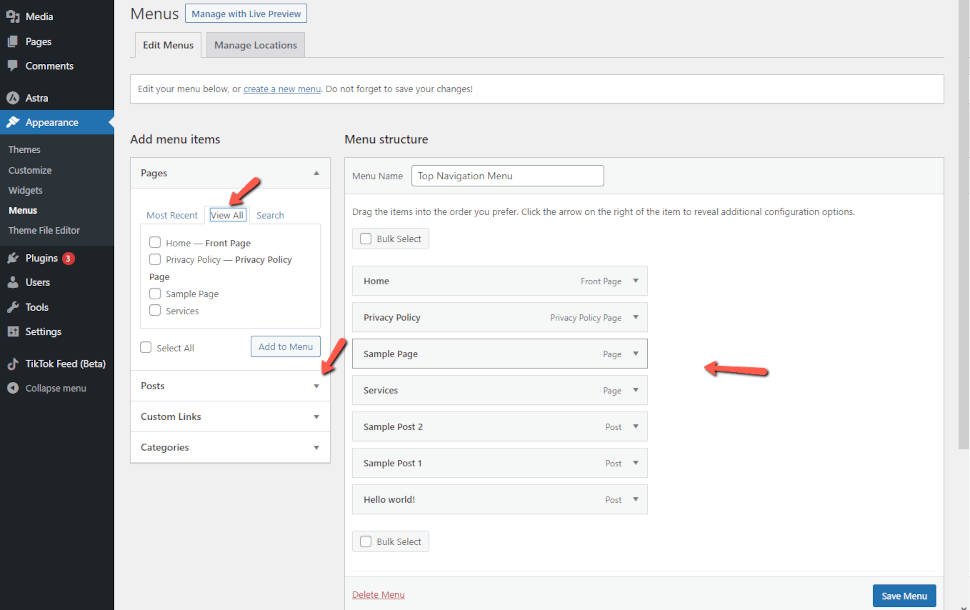
You can move your pages around by dragging and dropping them. Most themes allow you to place menus in a number of places. We're using the Astra theme in this example, which has five different locations.
After adding pages to the menu, choose where you want the menu to appear and click the Save Menu button. If you need help determining where each location is, save the menu in several places and visit your site to see how it looks. You're unlikely to use all locations, but you might want to use more than one.
Note
All menu items are listed vertically (from top to bottom) in the menu editor. Depending on your chosen location, the menu will appear vertically or horizontally (left to right) on your site.
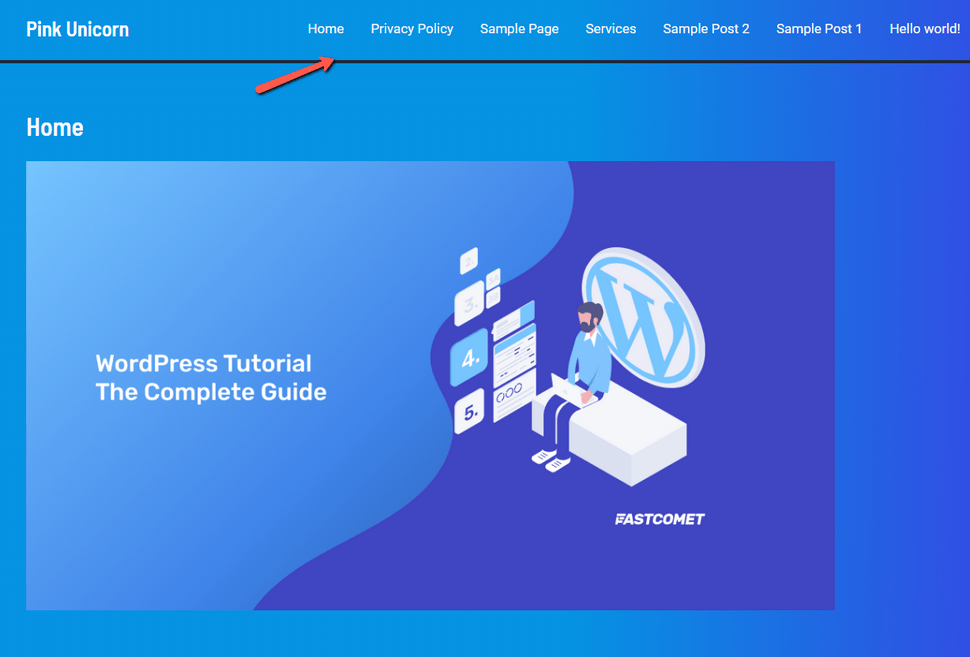
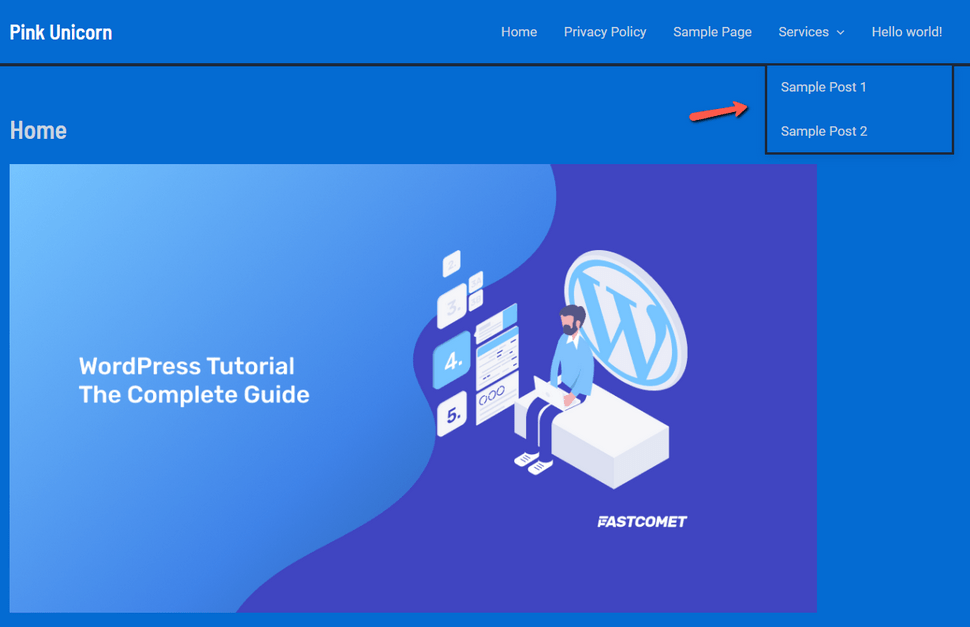
On the website, here is our completed menu:
How to Create Dropdown Menus in WordPress
Dropdown menus, also known as nested menus, are navigation menus that contain parent and child menu items. When you hover your cursor over a parent item, all child items appear in a sub-menu beneath it.
Make a submenu by dragging an item below the parent item and then slightly to the right. In our menu, we've done this with two sub-items beneath Services:
Here's the sub-menu live on the site:
You can add multiple dropdown layers so that your sub-menu has a sub-menu. That can result in a cluttered appearance, and many themes do not support multi-layer dropdown menus, so exercise moderation.
How to Add Categories and Custom Links to WordPress Menus
Categories and custom links can be handy when it comes to navigation. Follow along, and we will show you how to add them to your menus.
How to Add Categories
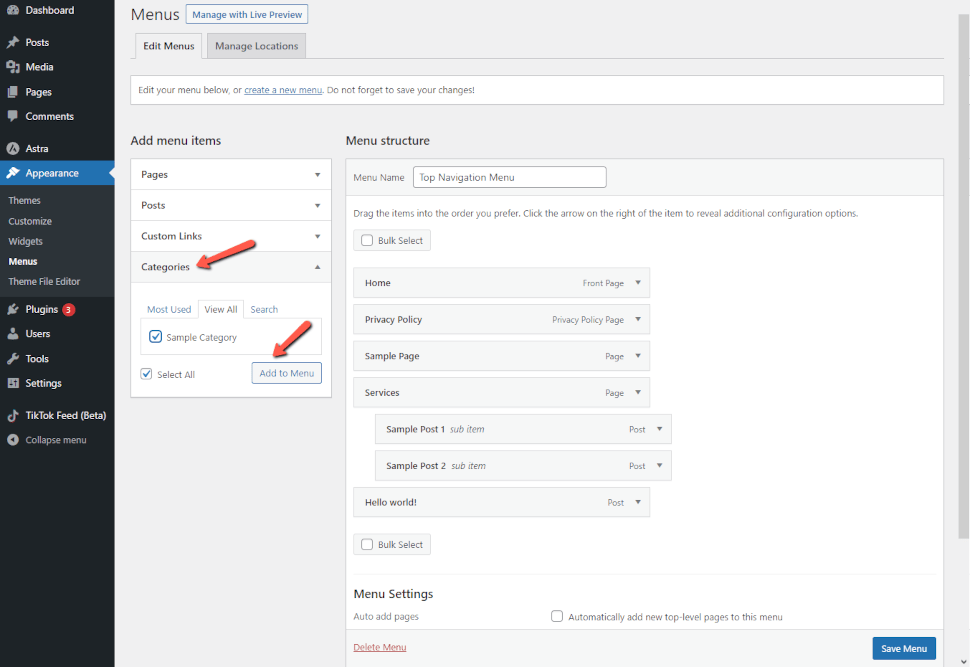
If you're using WordPress to run a blog, add your blog categories as a dropdown in your WordPress menu. By clicking the Categories tab on the left side of the Menus screen, you can easily add categories to your menu. You may need to click the View All tab to see all of your categories.
Choose the categories you want to include in the menu and click the Add to Menu button.
The categories will appear in your menu as regular menu items. You can move them around by dragging and dropping them. If you have not created any categories, you can easily do that when you hover over the Posts button and click the Categories button. You can then add your posts to any categories you create via the Posts page.
How to Add Custom Links
Aside from categories and pages, WordPress makes adding custom links to your menu extremely simple. That can be used to connect your social media profiles, online store, or other websites.
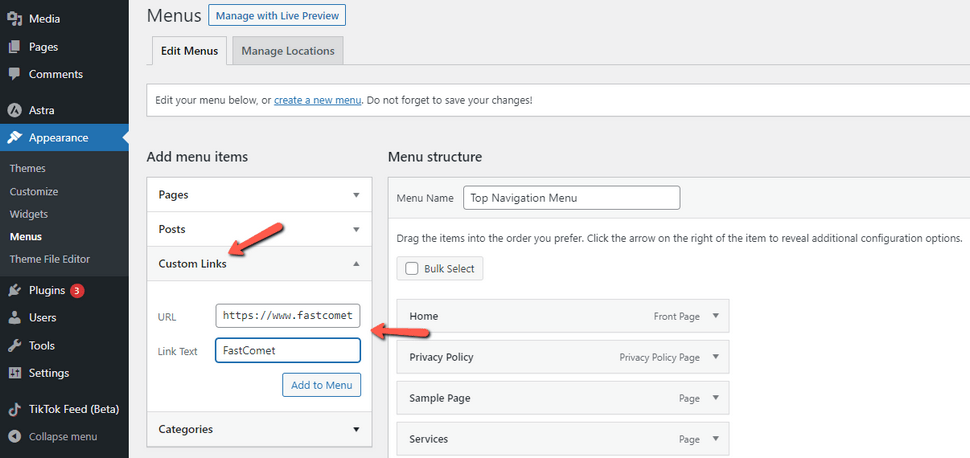
Use the Custom Links tab on the menu screen and then add the link and the text you want to use on your menu.
How to Edit or Remove a Menu Item
When you add pages or categories to your custom navigation menu WordPress will display their titles in the menu itself. You have the option to change that. Click on the downward arrow next to any menu item.
Here you can change the name of the menu item. That is also where you can click Remove to remove the link entirely from your menu. If you're having trouble with the drag-and-drop interface, you can move the menu item by clicking the appropriate Move button.
How to Add WordPress Menus in Sidebars and Footers
You are not limited to the display locations for your theme. Navigation menus can be added to any widget area, such as your sidebar or footer.
Add the Navigation Menu widget to your sidebar by going to Appearance → Widgets. Next, give the widget a title and select the appropriate menu from the Select Menu dropdown list.

How to Go Further with Navigation Menus
The WordPress menu system does not have to be difficult to use. It may appear hazy at times, but as you can see, it's a simple process that can be highly effective once you know how to use it. Remember that menus aren't one-size-fits-all as you continue to design your own site navigation. Consider who you want to find specific pages on your site and work on the menu system to provide that experience. Every page, post, and link does not have to be on the same menu. When it comes to WordPress menus, less is more.
We hope you find this article useful. Discover more about FastCloud - the top-rated Hosting Solutions for personal and small business websites in four consecutive years by the HostAdvice Community!

WordPress Hosting
- Free WordPress Installation
- 24/7 WordPress Support
- Free Domain Transfer
- Hack-free Protection
- Fast SSD Storage
- Free WordPress Transfer
- Free CloudFlare CDN
- Immediate Activation