How to Create Roles in vTiger
Updated on Dec 10, 2015
One of the importent vTiger core features is the ability to create and assign roles to the users on your website. This allows you to create the actual hierarchy of your company and apply it on your website as well. Each user will have only certain access/edit rights on your website and will not be able to access all of the data.For example, you can create different departments, managers, etc.
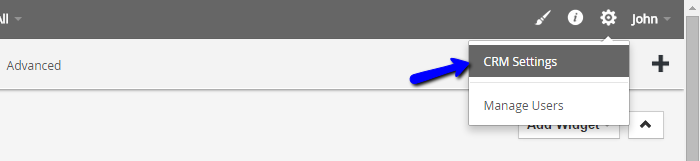
To create new role in vTiger, you need to log into your website as administrator. Navigate to the Settings icon and then CRM Settings.
Locate the Users & Access Control section and access the Roles service.

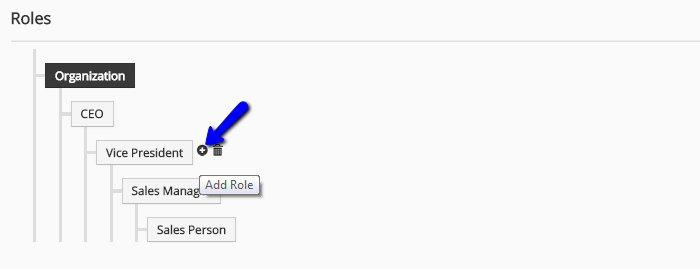
This will display the current roles on your website. They are in a certain hierarchy for easier review. Now, to create a new role, you need to move your mouse over an existing one and click on the + (plus) sign. This will create a new role on the same level in the hierarchy tree. For this example, we have moved the mouse cursor over the Vice President role as we want to create a Senior Technical Support leader.
Enter the details for your new role:
- Name - Set a unique name for the new role.
- Reports to - This will be automatically selected as per the hierarchy tree.
- Copy Privileges From - If you have a similar role on your website, you can copy all of the privileges from it. Otherwise, you can simply enable the ones that you wish to allow to the new role.
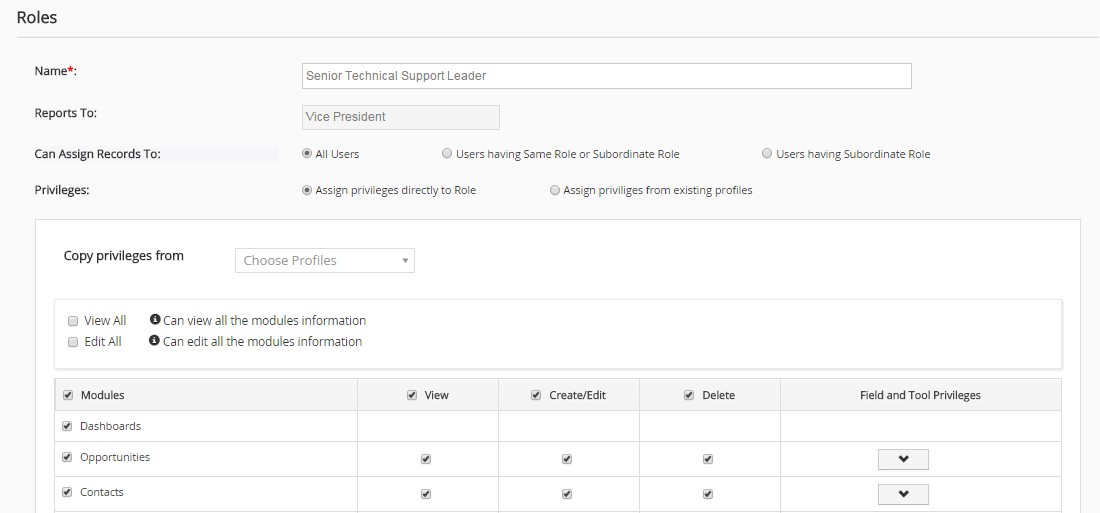
When you are ready, click on the Save button below the form. The system will automatically create the new role, using the details you have specified for it above.
On this page...

vTiger Hosting
- Free Installation
- 24/7 Support
- Free Domain Transfer
- Hack-free Protection
- Fast SSD Storage
- Free Transfer
- Free Cloudflare CDN
- Immediate Activation