Additional Tools in WP Rocket
Updated on Jun 28, 2023
The Tools section in WP Rocket's settings is humble but offers three excellent bits of functionality.
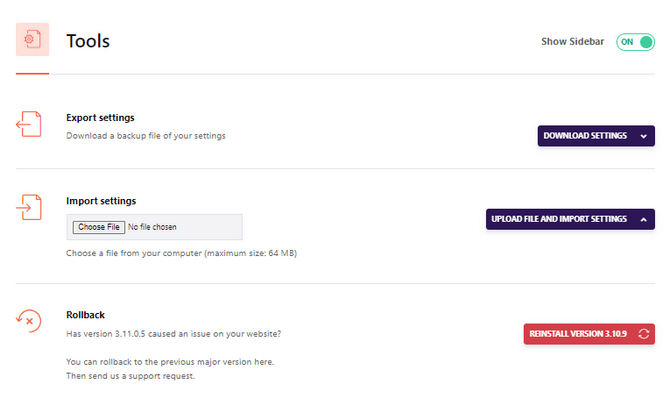
- Export Settings: This will allow you to export the current settings of your WP Rocket plugin as a JSON file. That is great if you want to use those settings on a different website.
- Import Settings: Use this if you already have a JSON file of WP Rocket settings you would like to use on your website. Upload the file, and the plugin will automatically apply the settings for you.
- Rollback: The most important of the three options. If an update breaks your website, you can downgrade the plugin to a previous version.
On this page...

WP Rocket Hosting
- Free Installation
- 24/7 Support
- Free Domain Transfer
- Hack-free Protection
- Fast SSD Storage
- 20% WP Rocket Discount
- Immediate Activation