Google APIs
Updated on Oct 9, 2023
Did you know that you can actually connect many Google Workspace services to your Node.js application? That is entirely possible via the various APIs that Google provides for its own services and third-party ones. This tutorial section will show you how to set up a project, assign it an API, and then connect it to your Node.js application. The process is easy, and all you need is a Google account. The APIs themselves are free to use. However, Google might impose limitations on traffic over the APIs to ensure fair usage for all its customers. For instance, these are the limitations of the Google Drive API. Additionally, depending on your project, you may apply for an increase in the quota. There is no guarantee your application will be approved, though, so keep that in mind.
With the general information out of the way, let’s dive into how to select, enable, and integrate a Google API in your Node.js project.
There are three steps to the process:
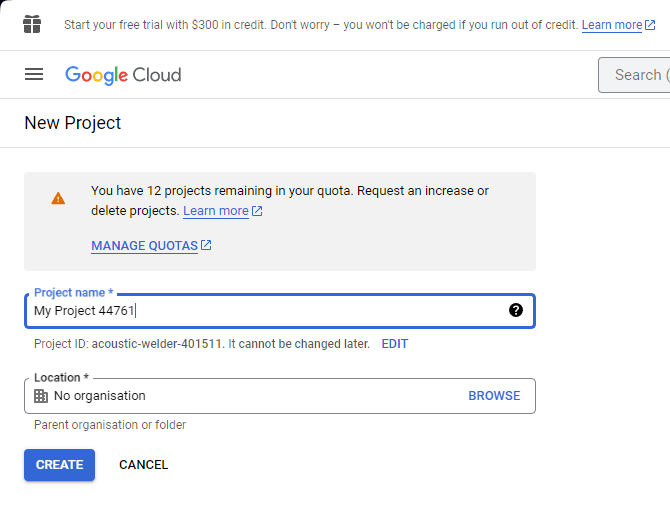
Create a Google Project
The first step is to log into your Google account and go to the Google API Console. Then, select the project you want to connect a Google service to or create a new one. If you already have any ongoing projects, select them from the drop-down menu at the top. If you do not have any ongoing projects, you can create a new one via the Create a Project button.

Name your project, select a location, or leave it as No Organization. Click Create. And that is it! You can now proceed with adding an API to it.
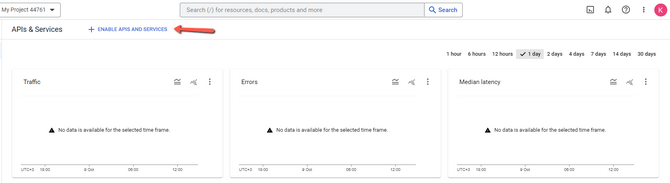
Add an API to Your Project
Now that you have a project ready to go or are already using one you had previously, it is time to assign an API to it. Click on Enable APIs and Services at the top of your screen.
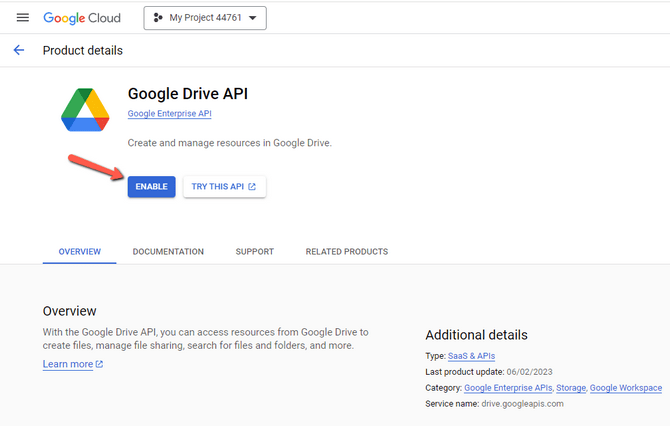
Then, find the API you wish to use. For our example, we will use the Google Drive API. Click it and then enable it.
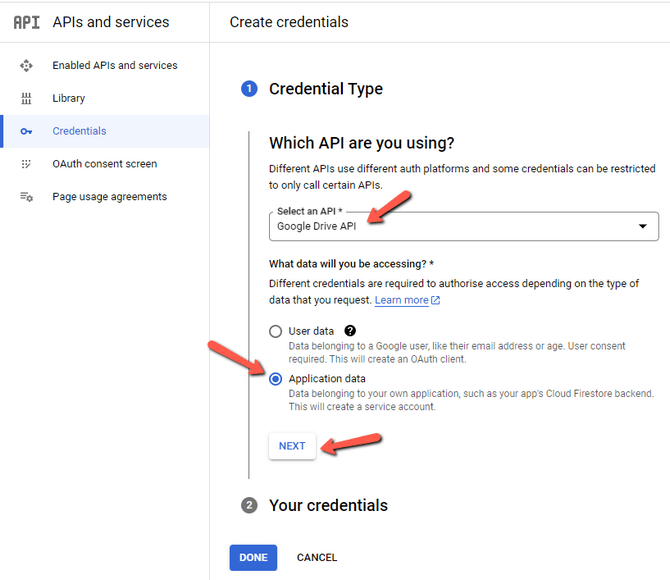
You will be taken back to your project, to the Enabled APIs and Services tab, and specifically to the API you enabled. You can find all the information you need regarding the API in it. You can also create credentials that will allow you to integrate it with your Node.js application. Since you just added this API, there should not be any credentials created for it, so click on Create Credentials in the top right to begin. From the drop-down menu on the next page, select the API you are creating the credentials for. If this is your first API, it will be alone in the list. Then, select Application Data.
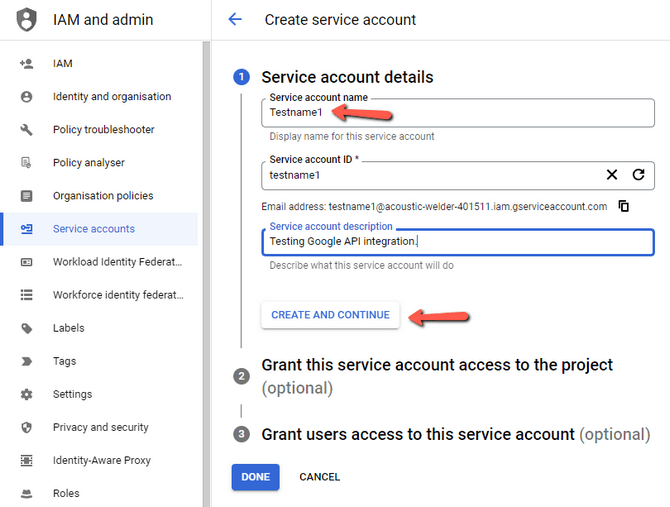
On the following page, fill in the required fields (Service account ID will fill on its own when you input an account name), and click Create and Continue.
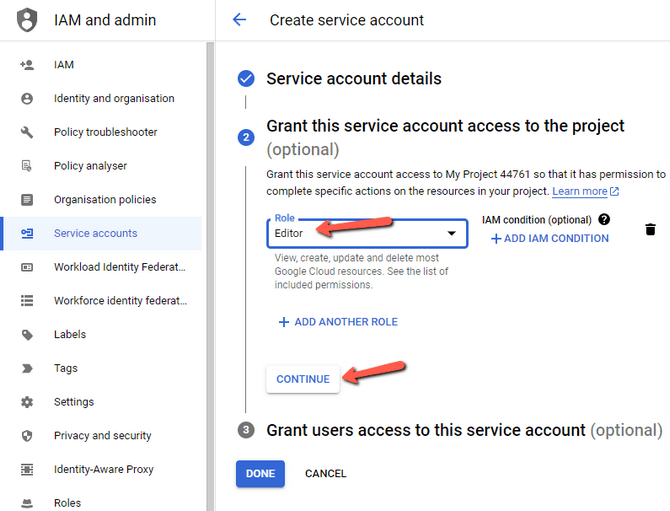
The next step is to give editorial rights to the account. Click on the Select a role drop-down menu and find the Editor role. There is no need to add an IAM Condition. Click Continue when done.
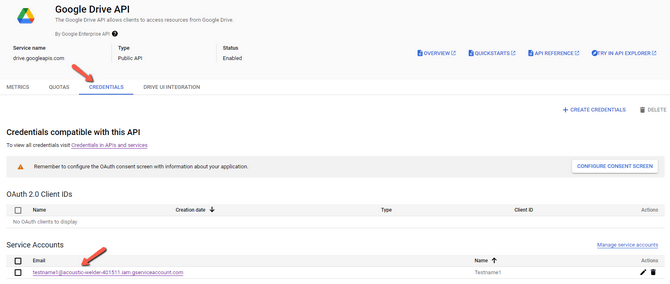
You can add additional users or admins to this service account in the following step. If you don’t need to add any, click Done, and that is it! The credentials are all set, and now you need to download a private key for them. Go to the Credentials tab and click on the service account.
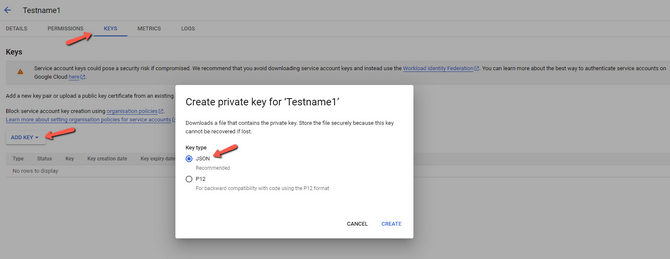
Then, click on Keys and on Add Key. Create a new one and select JSON as the key type. That will download a key as a JSON file to your computer. We recommend backing it up, just in case.
With that, it is time to move on to integrating the API into your Node.js application.
Add the API to Your Application
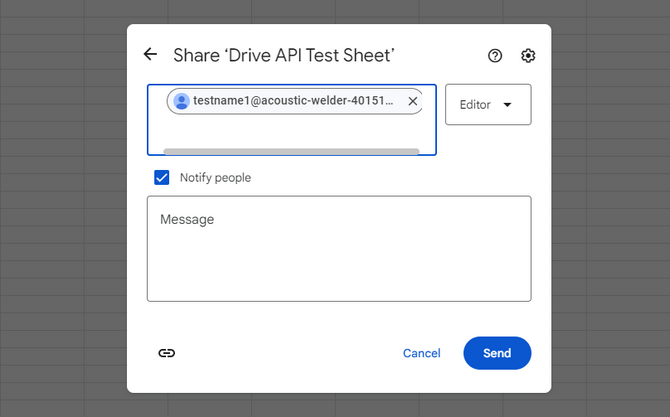
To begin with, upload the file you just downloaded to the root directory of your application. Then, rename it to client_secret.json. Next, open it and find the line that says client_email. Copy everything inside the quotes (excluding the quotes themselves), and go to the document you wish your app to access. Click on Share in the top right and insert the email you just copied into the field. Click Send, which will allow access to the system account for the Google Drive API you created earlier.
We will give you an example of how this works with a spreadsheet. To start, open your terminal or command line and navigate to your application’s root directory. Then, run the following command.
- npm i google-spreadsheet
When the installation finishes, create a spreadsheet.js file. In it, place this code.
var GoogleSpreadsheet = require('google-spreadsheet');
var creds = require('./client_secret.json');

// Create a document object using the ID of the spreadsheet - obtained from its URL.
var doc = new GoogleSpreadsheet('*spreadsheet ID*');

// Authenticate with the Google Spreadsheets API.
doc.useServiceAccountAuth(creds, function (err) {
  // Get all of the rows from the spreadsheet.
  doc.getRows(1, function (err, rows) {
    console.log(rows);
  });
});
You will have to replace the spreadsheet ID part of the code with the ID of your own spreadsheet. The ID is the long alphanumeric segment of the URL.

Copy the ID, place it in your spreadsheet.js file, save the changes, and you can then open the spreadsheet directly in your terminal by running this command.
- node spreadsheet.js
To find out more regarding the functionality of the package, you can read up on its official NPM or GitHub pages. Here are just a few examples of what you can do via relatively simple commands:
- Figuring out the total number of rows:
console.log(rows.length);
- Inserting a new row in your spreadsheet and populating it with data:
doc.addRow(1, { date: '28', month: 'October' }, function(err) {
  if(err) {
    console.log(err);
  }
});
  if(err) {
    console.log(err)
  }
});
Finally, as a word of advice, the row-based API also assumes there are no empty rows in your sheet. If any row is entirely empty, you will not be able to access any rows after the empty row using the row-based API.
You can use all of this to create custom reporting tools, simple data gatherers without needing a database, and build models based on REST endpoints by utilizing frameworks such as Express and many more useful apps.
With all that said, despite this being an example with just Google Drive, the integration is similar for other APIs.

Node.js Hosting
- Multiple Node Versions
- 24/7 Node.js Support
- Free Domain Transfer
- Hack-free Protection
- Fast SSD Storage
- Free Node.js Transfer
- Free Cloudflare CDN
- Immediate Activation