Installing BoldGrid via the Wordpress plugin installer
Updated on Dec 6, 2016
BoldGrid is a WordPress plugin that makes it even easier to create websites and automates a lot of the tasks you usually have to manually do. To manually install the plugin, you must follow the usual procedure for plugin installation and activation.
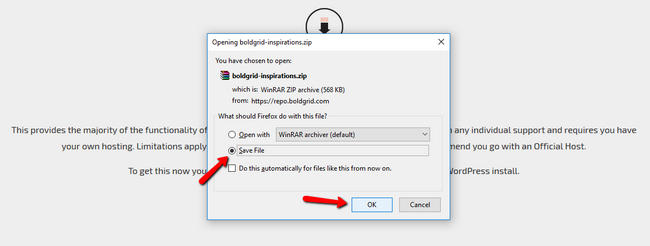
Firstly, you will have to download the plugin by visiting the official download page and scrolling to the end of it for the download link or simply clicking here and saving the zip file on your local computer.
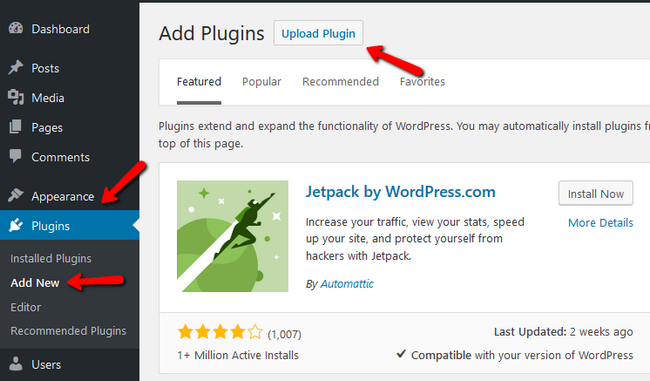
Now login to your WordPress admin area and Navigate to the Plugins → Add New section where you will find the Upload Plugin button.
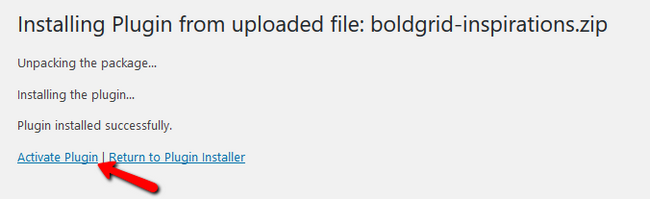
Now click on the Browse... button, select the zip file representing the plugin and click on the Install Now button.

After the process has been completed, select the Activate Plugin option to enable the plugin.
The next step involves interacting with the BoldGrid API via a Connect Key. Once you have done that you are ready for action! Drag, drop, customize, and build your dream website.

BoldGrid Hosting
- Free Installation
- 24/7 BoldGrid Support
- Free Domain Transfer
- Hack-free Protection
- Fast SSD Storage
- Free BoldGrid Transfer
- Free Cloudflare CDN