How to Transfer Away a Domain Name From HostGator to FastComet
Updated on Feb 3, 2022
You already have a great domain name, but you’re not satisfied with your current HostGator registrar, and you are looking to migrate? Maybe the domain name rate is too expensive? Or, you’re looking for a registrar with more features? Not to worry, you can transfer your domain to a new domain name registration provider, stress, and hassle-free. And you’ve come to the right place.
While HostGator claim they include 24/7 support for all their plans, that's not entirely true. They only provide “live 24/7 support” for clients with dedicated plans. The difference with FastComet is that all our services include 24/7 support that also entails technical support at all times. The best thing here is that when you transfer your domain over, you will be able to manage all of your domain settings and billing from your FastComet account and have everything you need, all in one place. Additionally, you can use the domain name as a Private DNS or set it up with Google Apps. Furthermore, we will send you an email when your domain is close to expiration to avoid any downtime due to missed domain renewal.
Here at FastComet, we make it super easy to transfer a domain registered with HostGator by guiding you through each step with simple instructions.
Table of Contents:
Prepare to Transfer the Domain Safely and Easily
Before you continue with the domain transfer, please note that when a domain name is transferred away, the nameservers associated with your domain stay the same during its transfer from one registrar to the other. So, in case your domain name is using the default nameservers of HostGator, those nameservers will be preserved during the domain transfer, and thus you will not be able to change the nameservers until the transfer is complete.
This means that if you switched to another web-hosting provider and your website was already migrated, you should ensure that your domain name is pointed to the new hosting provider before initiating a domain transfer. Again, you will not be able to change the nameservers until the domain transfer is complete.
Note:
Domain Name Registration and Web Hosting are separate services. The domain name transfer process will not migrate your website automatically. If you are a FastComet customer and you wish to transfer your website from HostGator, please submit a migration request from your client area. Our transfer experts will move your existing sites and emails free of charge, seamlessly, and with no downtime.
Special Offer:
Once the domain name transfer is completed, you can take advantage of our special offer. We will renew your domain for one year free of charge.
The details listed here are only for transferring your domain’s registration to another registrar. The transferring of the hosting for your site is a completely different process. Read more about that process in the following article: How to transfer your website to FastComet.
Review Domain Name Transfer Requirements
- Due to ICANN's Transfer Policy, domain names need to have been registered for more than 60 days in order for them to be eligible for transfer. This 60-day registrar lock is to prevent fraud and theft of domains;
- You can't transfer your domain if it's within 60 days of а previous transfer;
- Usually, the domain name should have more than 15 days before its expiration date;
For more thorough information, you can check our tutorial on domain transfer requirements.
Prior to attempting to transfer a domain away from HostGator, you must complete the following steps.
Steps to Transfer A Domain From HostGator
In order to transfer a domain away from HostGator to us, you have to complete the following steps first:
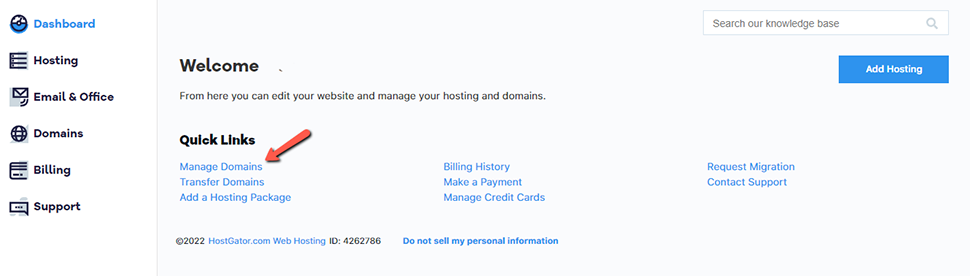
- Log into your HostGator Portal:

- Click the Manage Domains link:
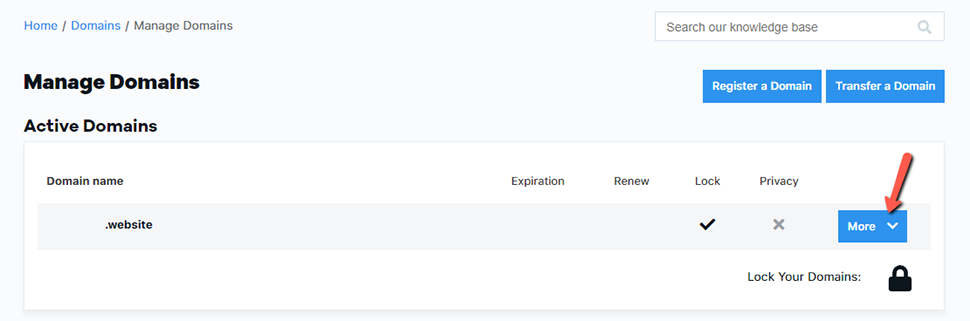
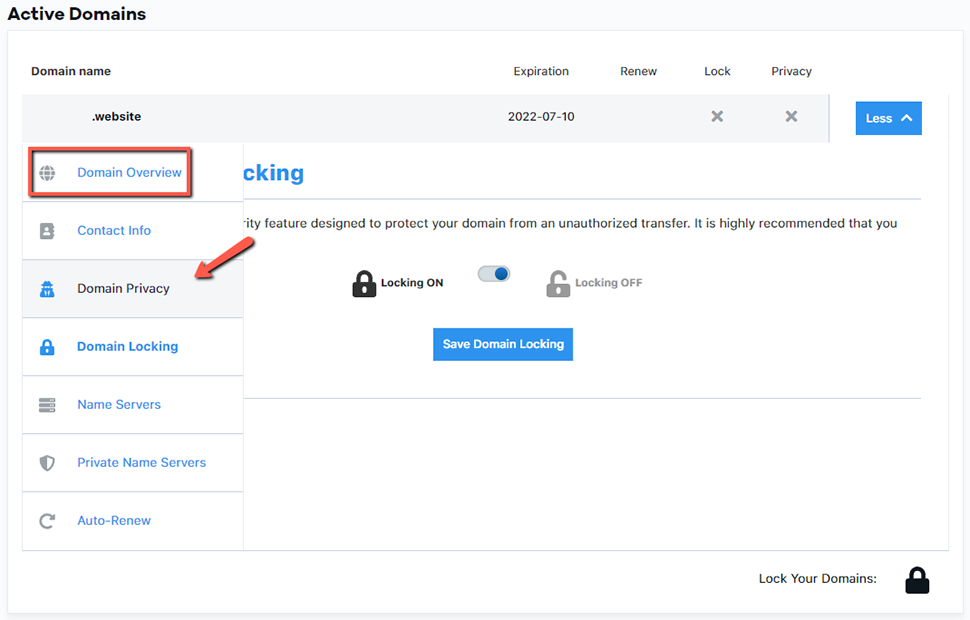
- Click on More to get an overview of the domain information and a few specific tabs:
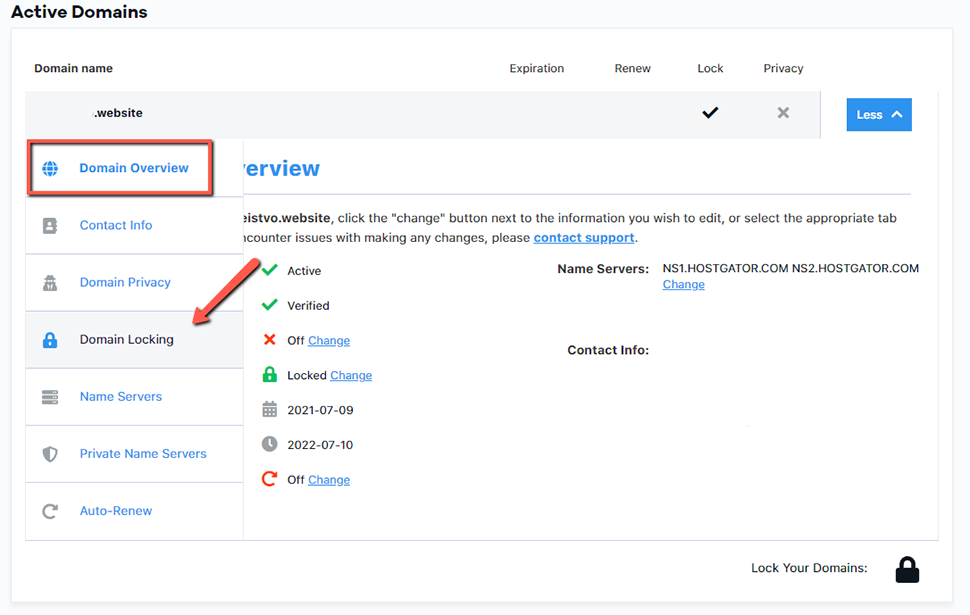
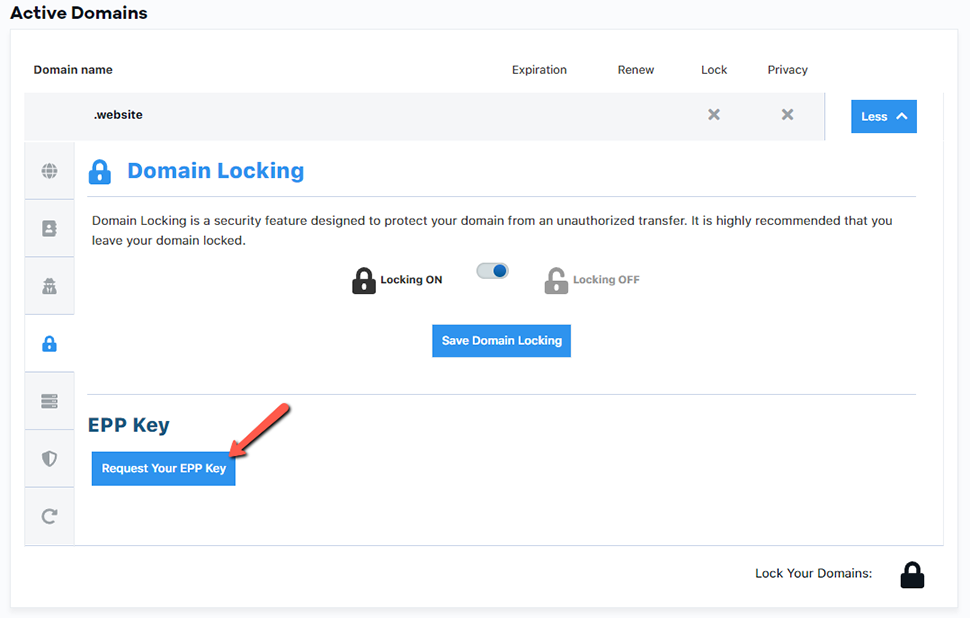
- Go to the Domain Locking tab:
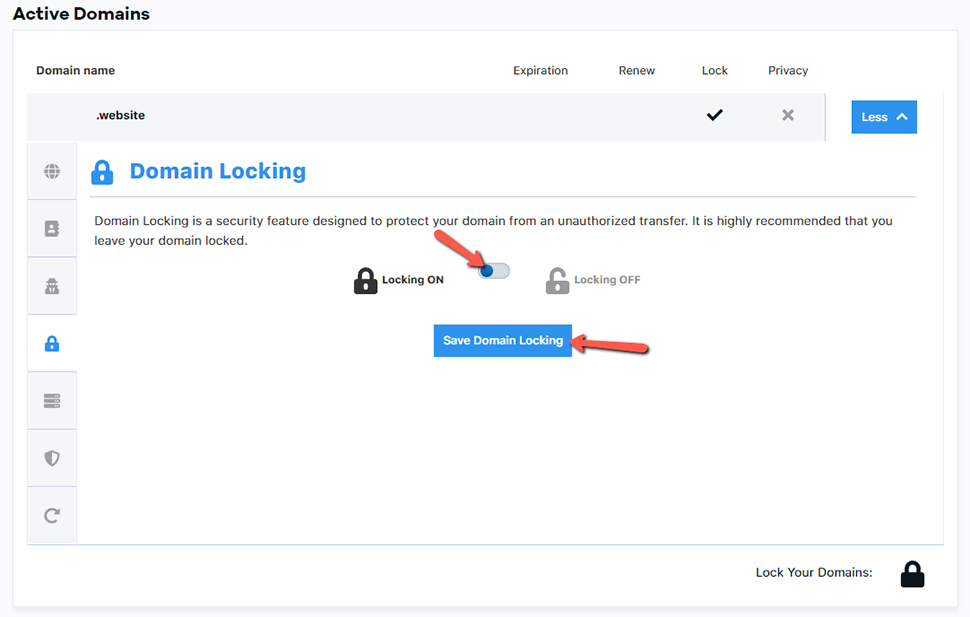
- Unlock the domain by clicking on the switch and then click on Save Domain Locking:
- After unlocking the domain, you will be able to get your Authorization/EPP code, which is required for the transfer to FastComet (or any other web host). Click on the Request your EPP Key button:
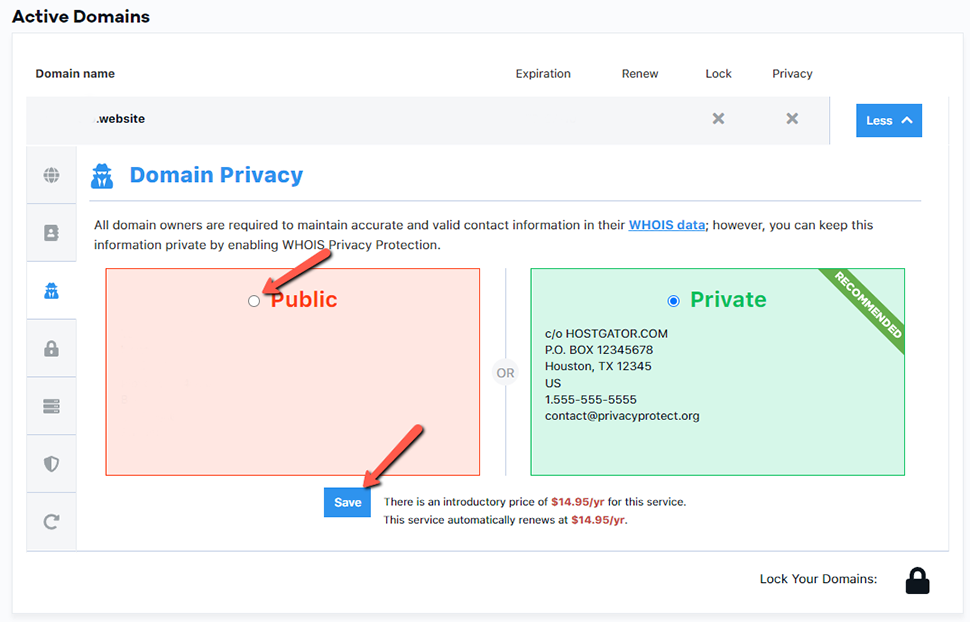
- Go to the Domain Privacy tab:
- Turn off Privacy Protection if present:
Note:
Up until April 2021, removing the Domain ID Protection (aka Domain Privacy) was one of the requirements for a domain transfer. The requirement was in place because when you transfer a domain name from another registrar to FastComet, ICANN requires us to send a transfer verification email to the current registrant's email address. In case you initiate a domain transfer while still having ID Protection enabled at your current domain registrar, there is a high probability the transfer verification email won't be delivered. That has now changed. As of April 2021, you do not need to pause or disable Domain ID Protection when you transfer your domain name. The domain transfer can proceed with ID Protection enabled.
- Go to the Name Servers tab:

- Modify the name servers to point to the new name servers in the Name Servers tab:
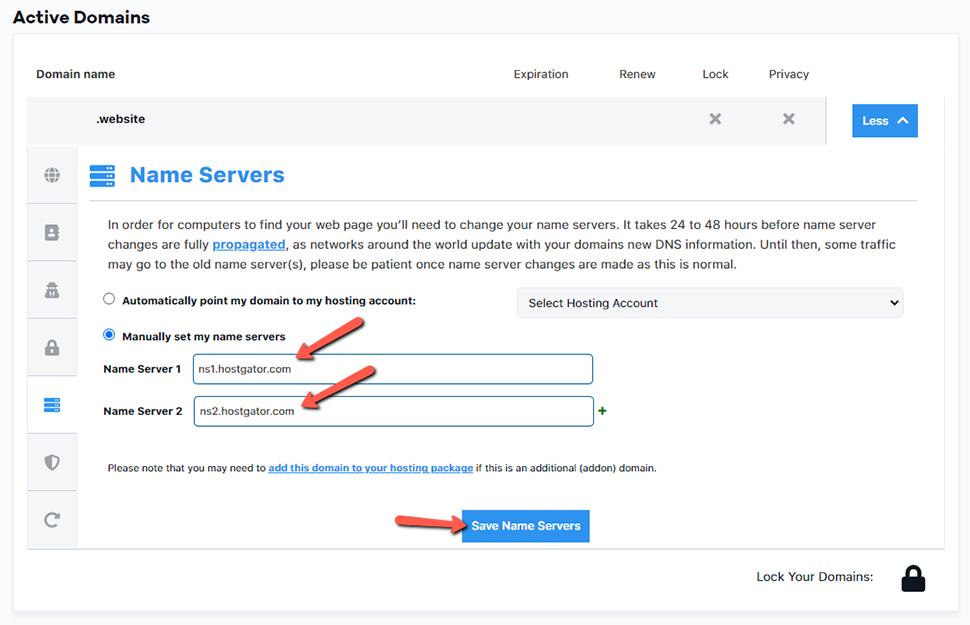
The transfer needs time to process. As your previous provider should release the domain to FastComet, it is a good idea to point your domain to the FastComet nameservers or via A record to the IP address provided to you in your Welcome email so that you’d be able to start working on your website.
Changing your name servers while your domain is being transferred may cause the transfer to fail. Be sure that you have updated your name servers before the transfer begins so that your domain will be working as soon as possible.
Note:
You won’t be able to edit the name server settings during the transfer process.
- Ensure the contact info is up-to-date with the correct email address on the Contact Info tab for Registrant, Administrative, and Billing. The Admin contact receives the email with the EPP Code and information about the transfer.
If all of the above prerequisites are met, you can order a domain name transfer with us.
Purchase Your FastComet Hosting Plan
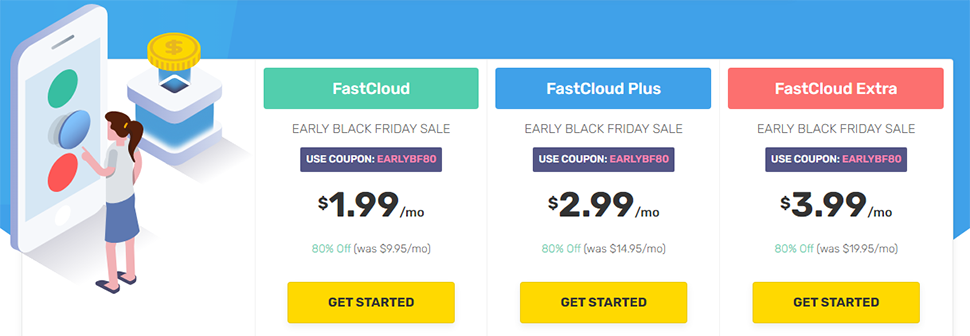
The first thing you should do (if you haven’t already) is to choose from our hosting plans. You can check our price list on your own, but you should consider contacting one of FastComet’s Customer Care specialists, who will help you pick the best plan for your online project.
Note:
If you already have an existing website that you plan to move over, check the correct steps to transfer both your Domain Name and Website to Avoid Downtime
- Once you have chosen your starting plan with FastComet, you can click on the GET STARTED button:
- Next, choose the option “I already Have a Domain,” and then click on the USE THIS DOMAIN button:
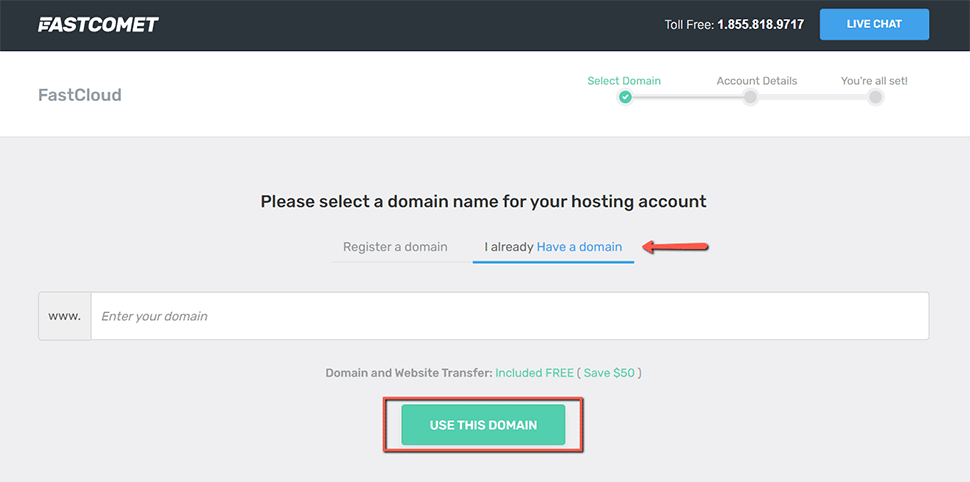
Note:
Choosing "I already Have a domain does not initiate the domain transfer. You need to do that additionally, as we explain further below in this post.
- You will get to a screen where you have to input all your contact and billing info. Make sure that all the information is correct. Once you are ready, please go through our Terms of Service and Privacy Policy. If you agree with our terms, check the box, and finish by clicking on the button COMPLETE ORDER:

Note: When you make changes to your DNS, please allow up to 24 hours for propagation after making the change. Thus, we recommend performing no changes on your website during that time, as once the propagation is over, they may not be saved on the new server.
Submit a Domain Transfer Request to FastComet
As you may have already seen during purchasing your FastComet hosting plan, we provide domain transfer services to all existing customers. After transferring your domain to FastComet, you get access to our user-friendly domain management interface, and you can take full control of your domain.
To initiate the transfer process for your domain name, please make sure that you have access to your domain administrative email address. In case you no longer have access to that email address, you may request to have that email changed by your current domain registrar.
When you have done everything in this post up until now, and you are sure that all requirements are met, continue with the following steps:
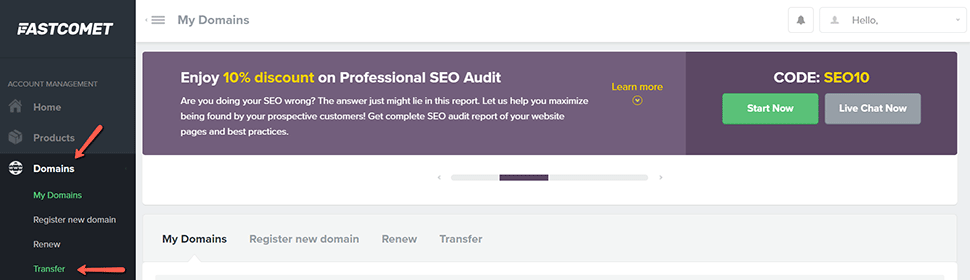
- Login to your FastComet Client Area;
- Click on the Domain Transfer link under the Domains section in your Client Area:
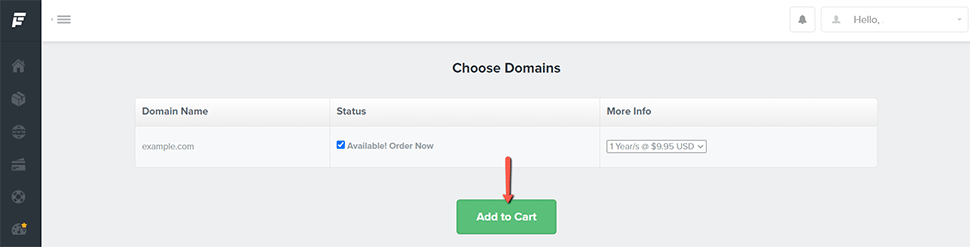
- Input your domain and select your domain extension to check if the domain transfer is available for your domain:
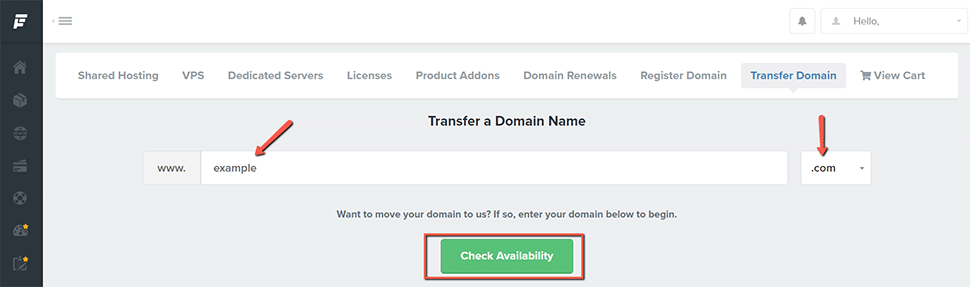
If you don’t find your extension on the list, contact our technical support for further information. You can do that by submitting a new support ticket.
- If your domain is available for transfer, click on the Add to Cart button to proceed:
- Insert your Authorization (EPP) Code in the field shown in this screenshot:
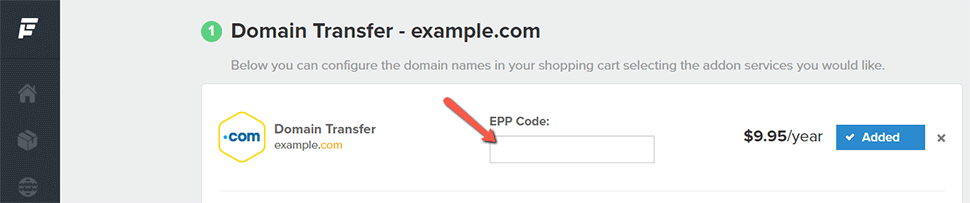
- If all requirements for the successful domain transfer are met, you should receive your domain transfer confirmation email shortly.
Note:
After changing your domain name servers, the new ones will be set after the domain transfer is complete. Your domain will not be modified by our registrar during the transfer.
Check the Status of a Domain Transfer
Domain transfers can take 5 - 7 days to complete. You may contact us at any time to inquire about your transfer status.
We hope you find this article useful. Discover more about FastCloud - the top-rated Hosting Solutions for personal and small business websites in four consecutive years by the HostAdvice Community!
Related articles
- How to Transfer Away a Domain Name from HostWinds to FastComet
- How to Transfer Away a Domain Name from Site5 to FastComet
- How to Transfer Away a Domain Name from JustHost to FastComet
- How to Transfer Away a Domain Name from Wix to FastComet
- How to Transfer Away a Domain Name from ChemiCloud to FastComet

SSD Cloud Hosting
- Free Domain Transfer
- 24/7 Technical Support
- Fast SSD Storage
- Hack-free Protection
- Free Script Installation
- Free Website Transfer
- Free Cloudflare CDN
- Immediate Activation