How to Add a Domain to CloudFlare
Updated on Nov 7, 2023
CloudFlare is an excellent service that can improve the performance and security of your website. The best part is it is free! We are also partnered with them, so we wanted to discuss what the service offers and how to use it.
Before we begin, though, we must mention one fundamental aspect of how the internet works nowadays. The further away you are from a website’s hosting server, the longer it will take for your browser to load that website’s content. That can be unpleasant if your website has a user base from all over the world. How are you supposed to have your website in multiple parts of the world simultaneously? That is what CloudFlare can help with!
In this post, we will tell you what CloudFlare is and how to add your domain to it.
This post includes:
What is CloudFlare?
CloudFlare is a CDN (Content Delivery Network) that has over 300 data centers around the world. But what is a CDN? Simply put, it is a network of data centers worldwide that share information to distribute content to users without the typical delay due to distance. In other words, all those data centers will allow visitors to your website to access it as quickly and fluidly as if they were close to your hosting server.
As you can imagine, that will make your website more enticing for new users from different parts of the world – since it will load normally for them as well. It will also save you the headache of hosting multiple websites on other servers. That is not all, though, as CloudFlare comes with many features (even their free plan), and we recommend you check out their page, which outlines all of them.
How to Add a Domain to CloudFlare?
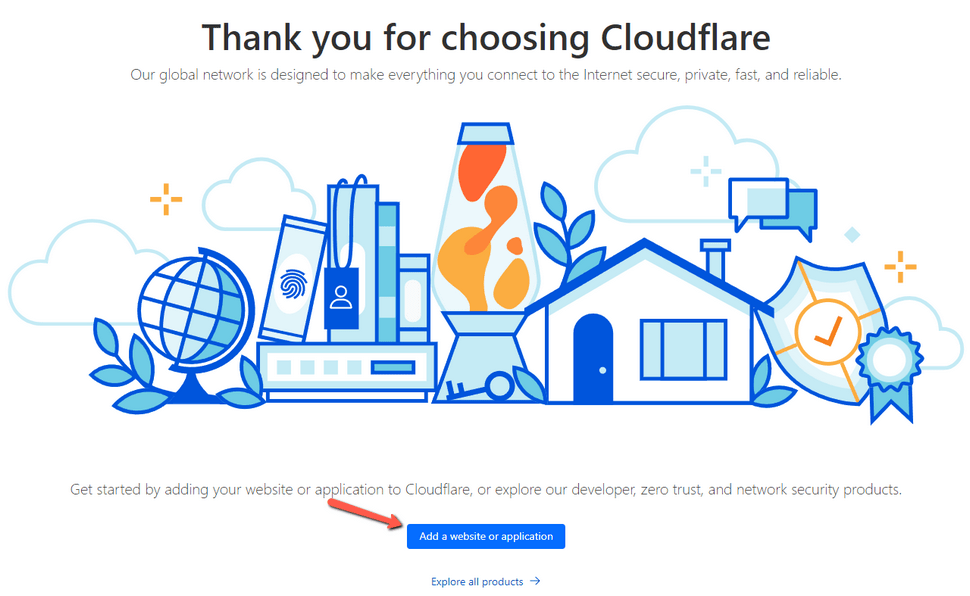
Getting started with CloudFlare is very easy. Firstly, you will need to create an account with them. Go to their signup page and fill in the form. Creating an account is entirely free, and so is adding domains, but we will discuss that later. After you have an account, you will be prompted to add a domain or website to your new account.
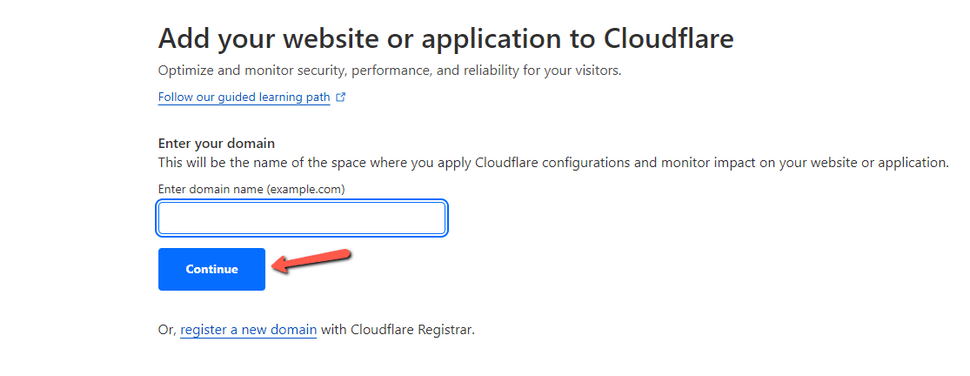
On the next page, you will be prompted to enter your domain name. You can also explore the additional features that CloudFlare offers from the menu on the left, and you can even register a domain with them. For the purpose of our tutorial, we will focus on adding a domain to the service. When done, click Continue.
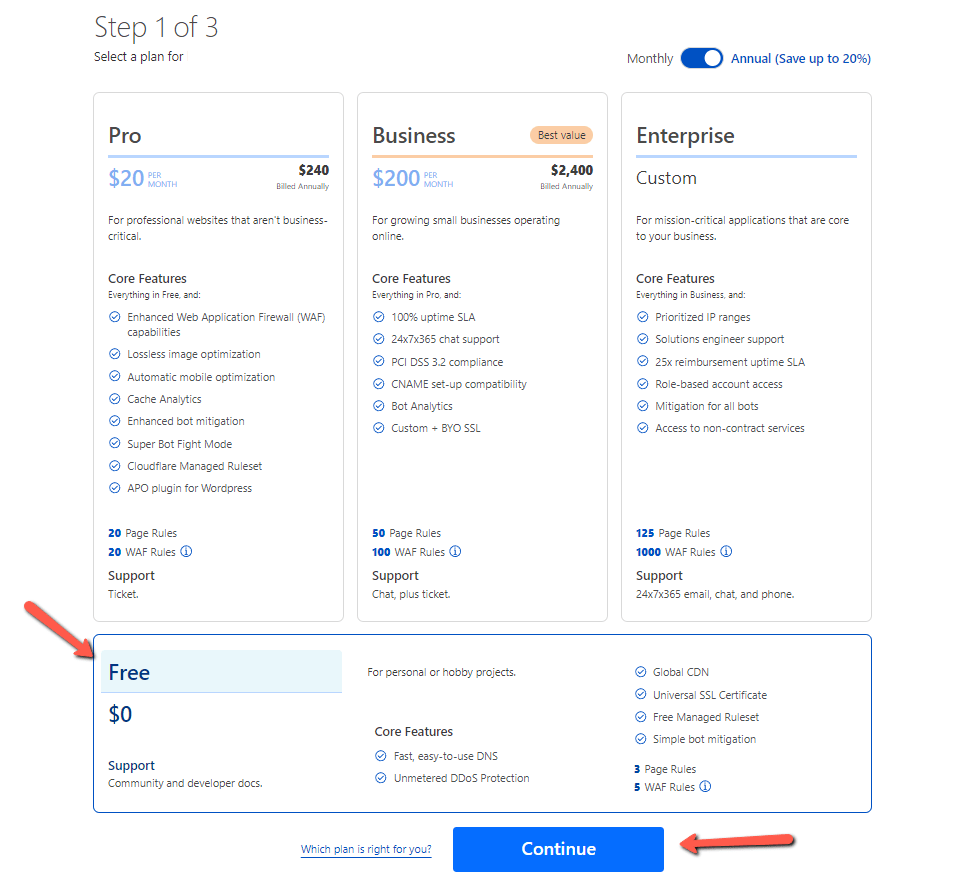
Now is when you have to choose your CloudFlare plan for this domain. There are a few paid plans that offer some fantastic features, but the free one is perfect for your basic CDN and security needs. We recommend starting there and upgrading as you see fit. When you are happy with your selection, click Continue.
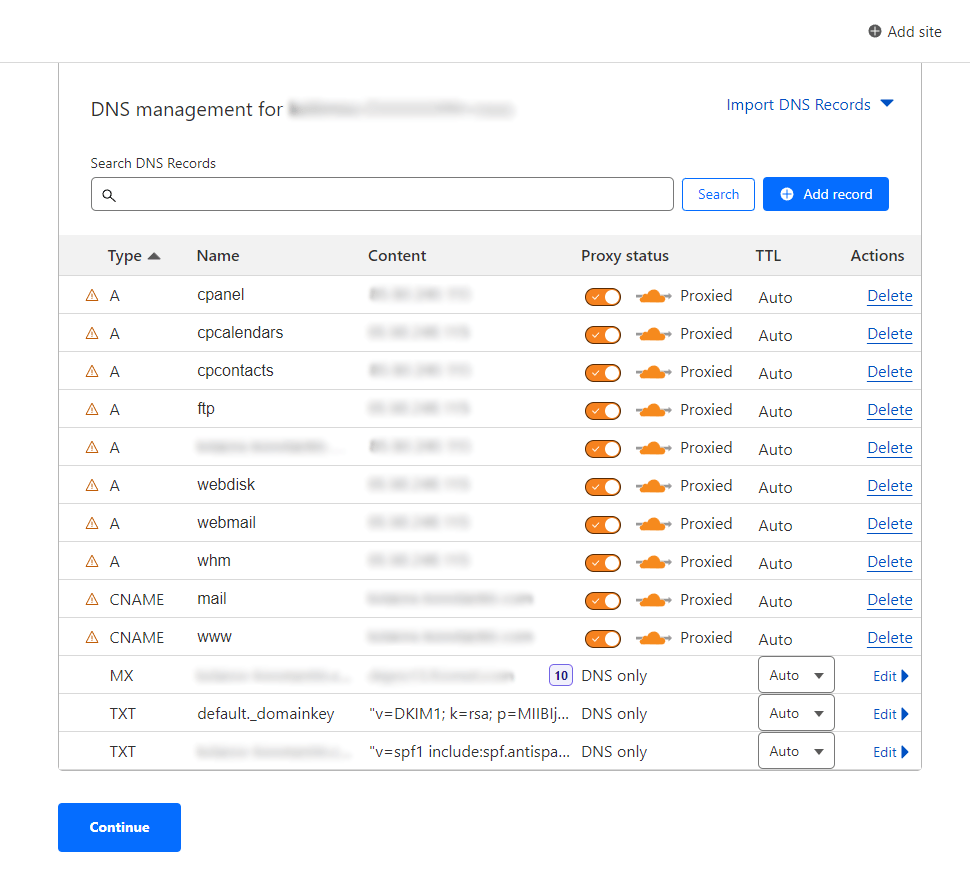
Next, you will be prompted to check your domain’s DNS records. CloudFlare will scan the domain’s existing DNS zone for them, but it is always good to double-check them. Without the correct DNS records, your domain will not function properly, and its website may even be inaccessible. When ready, click Continue.
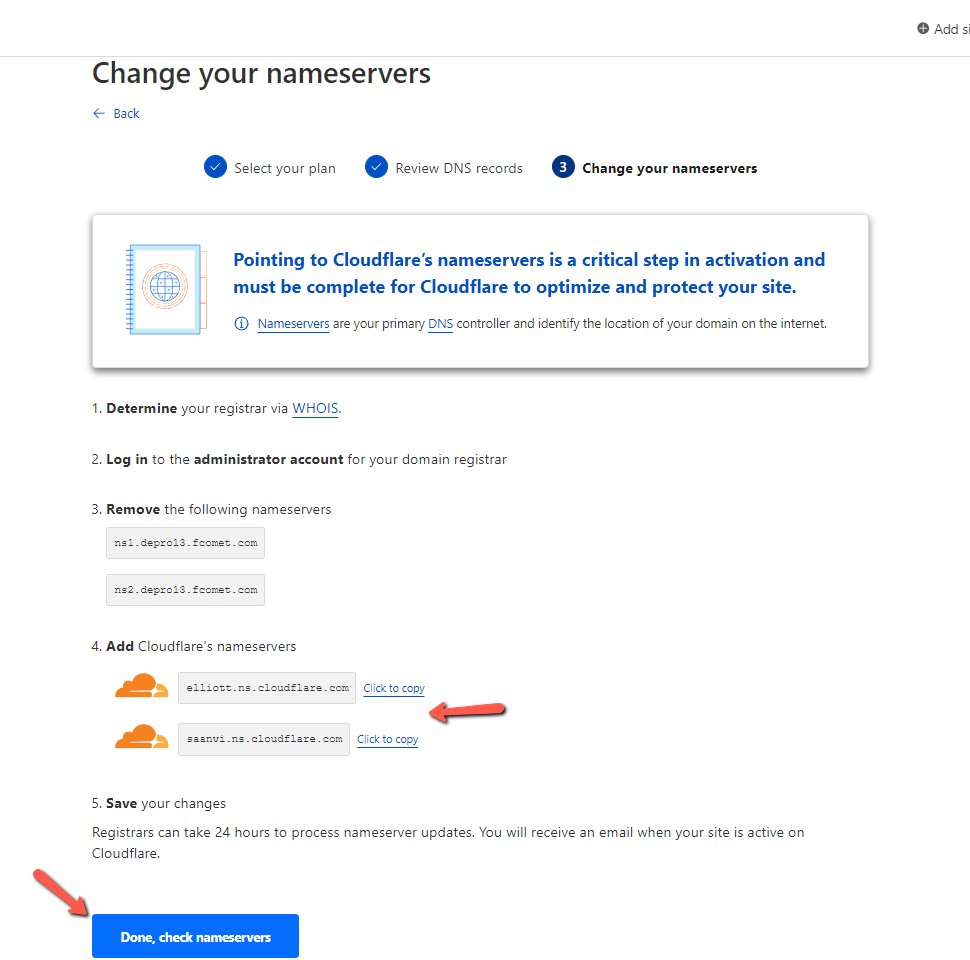
The final step has to be done on your domain Registrar’s end. It is time to change the Nameservers of your domain to the ones provided by CloudFlare. That will connect your domain to CloudFlare and, therefore, its services. When done, click Done, check Nameservers.
As with any other DNS change, please remember that it can take up to 72 hours for CloudFlare to pick up the new Nameservers. The process is called DNS propagation, and we explain it thoroughly in another tutorial of ours. However, once the propagation is over, your domain and its website will be covered by CloudFlare’s features. As you can see, the process is straightforward, but feel free to look through your account with CloudFlare, as they do offer a number of excellent services, even for free users.
Finally, please check our full tutorial on CloudFlare itself for more information about how it works and how you can gain the most out of its services.
We hope you find this article useful. Discover more about FastCloud - the top-rated Hosting Solutions for personal and small business websites in four consecutive years by the HostAdvice Community!

SSD Cloud Hosting
- Free Domain Transfer
- 24/7 Technical Support
- Fast SSD Storage
- Hack-free Protection
- Free Script Installation
- Free Website Transfer
- Free Cloudflare CDN
- Immediate Activation