How to Customize the Footer of Your Magento Store
Updated on Jul 11, 2023
When an online store is designed, naturally, most of the effort is dedicated to the homepage and product pages. In the meantime, seemingly tiny and inconsiderable elements as the footer are, in most cases, neglected if not entirely overlooked. In reality, the footer is a very important element, for it is the final thing your customers see as they scroll down a page, and what comes last always leaves an impression. Therefore, the footer design must be approached with a proper amount of attention and reasoning.
Yet, if your Magento 2 web store already has a footer and you are dissatisfied with the menu it has, we can show you how to create a new one.
This post includes:
How to Change Copyright Notice in The Footer
Firstly, we wanted to show you how to change the copyright notice in your existing Magento footer.
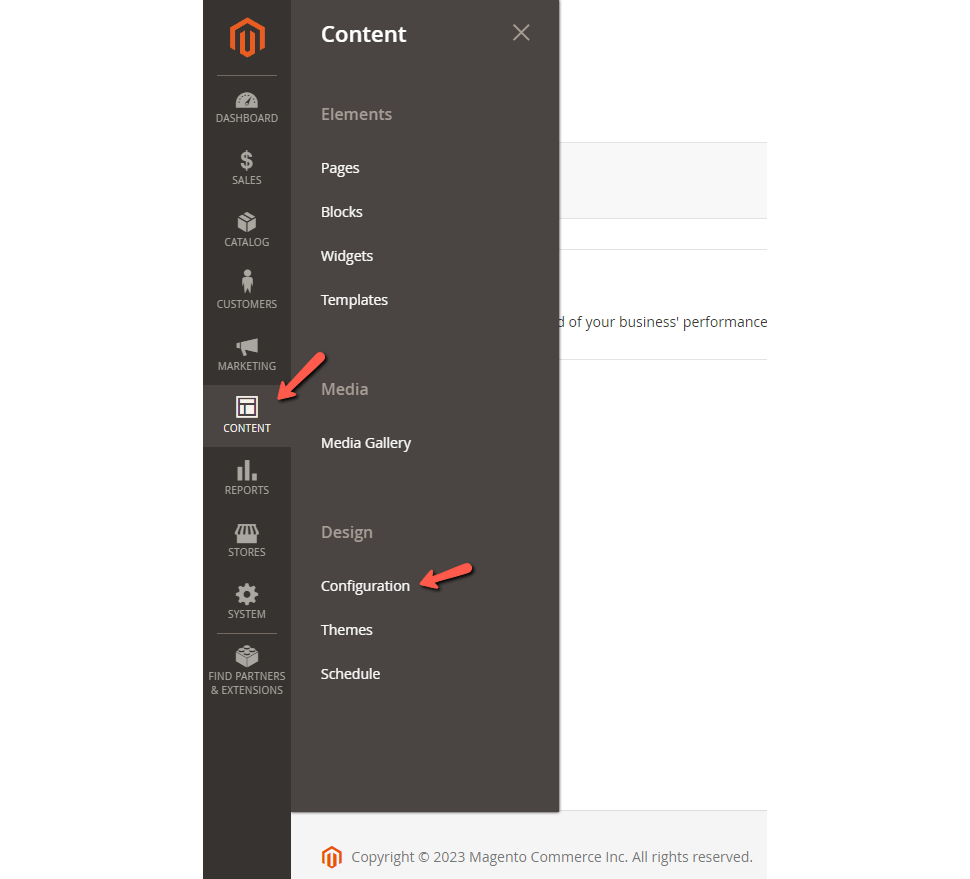
- On the Magento admin panel, navigate to Content → Design → Configuration;
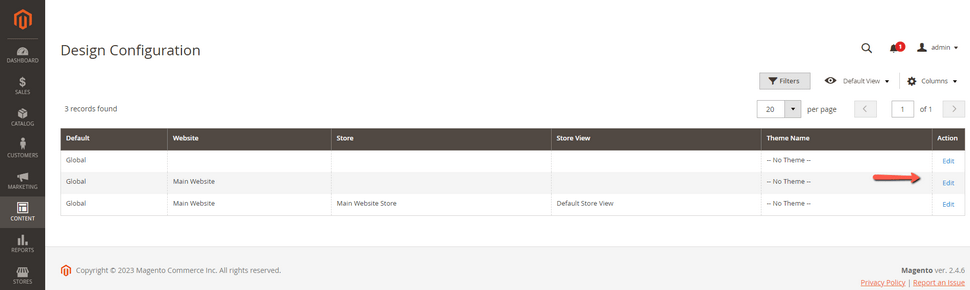
- On the Design Configuration page, find the store view you want to edit the footer section of and click Edit under the Action column;
- Scroll down to the Footer section and click on it to expand it;
- Change the copyright notice in the Copyright text area;
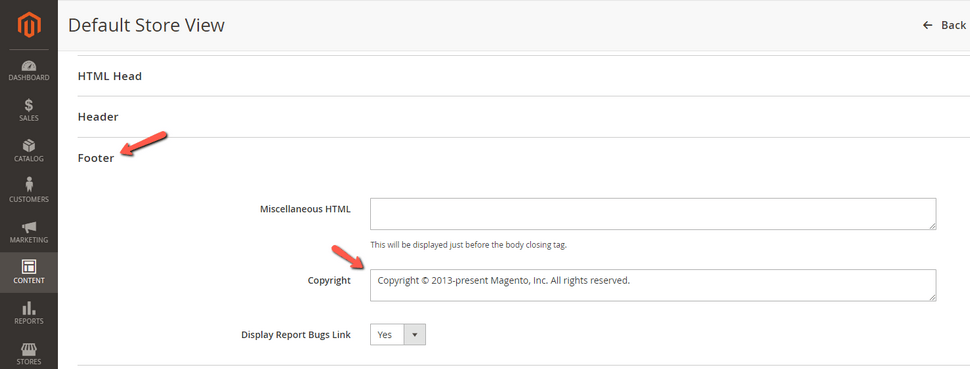
- Once you’re done, click the Save Configuration button on the top right.
How to Customize the Footer
The Magento Page Builder is available only in Magento versions 2.4.3 and above. If you’re using Magento 2.4.2 or below, you can still follow this guide to add, remove, or edit the links. However, instead of using their code-free page builder, you’ll need to add your own HTML code.
Add New Block
The first thing that you need to do is create your new footer block.
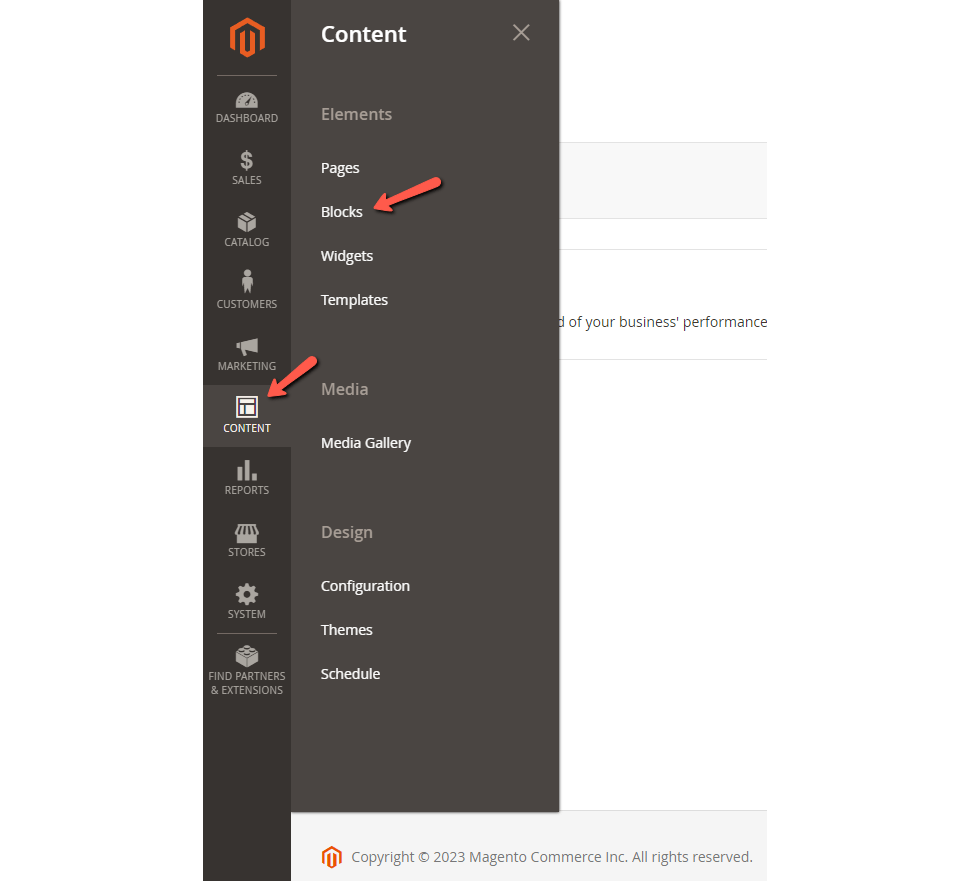
- Go to Content → Elements → Blocks in the Magento admin sidebar.
- Click Add New Block to add a new block.
- Add the Block Title. In this example, the title is Footer New. Then add your identifier. It is usually the block name, but with an underscore between the words and no capital letters.
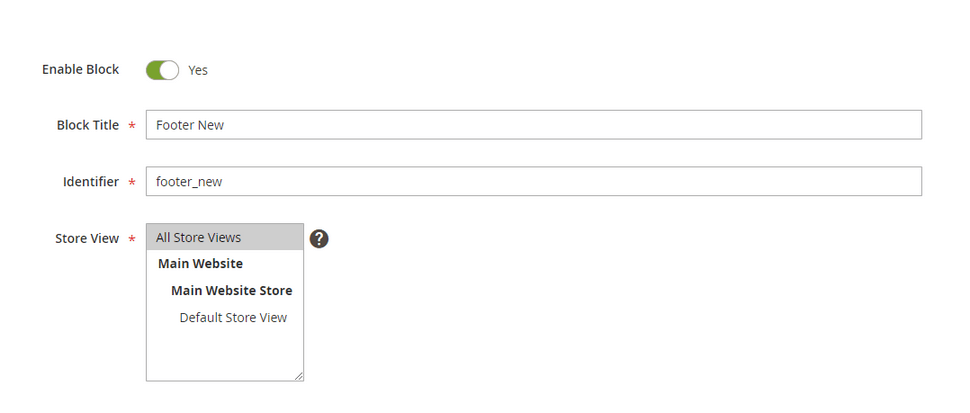
- Select the appropriate Store View to assign the block to and save the block.
Edit with Page Builder
Next is the actual customization of the footer. The Magento page builder comes with a lot of options you can use, so feel free to make the footer look the way you want it to!
Note
If you’re using Magento 2.4.2 or below, paste the HTML code in the box below the Show/Hide Editor, and skip to the “Add Widget” section directly.
- Once you have saved your block, click on the Edit with Page Builder button in the bottom right of the screen;
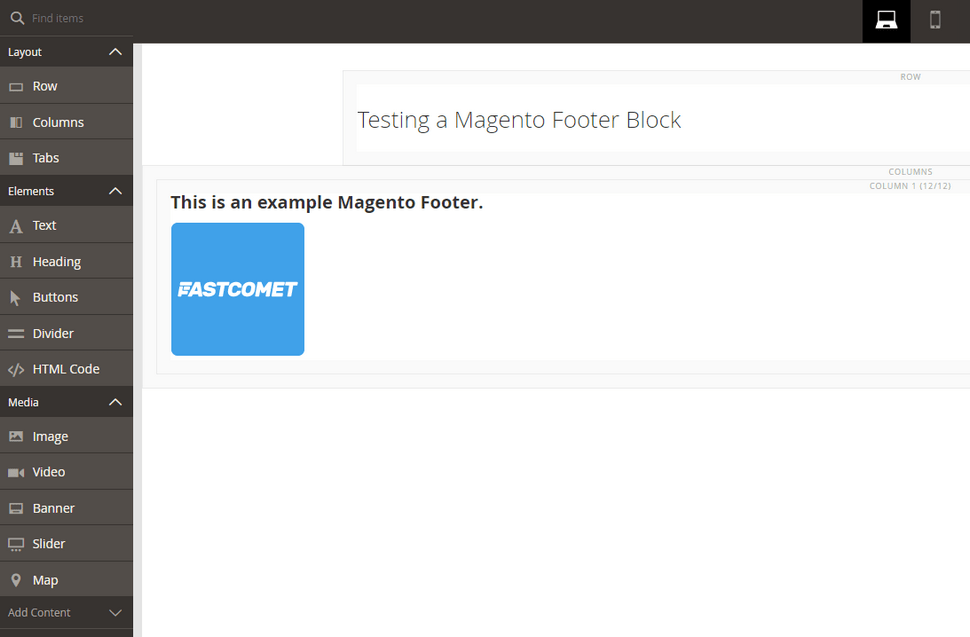
- When you’re in the page builder, drag and drop any elements you wish to use for your footer page and customize them to your preference. You can insert an URL by right-clicking on the text and selecting the chain link icon. You can also change the alignment, border, margin, and padding and add CSS in the Page Builder;
- After you’re done designing the new footer, click on the two arrows in the top right to go back to the footer block page and save it once more.
Add Widget
Time to enable the footer so it actually appears on your website.
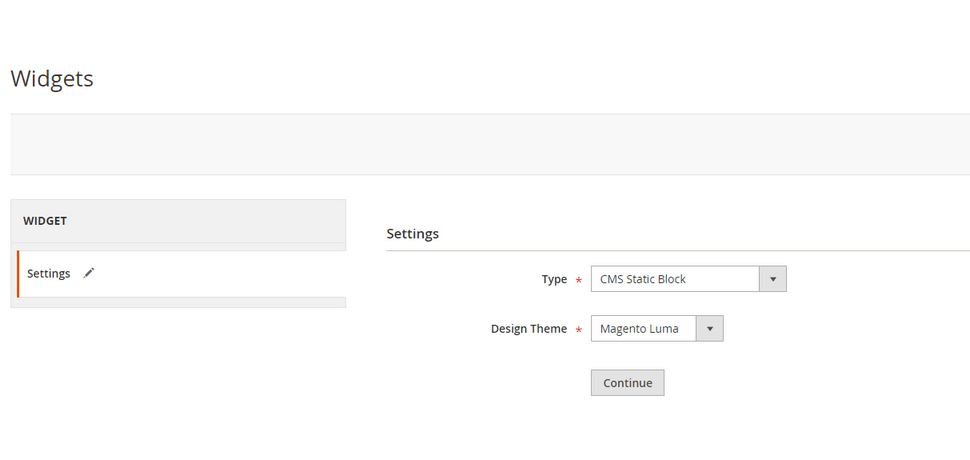
- Go to Content → Elements → Widgets;

- Click on Add Widget in the top right corner;
- Select CMS Static Block in the Type field. Select the appropriate theme in the Design Theme field and then click Continue.
- Add the Block Title as the Widget Title. Select the right Store View in the Assign to Store Views field. Set the Sort Order as 0;
- Click on Add Layout Updates in the Layout Updates section at the bottom of the page. Select All Pages from the Display on dropdown and CMS Footer Links from the Container dropdown that will appear after your Display on dropdown selection;
- Go to Widget Options on the left side of the page and click on Select Block and choose the new footer block from the list;
- Click Save to save the changes.
Refresh Cache
Finally, Magento requires you to refresh its cache after every major change, so here are the steps:
- Go to System → Tools → Cache Management in the Magento admin sidebar.
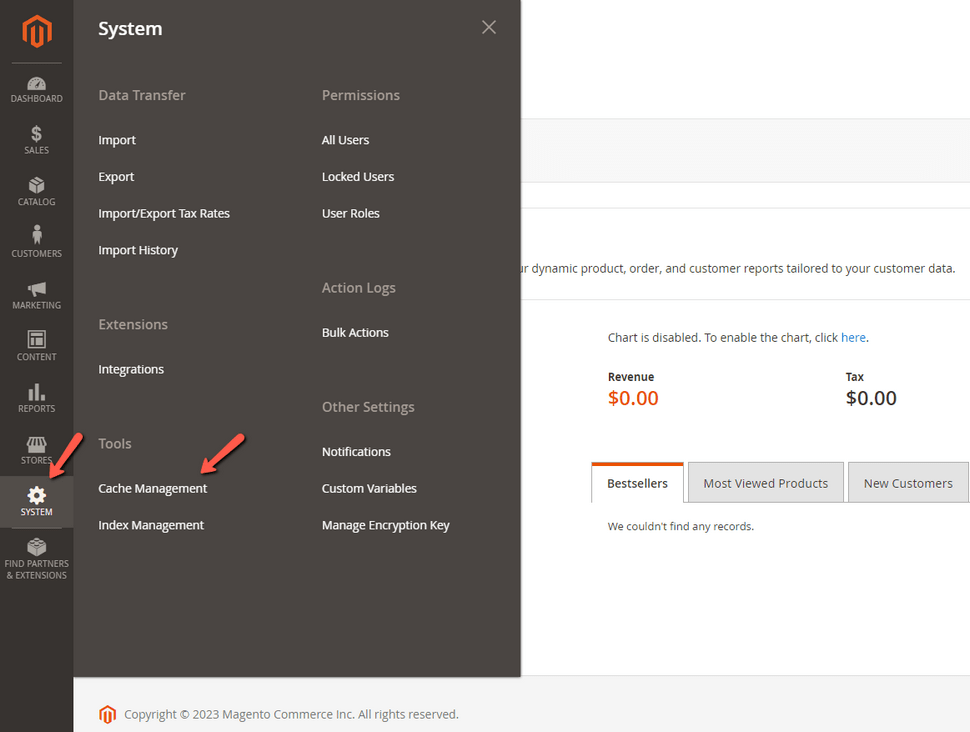
- Select the invalidated cache and click on Submit to refresh the cache.
Wrapping it up
This is how you edit a footer menu in Magento 2. The footer of an online store might be at the bottom of each page, but it is not at the bottom of the priorities list. The footer is a great place to list any links you have, any contact information, a logo, or anything else you can think of. Use it to your advantage.
We hope you find this article useful. Discover more about FastCloud - the top-rated Hosting Solutions for personal and small business websites in four consecutive years by the HostAdvice Community!

Magento Hosting
- Free Installation
- 24/7 Magento Support
- Hack-free Protection
- Fast SSD Storage
- Free Domain Transfer
- Free Magento Transfer
- Immediate Activation
- Free Cloudflare CDN