How to install Windu Template
Updated on Mar 13, 2019
Windu comes with a large number of templates ready to be installed via the Windu admin dashboard. To setup any of the included templates or upload a new one first you will need to login into Windu Admin Dashboard.
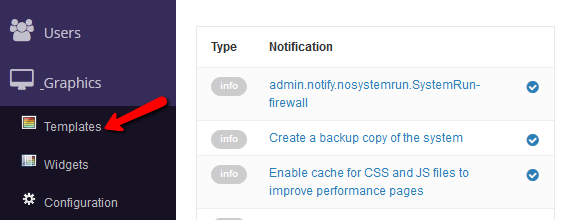
From the Windu admin panel, please navigate to the Graphics → Templates section of the main admin panel.

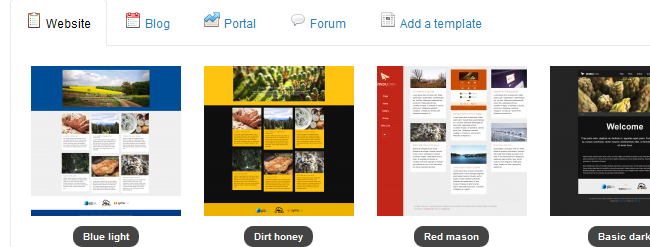
This will redirect you to the Windu template page under your admin area. There are four different template types which you should consider depending on the type of webisite you plan to create. The four main categories are: Standard Website, Blog, Forum/Portal.

Under each tab you will locate different templates specifically designed for different types of websites. To install a template of your liking simply click on the template thumbnail. When you have your template installed you should see it in the template list located on the left. To activate the template click on the activation icon.

After a few seconds the desired template will be set for you and you can check your website new look.
If you would like to review your template images, css or files you may click on the pencil icon next to the template name.

This will redirect you to the template browser via which you can check all template files. Remember that you can easily edit your template files via the pencil icon next to the file that needs to be modified. Additionally, you can download the whole template package via the download icon next to the template name.

When you have your template downloaded you can unzip the archive on your local computer and edit any files you need.

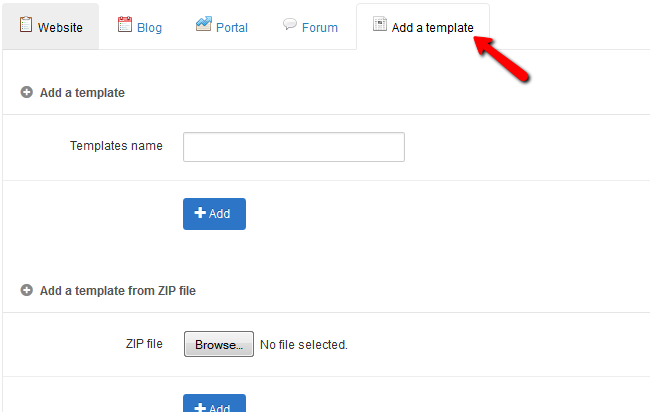
When you are satisfied with your changes you may archive all files once again and upload it to your Windu CMS via the Add a Template option.

Windu CMS Hosting
- Free Windu Installation
- 24/7 Windu Support
- Free Domain Transfer
- Hack-free Protection
- Fast SSD Storage
- Free Windu Transfer
- Free Cloudflare CDN
- Immediate Activation