How to backup from WHM to Google Drive
Updated on Nov 9, 2018
From this tutorial, customers currently located on a Cloud Virtual Private Server (VPS) or Dedicated Server (DS) will be able to learn how to create a custom destination for their backups and point it to their Google Drive accounts.
To backup your WHM to Google Drive, you will need to:
Create a Google project and configure the Google Drive API
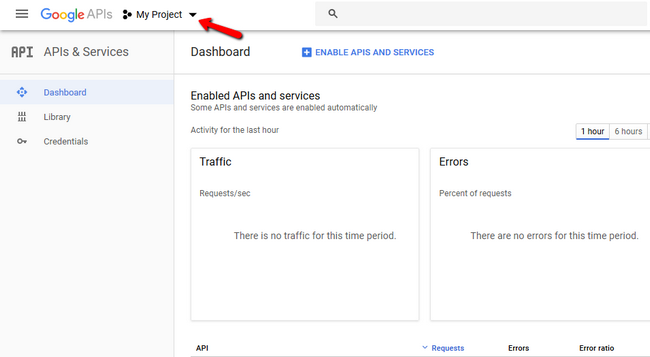
Configuring a channel for your backups to be pushed on to your Google Drive will require a properly set project and API credentials. All of this can be done very quickly via the Google's Developers Console which you can open via your google account. To create a new project, click on the My Project/Select a Project button at the top of the page.
If this is the first time you are opening the console, you will not have an active project, so let's create one. Click on the New Project button.
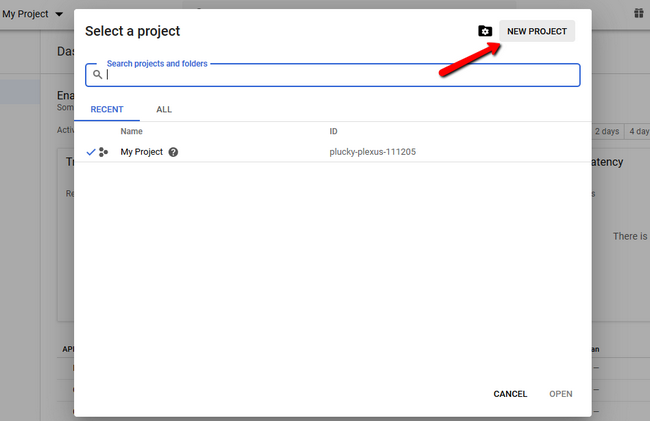
Name your project so you can recognize it later and click on the Create button.

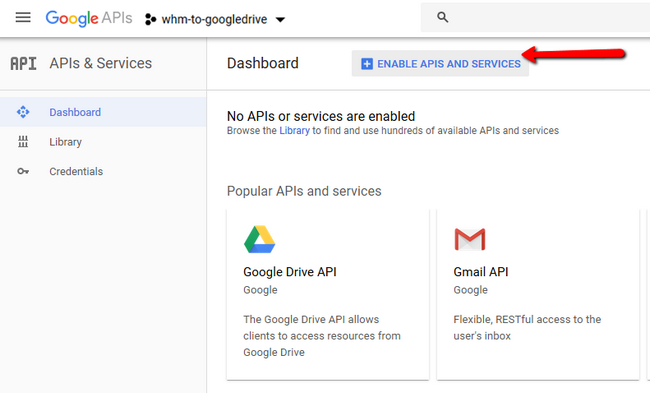
Now, you will have to enable the Google Drive API, so click either on its icon if it is present or hit the Enable APIs and Services button.
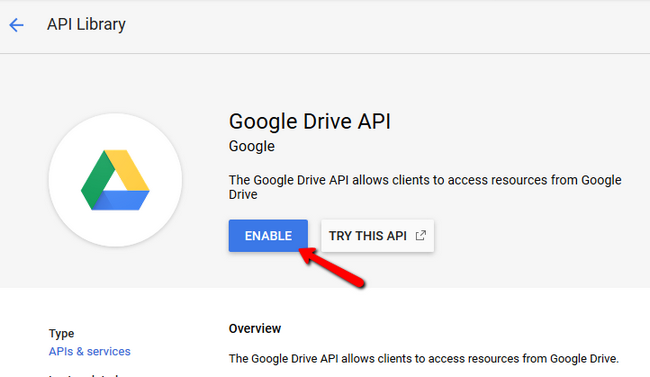
Select the Enable option to continue.
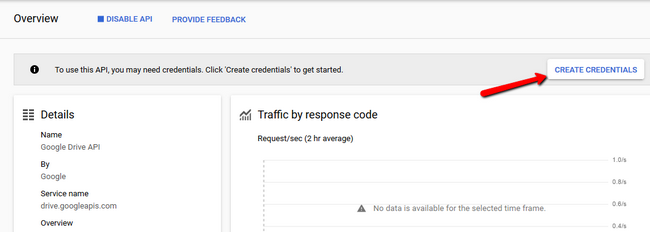
Since later we will need 2 different strings of symbols that will act as our public/private keys, we have to add credentials for the API so click on the Create Credentials button.
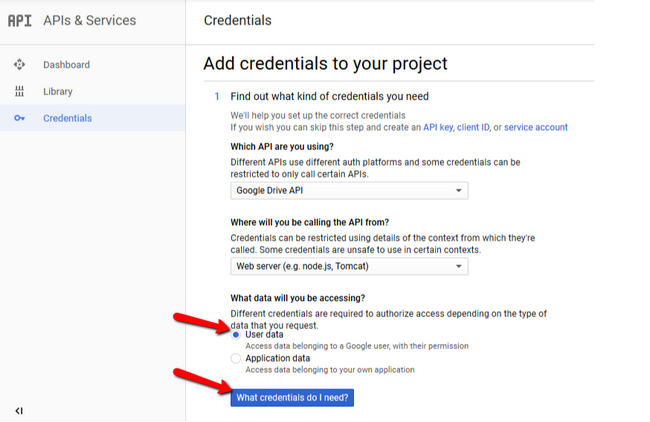
Here you will see a plethora of options for each field. The ones that you will need are the following:
- Which API are you using?
Google Drive API - Where will you be calling the API from?
Web server (e.g., node.js, Tomcat) - What data will you be accessing?
User data
When you are done, click on the "What credentials do I need?" option to continue.
As part 2 of this setup, you will be prompted to create an OAuth 2.0 client ID.
Add a name which will be easy to remember and be descriptive of the use of credentials and in the Authorized redirect URLs add hxxps://hostname:2087/googledriveauth/callback where hostname will be substituted with the actual hostname of your server. Note that using your server's IP here will not be possible.
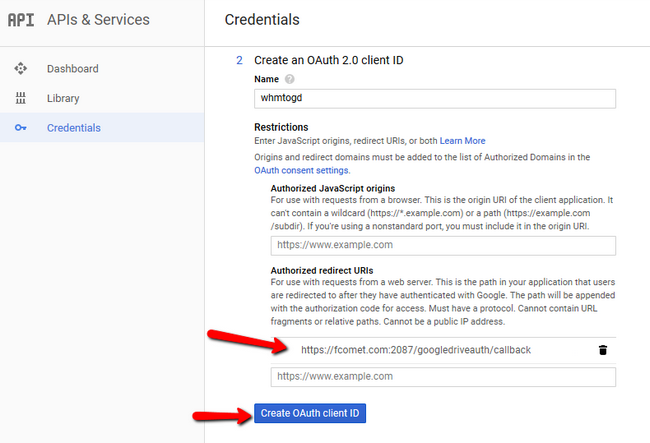
Click on Create OAuth client ID, and after that, you can pretty much leave part 3 of the setup as it is. On part 4 you will get the Client ID and rest of credentials for the API. Make sure to download the .JSON file as you will need it for the "private key" which in this case is called client_secret. Click Doneto finalize the setup.
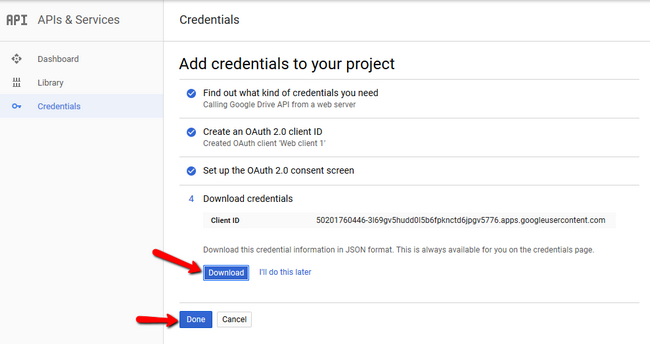
Open the downloaded file with a text editor and copy the client _secret string. You will need this for the configuration of your custom google drive destination in the second half of this tutorial.

Google Drive as an Additional Destination in WHM's backup configuration
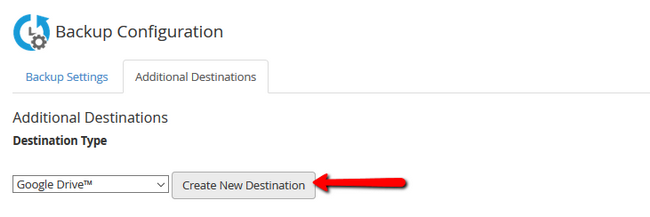
To actually make the backup be pushed each time to your Google Drive or as referred in the past - to make a Google Drive transport, you will have to navigate to WHM → Backup → Backup Configuration and switch the to the Additional Destinations tab. Then select Google Drive as a Destination Type.
Now if you wish to specify in what orders should the backups be kept, you can do so in the Folder field. The Client ID field should be populated with the Client ID which you got from the first part of this tutorial. The same goes for the Client Secret which you got from the .JSON file.
Once you have copied both API credentials in the correct fields, click on the Generate Credentials button. This is a bit like a reverse of what we just did in the Google Developers console, and now you will be prompted to Authorize Access.
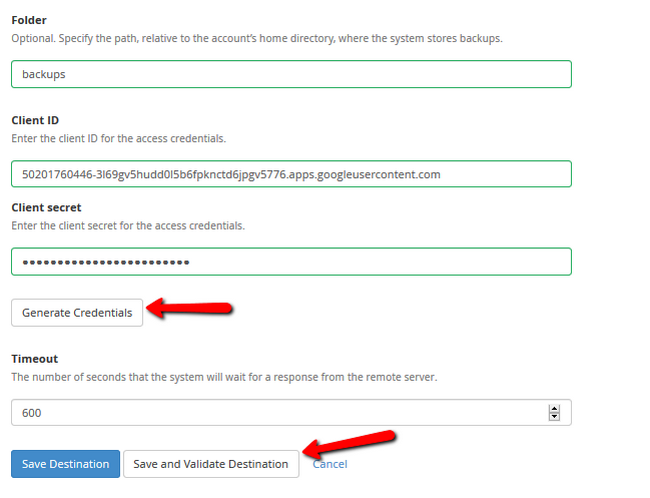
We recommend you keep the default Timeout value and complete the setup by clicking on Save and Validate Destination. If you click on only Save Destination, a validation can be performed afterward at any time, but that validation is required in order for the backups to actually arrive at your Google Drive. You wouldn't want to do all of this only not to have your backups properly pushed, so validation is a must.
With this, you now have completed this tutorial and added another layer of redundancy for your precious files.

WHM Hosting
- Free Domain Transfer
- Root Access
- Fast SSD Storage
- Hack-free Protection
- Guaranteed Resources
- Optimized Server Setup
- Free Website Transfer