How to Set up a Cron Job in cPanel
Updated on Feb 28, 2020
Cron is a Linux program (or other UNIX type OS), used for scheduling your time-based jobs. You can use the program when you want to automate specific repetitive tasks on your server, ultimately saving you time.
What we will cover:
What is a Cron Job?
Cron jobs are typically scheduled to run at specific dates or times. The ‘job’ is a script that usually performs an update task. Some examples of such tasks are:
- Expiring user accounts;
- Sending out automated emails;
- Data visualization;
- Deleting user accounts;
- Updating tables;
- Maintenance tasks;
- Website updates.
The cron job format may seem a bit complicated and overwhelming for first-timers, but this guide is to help you by breaking the whole process down into easy-to-follow steps. Keep in mind that the Cron job is a helpful and powerful tool that can save you time daily.
Components of a Cron Job
A Cron Job needs to have the following components:
- The script or task to be executed (the command);
- The command to execute the job repeatedly (set in cPanel);
- The resulting output/action of the script (report sent to the email address set by the user);
Prerequisites
The things you will need before setting up a cron job in cPanel are:
- A domain name (www.example.com);
- A web hosting account that supports cPanel (FastComet);
- cPanel username and password.
Setting up a Cron Job in cPanel
There are four steps that you need to follow when setting up a cron job in cPanel.
Step 1: Log in to your cPanel Account
To log in to your cPanel Account, if you are a FastComet customer, you need to go to your Client Area (my.fastcomet.com). From there, you click on the cPanel icon:
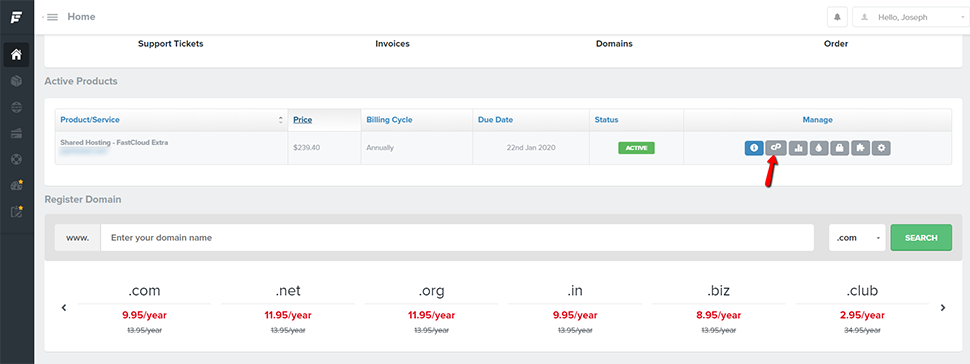
And here you are!
Step 2: Search for Cron Jobs
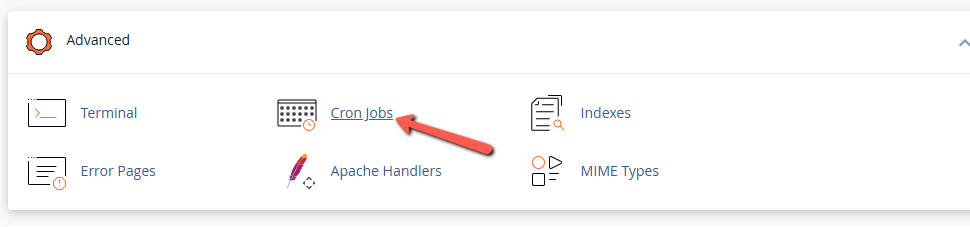
Once you are in the cPanel, you will be able to find Cron Jobs. You can do that quickly if you type it into the cPanel search bar. Go to the cron job menu by clicking on the link or the icon:
Step 3: Updating Cron Email
If you want to get notified when your cron jobs run, you need to enter your email in the “Cron Email” section. This is not a necessary step before you continue, but it’s recommended.
Those email notices would be handy to indicate whenever something goes wrong. For example, if you don’t receive an email after you have subscribed for cron job updates, you will know that something is not quite as planned.
Note:
Not all scripts that are executed via cron jobs provide outputs or send emails. That depends on the PHP code you are using.
Nevertheless, if you have a lot of cron jobs, such emails could start to irritate you.
To receive an email whenever a cron job runs, enter your email address in the Email field:
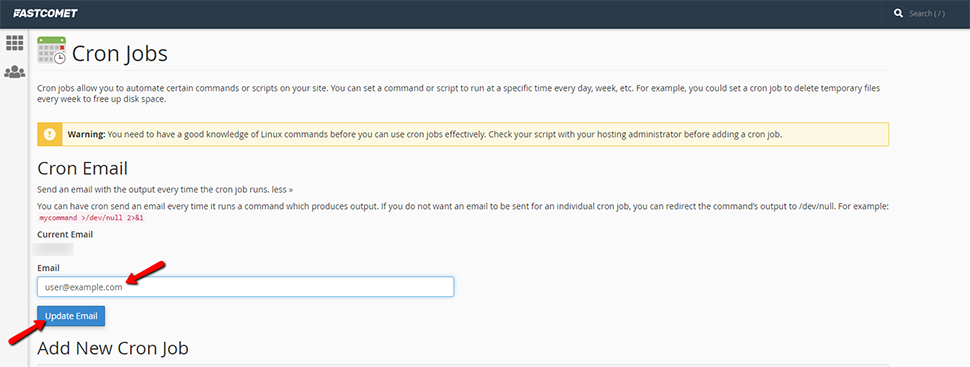
Note that there could be cases your default email address for the specific cPanel account is pre-set to receive the cron job notices. If you no longer wish to receive the notices, click on Update Email without inputting anything in the Email field.
Step 4: Setting up a Cron Job
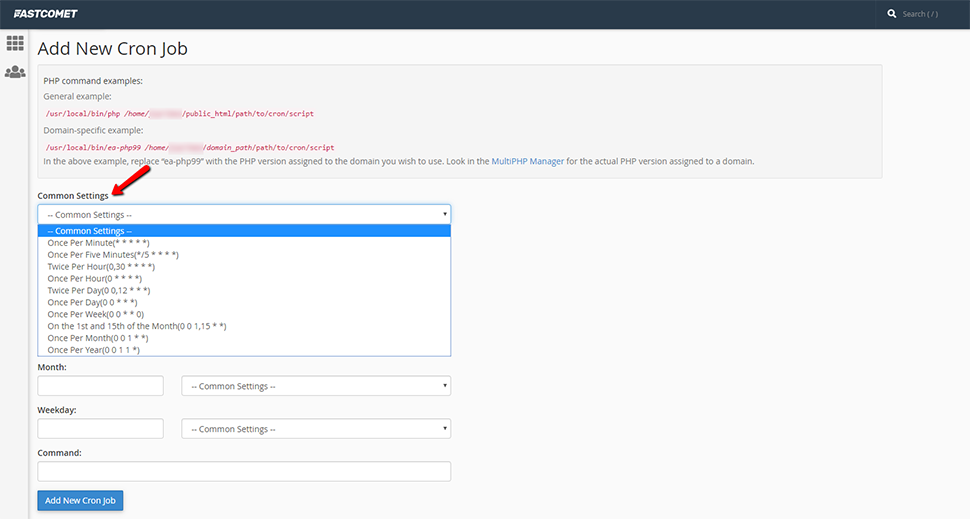
To set up your cron job in cPanel, scroll down from the email options, and find the Add New Cron Job section:
Before you start configuring the individual time and date elements, find and click the Common Settings drop-down:
Cron Job Timings
You will need to follow some steps in regards to the timings of the cron job. You can select your desired cron job interval from the appropriate menus, or you can enter your values:
- Common settings — here, you can select one of the most commonly used intervals. If you choose one option from the drop-down, the system will configure the settings in the Minute, Hour, Day, Month, and Weekday boxes for you:
- Minute — indicates the number of minutes between each cron job or the minute of the hour that you have set for the cron job;
- Hour — indicates the number of hours between jobs, or the hour on the days that you have set for your cron jobs;
- Day — indicates the number of days between cron jobs, or the day of a month, on which you have cron jobs set;
- Month — indicates the number of months between jobs or the month of the year when you want to run the cron job;
- Weekday — sets the weekly schedule when you wish to run the cron job.
In the Command text box, you can enter your desired command that you want to run via the cron job.
Note:
You have to specify settings for the Minute, Hour, Day, Month, Weekday, and Command text boxes. Be cautious whenever using the ‘rm’ command in a cron job. If you don’t declare the proper options, you could delete your home directory data (you definitely don’t want that).
The “Job” Part
The final field in Add New Cron Job is Command. It’s the field where you enter the path to the file that contains the server command which you want to run at the specified times.
After entering the path, click the button Add New Cron Job.
If you wish to execute a PHP script, the command would have to consist of two parts:
- The path to PHP for your account. As we are utilizing CloudLinux for shared servers and it’s not by default installed on VPS/DS packages, there are two different PHP paths that our clients should utilize:
/usr/local/bin/ea-php# - EasyApache (VPS/Dedicated CPU Servers without CloudLinux).
/opt/alt/php#/usr/bin/php - CloudLinux.
Note:
The # will have to be replaced with the appropriate PHP version. For PHP 7.3 it is ea-php73/php73, for PHP 7.0 — it is ea-php70/php70, etc.
- The path to the file you are executing.
When you are successful in setting up your cron job, you will see the following message: ‘cPanel successfully added the cron job.’
Edit or Delete a Cron Job
Sometimes you might need to edit or delete one or more of your cron jobs. In such cases, you need to:
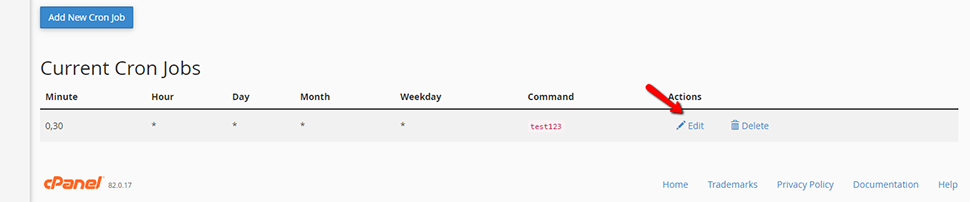
- Scroll down to the Current Cron Jobs section;
- Click the Edit or Delete link. Edit will bring up the cron job settings;
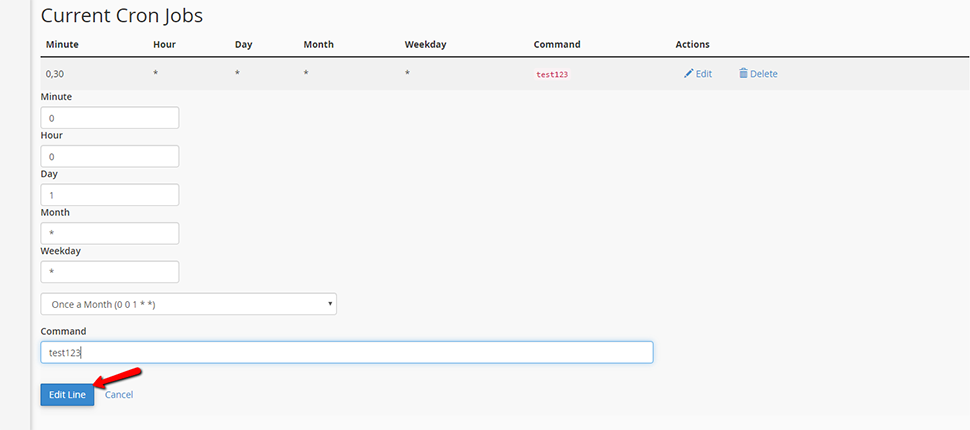
- Make all necessary changes and then click the Edit Line button:
- Delete opens a delete dialog. Click the Delete button:

That’s the Whole Procedure
You might have been surprised, but as you can see, setting up cron jobs via cPanel is quite a straightforward process. If you find that cron jobs are useful to you, you should start thinking about other uses for them.
However, in case anything goes wrong after setting a cron job, and you don’t know what to do—contact our 24/7 technical support team. Open a support ticket, and you can be sure that our experts will assist you as soon as possible.
We hope you find this article useful. Discover more about FastCloud - the top-rated Hosting Solutions for personal and small business websites in four consecutive years by the HostAdvice Community!

cPanel Hosting
- Free Domain Transfer
- 24/7 Technical Support
- Fast SSD Storage
- Hack-free Protection
- Free Script Installation
- Free Website Transfer
- Free Cloudflare CDN
- Immediate Activation