How to Configure the Blocks of your website
Updated on Mar 13, 2019
Open Atrium display the content you are adding to the platform using block structure. Of course if you would like to change the block structure or to add additional blocks to the default appearance of the theme you are using you can do so by using the Blocks configuration page. In this tutorial we will show you how that page is structure and we will explain its elements.
To configure Blocks in Open Atrium, you need tos:
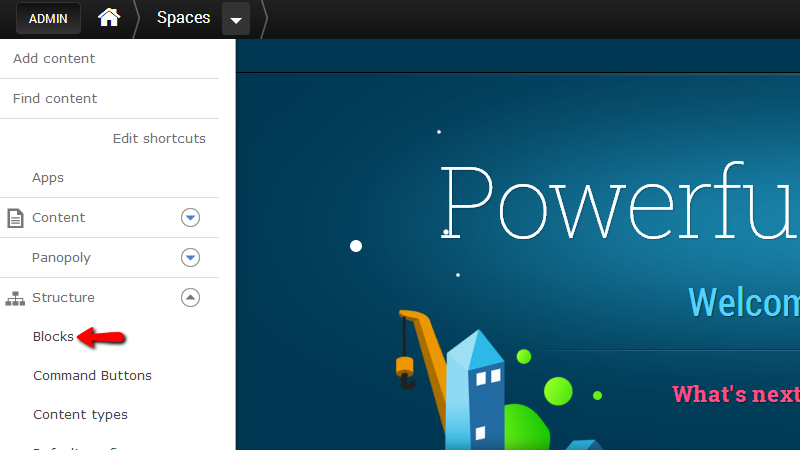
Step 1 Access the Blocks Configuration page
In order to access the Blocks configuration page you will need to navigate to Admin>Structure>Blocks.
At the top of that page you will notice tabs structure representing the currently enabled themes you have as the blocks configuration for each theme will be different. Please choose the currently used theme by your website so you can change its default blocks structure.
Once you have clicked on the tab representing the currently active theme for your website you will be presented with a short description on what this page is used for and bellow that description you will see the areas of the theme where blocks can be added.
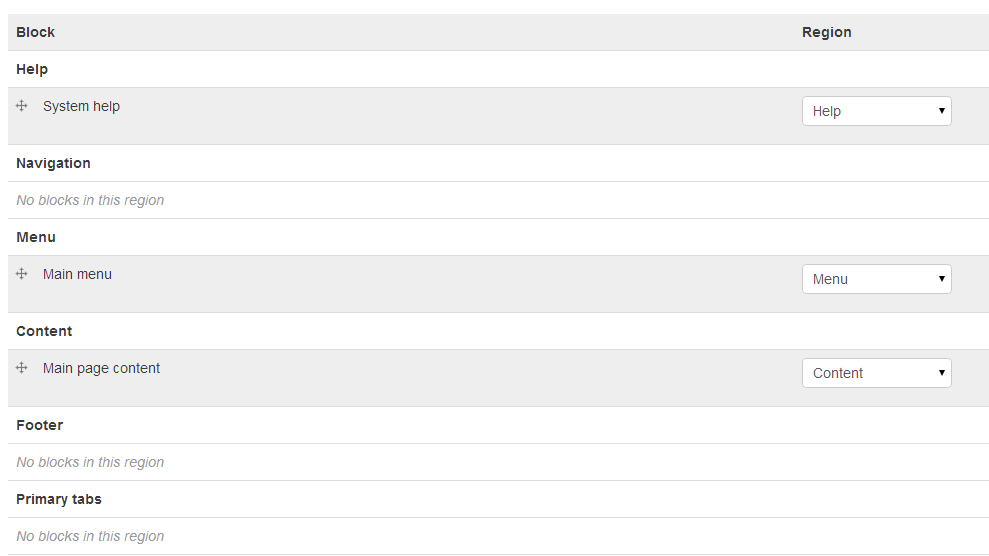
The supported block areas by the Open Atrium Radix theme are:
- Help
- Navigation
- Menu
- Content
- Footer
- Primary Tabs
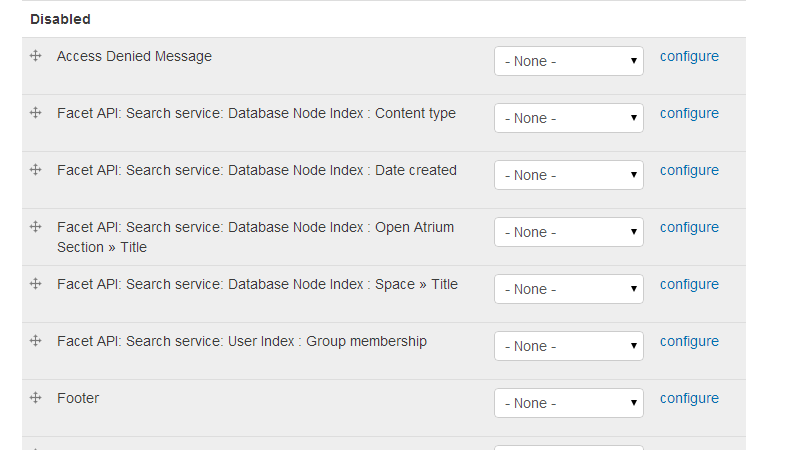
Bellow the block areas you will see a list of the Disabled (Inactive) blocks. The list is quite long but there you will be able to find basically every block you will need.
In the next step we will show you how to add blocks to the block sections of your website.
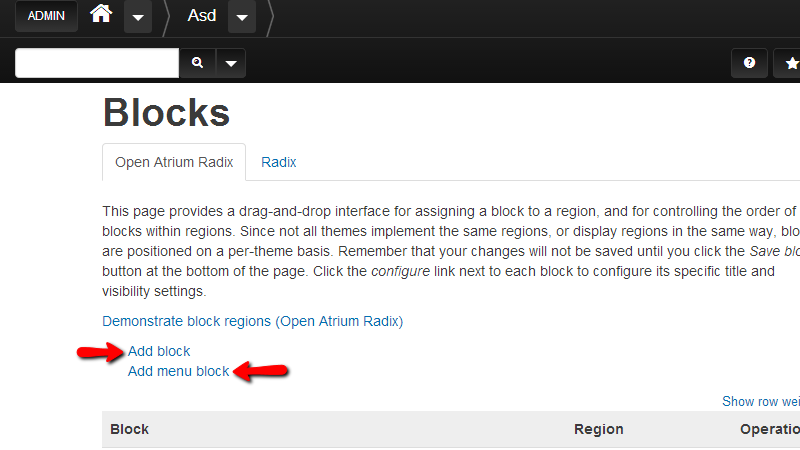
Step 2 Add/Remove blocks in the block areas of your website
At the top of the page you will be able to see the two options called Add Block and Add menu block. These options are used if you would like to add your own custom block to your theme particularly useful if you are unable to find a useful block in the list of disabled blocks.
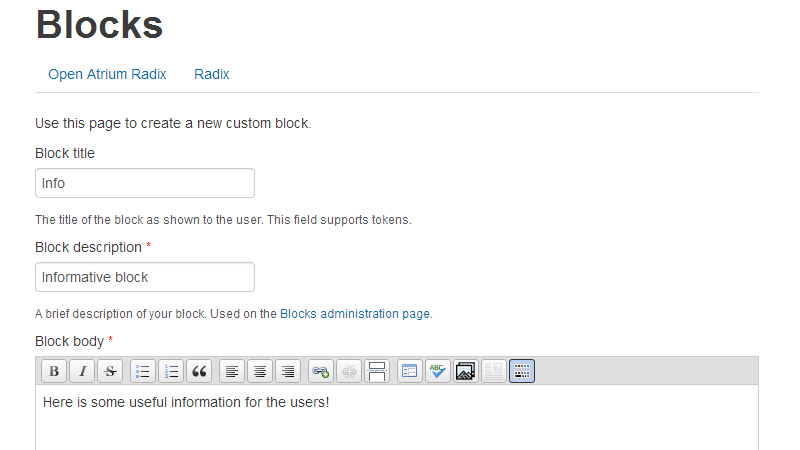
Let’s add a new block from the Add block option. By clicking on that option you will be redirected to a page where you will be able to configure the new block you are adding.
The configuration options are:
- Block Title
- Block Description
- Block Body
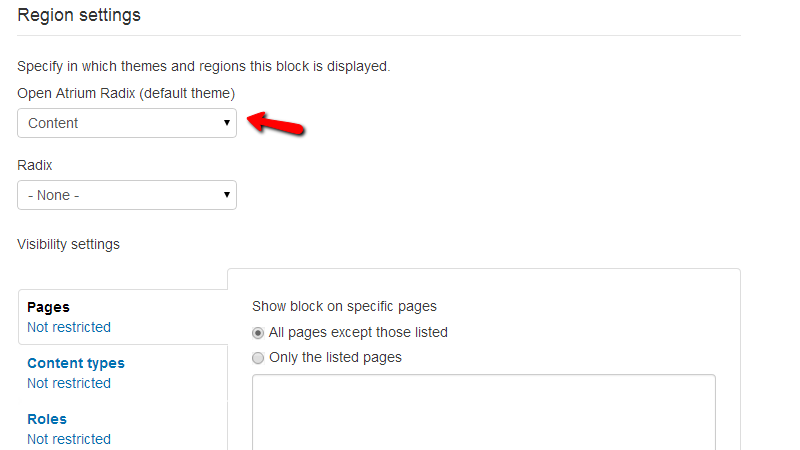
Next you will need to choose the settings for the region this block should be displayed at depending on the theme you are using. Please select the correct region from the drop-down list associated with your theme name.
The final settings are related to the visibility of the block. There you will be able to configure on which pages this block should be displayed, the content types where this block should be included, the roles where the block will be displayed and of course the users able to edit that block.
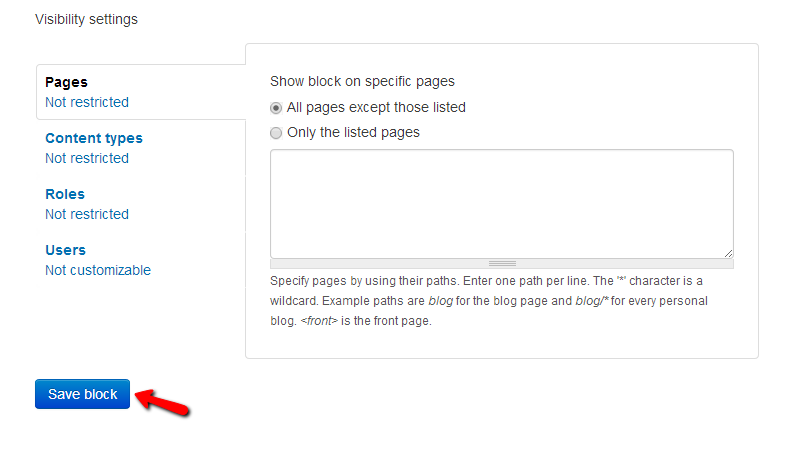
Once you are ready please press the Save block button at the bottom of the page so the block can be saved.
Then you will be redirected back to the blocks configuration page and you will see how your newly created block will be listed in the list of blocks for the chosen block area of your theme.
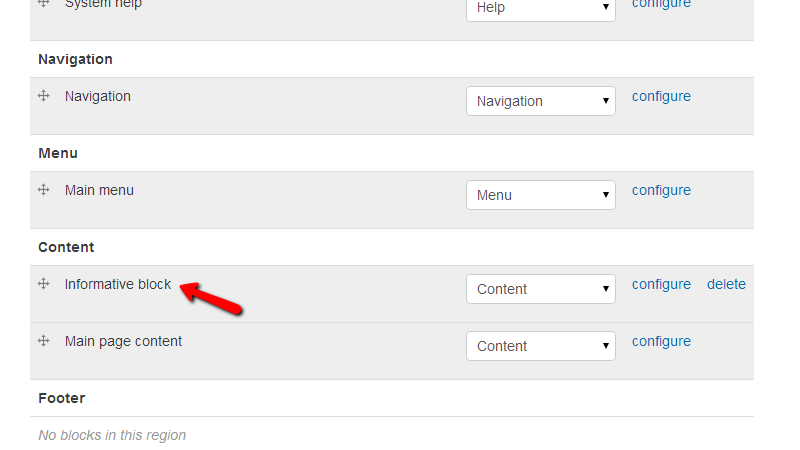
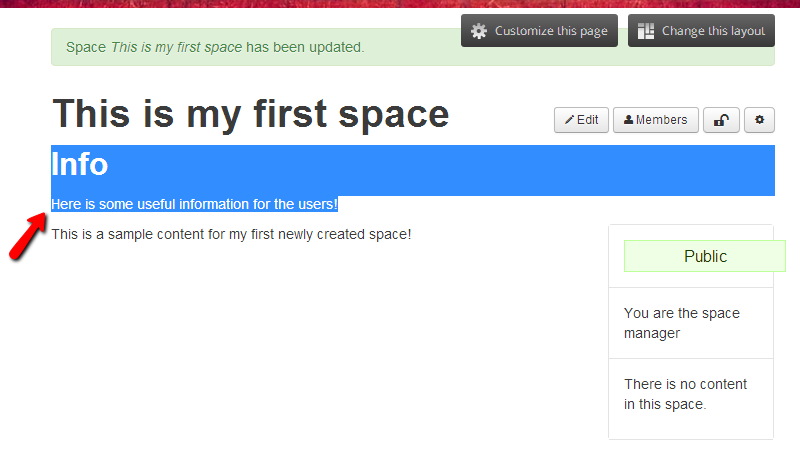
Here is how the block will look like on one of the spaces we have already created:
Now that you know how to add a new block to your website it is time to learn how to use the existing blocks. Actually this is relatively easy and straight process. Each from the disabled block is representing an already implemented functionality.
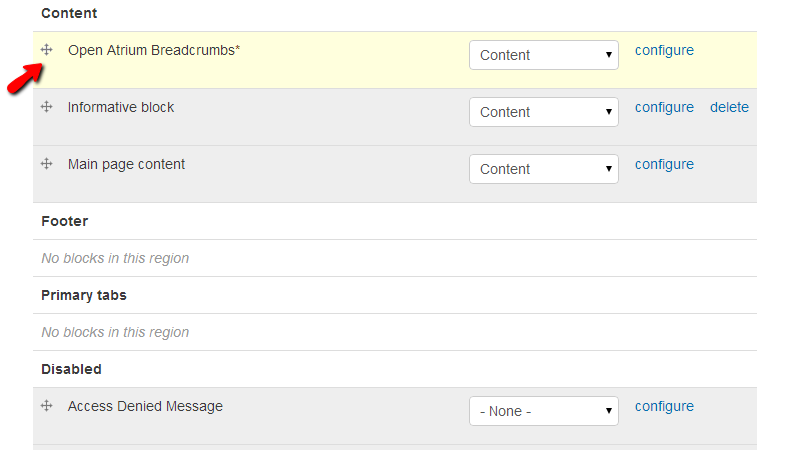
Let’s take for example the Open Atrium Breadcrumbs block. This block is providing the users with breadcrumbs for the pages they have accessed. If you click on the moving icon before the block’s name (In the list of disabled blocks) you will be able to move the block to the block area you would like that block displayed. For the purpose of this tutorial we will move the block to the top of the Content area.
And then you will need to save the blocks from the Save Blocks button at the bottom of the page.
Last but not least you can also move every already configured blocks to every location you would like to. Keep in mind however that the moving of blocks will be active for the pages you configure the block to be displayed at. If you leave the configuration for all of the pages then you will most probably see the block on every page even on the administrative pages.
Congratulations! You can now configure the different blocks of your website!

Open Atrium Hosting
- Free Open Atrium Installation
- 24/7 Open Atrium Support
- Free Domain Transfer
- Hack-free Protection
- Fast SSD Storage
- Free Cloudflare CDN
- Free Open Atrium Transfer
- Immediate Activation