How to enable Google Analytics in Cinematico
Updated on Dec 10, 2015
This tutorial will review the process on how to enable Google Analytics on your Cinematico website. This is a good feature that will allow you to track the visitors on your website, the pages they are accessing, their location and much more. Based on that, you will be able to make a decision for the further development of your website.
Step 1 Get Google Analytics
The first step is to register your own Google Analytics account. This will allow you to use their service on your website. You can register such an account via the official Google Analytics website.
Once you sign up for the service and add your website, you need to navigate to Admin → Tracking Info → Tracking Code.
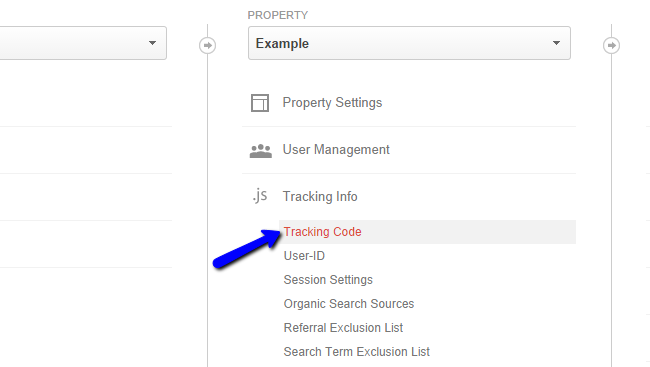
Here, you will be able to see the Tracking ID for your website. Copy that ID number as you will need to add it to your Cinematico installation.

Step 2 Configure Cinematico
The next step is to access the administrative area of Cinematico, which is the URL of your website, followed by /settings. Scroll down to the Google Analytics section and edit the following field:
- Analytics ID: Enter the Tracking ID number from the previous step.

Click on the Save button to keep the changes.
On this page...

Cinematico Hosting
- Free Cinematico Installation
- 24/7 Cinematico Support
- Free Domain Transfer
- Hack-free Protection
- Fast SSD Storage
- Free Cinematico Transfer
- Free Cloudflare CDN
- Immediate Activation
