Locate and Edit Cinematico Configuration File
Updated on Dec 10, 2015
The configuration file of a certain script contains valuable information and options that you can edit manually. If you make any changes on the configuration file, they will automatically be applied on your website as well. The information on how to locate and edit the configuration file of Cinematico is valuable as it will allow you to configure your website during a backup restore, for example.
The first thing that you need to do is to locate the root directory of your Cinematico installation on the server. In our case, we are using example.com as our domain and we have installed Cinematico in a the public_html/ directory of our account. This means that our Cinematico website is accessible directly via the example.com domain that we are using.
However, note that if you have installed your Cinematico website in a subfolder, for example called "video", this means that there will be a "video" folder within the public_html/ directory of your account and your website will be located in it.
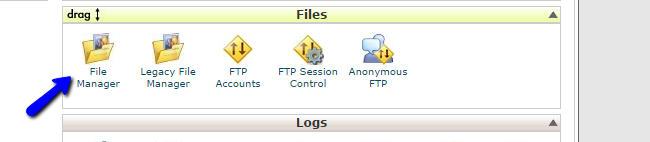
To access the main configuration file of Cinematico, you can access your cPanel account first and then locate the File tab. Select File Manager from the available services within that tab.
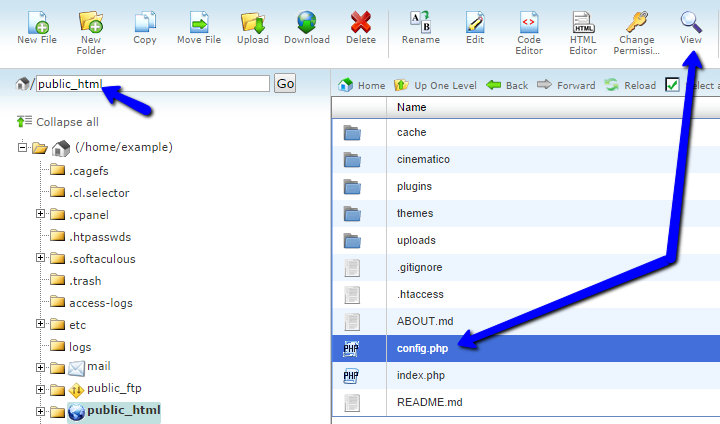
Select the Home Directory and the Show Hidden Files options and then click on Go.

Navigate to the location of your Cinematico installation. In our case, this is the public_html/ directory of our account. Within that directory, you will notice a config.php file, which is the main configuration file of Cinematico. The file contains a large number of different setup options and we will review them all so you can get a better understanding of what they do. Select the config.php file and click on the View button at the top menu to review it.
$site_url = "http://example.com";
This is the actual URL that is configured for your website. In our case, it is example.com, but you will find a different value here, depending on the way you have installed Cinematico. Note that if you are restoring your website from a backup on a different location, you will have to edit this line.
$site_title = "FastComet Test";
$site_description = "My video community!";
Those two lines are about the site information on your website. They specify the title and the description on your Cinematico installation.
$video_service = "youtube";
The video service on your website can be either "youtube" or "vimeo". Depending on this choice, you will also have to provide the details for your YouTube or Vimeo account.
$youtube_username = "cpaneltv";
$youtube_display = "user";
$youtube_channel = "q2Q3Ry4G21M";
$youtube_playlist = "";
$youtube_featured_video = "_4KMQteXFUg";
You can provide your YouTube details here. If you wish to use your YouTube account, you need to set the $video_service option to reflect your choice as well.
$vimeo_username = "cpaneltv";
$vimeo_display = "user";
$vimeo_channel = "";
$vimeo_featured_video = "_4KMQteXFUg";
You can set your Vimeo account details here. Note that to use your Vimeo account, you need to specify that using the $video_service option above.
$site_theme = "focus";
The default theme of Cinematico is called "focus". You have the ability to get and install paid Cinematico themes and if you do that, you need to specifiy the actual theme you will be using here.
$gallery_title = "Your Gallery Title";
$gallery_description = "A short description for your video gallery.";
$gallery_items_number = "12";
Set the title and description for your video gallery. Note that the $gallery_items_number will determine how many videos you wish to display on a single page.
$footer_text = "Copyright © 2014 FastComet";
The footer text on your website can be edited directly via the configuration file. Set your company information to get it displayed at the bottom of each page on your website.
$about_title = "About Us";
$about_text = "Dummy about us text";
The two lines above will set the information on your About Us page. You can set a title and the actual text to be displayed on the page.
$not_found_title = "Page Not Found";
$not_found_text = "Dummy not found page text";
The two lines above will set the information for your 404 Not Found page. If there is missing content on your website, the system will display the page title and text for your users.
$profile_name = "FastComet";
$profile_twitter = "FastComet";
$profile_facebook = "FastComet";
$profile_email = "[email protected]";
The lines above will display the information for the main user profile on your website. You can set a name, twitter/facebook accounts that can be linked directly from your website, etc.
$site_analytics = "UA-44794490-4";
If you have a Google Analytics account and you need to use it on your website, you can set your ID number here.
$username = "admin";
$email = "[email protected]";
$password = '$2a$08$fCRQUR4aXsVQQxyEvk1jBu.TwXoT12IMYaQARazfQ7F/Nhuq5e3g6'
The last part of the configuration file of Cinematico is the details for your administrative user. Note that the password is encrypted so it is not advisable to change it from there.
On this page...

Cinematico Hosting
- Free Cinematico Installation
- 24/7 Cinematico Support
- Free Domain Transfer
- Hack-free Protection
- Fast SSD Storage
- Free Cinematico Transfer
- Free Cloudflare CDN
- Immediate Activation