X-Cart Installation via Softaculous
Updated on Dec 10, 2015
The easiest way of installing X-Cart on your account is using the Softaculous auto-installer in cPanel. This offers a number of configuration options that you can use with a click of the mouse button. The process does not take more than 10 minutes for a full completion and it feels intuitive as well.
To Install X-Cart via Softaculous, you will have to:
step
Access Softaculous in cPanel
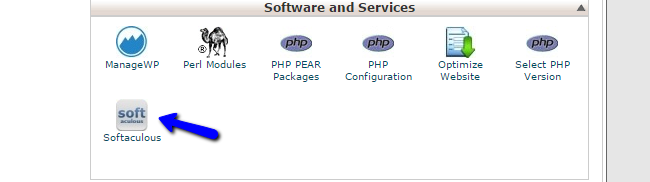
The first step of the process is to access your cPanel account with us. Once in, locate the Software and Services section and click on the Softaculous icon.
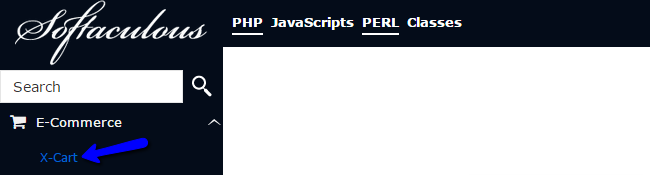
Softaculous will display all of the available applications for free installation on the left side of the screen. They are categorized by their functionality into different sections. In the Search bar at the top, simply type X-Cart and click on the application.
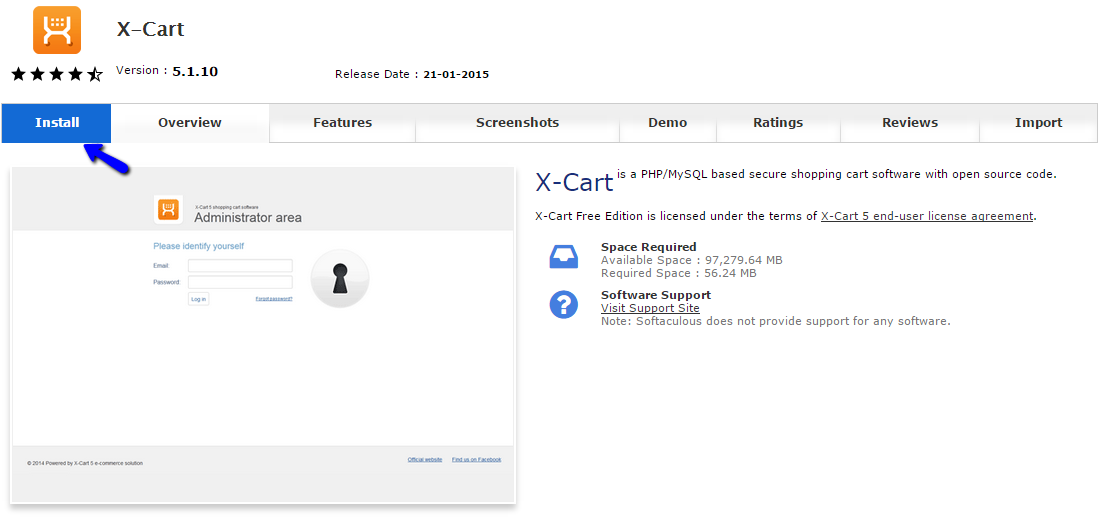
The system will display information about the X-Cart application, reviews, features, demo and other information about it. This will provide more infromation on what the application does and how to use it for the development of your website. If you are sure that you wish to install it on your account, click on the Install button at the top.
step
Configure X-Cart Installation
You will be presented with different options for the new installation. We will review them one by one so you can get a better understanding of how to adjust the new installation the way you need it.
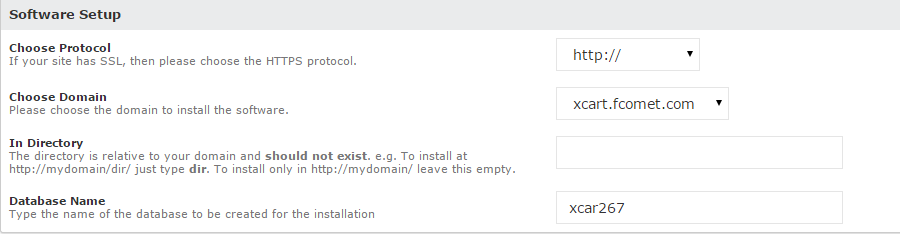
The first section is called Software Setup. The options you have are:
- Choose Protocol - Do not select the https protocol if you do not have a private SSL certificate installed on your account by the FastComet technical support team. This is a paid service that you can get via your Client Area;
- Choose Domain - Select the domain to be used for the new installation. If you have any addon or subdomains, you will be able to select them from there;
- In Directory - If you are planning to install X-Cart in a subfolder of your account, you need to enter it's name here. Leave it blank to install the application in the root directory of your domain;
- Database Name - Set the name for the database on your website. The system will create it automatically for you.
The second section is the Database Settings. It allows you to set:
- Table Prefix - If you are using an existing database with data on it, you can specify a prefix for the tables of the X-Cart installation.

The last section is the Admin Account. This is important as it will create the administrative user on your website. The options are:
- Admin Email - Enter the email account for the administrative user;
- Admin Password - Enter a password for the administrative use.

When you are ready with the configuration of the available options, click on the Install button to proceed further.
The system will take a few seconds to install X-Cart on your account. Once completed, you will get a successful message, listing the links to the front and back end of your website.
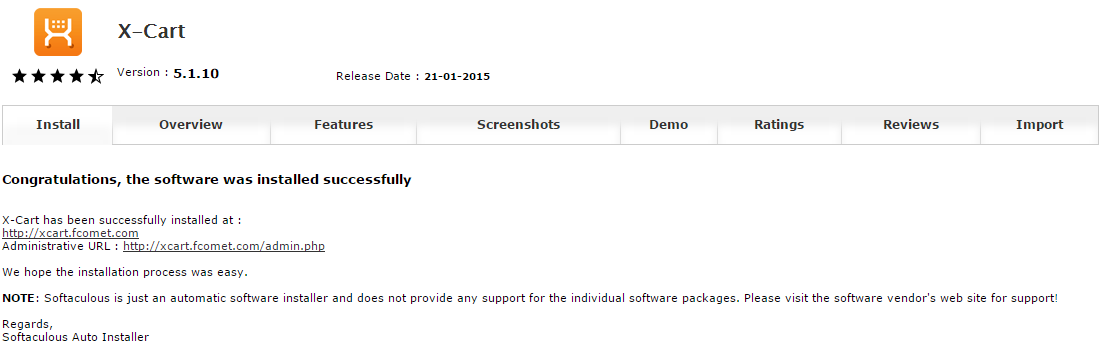
Keep a note of this information for future reference. Enjoy!
On this page...

X-Cart Hosting - free features
- Free CS-Cart Install
- 24/7 Expert Support
- Free Domain Transfer
- Hack-free Protection
- Fast SSD Storage
- Free CubeCart Transfer
- Free Cloudflare CDN
- Immediate Activation