How to install Windu
Updated on Mar 13, 2019
This tutorial covers the steps required to obtain and upload the latest version of Windu installation package on your hosting account and the installation wizard steps to finalize the setup.
To install Windu, you need to complete the following steps:
Download Windu Installation Package
To get started first you need to download the official Windu installation package from the Windu website. You will locate the download button on Windu Homepage 'Get Windu'.

Save the Windu package on your local computer and unzip the installation archive on your local computer. In the newly created directory from the extracted archive you should see the following files and folders:
app/
cache/
data/
favicon.ico
.htaccess
index.php
robots.txt
Upload Windu Installation Files
To proceed with the installation of Windu on your hosting account you should upload all files and folders to your hosting account public folder. A public folder is any directory under your hosting account that can be accessed via your browser using your domain name. For example, if you are using cPanel-based hosting account and you would like to have your Windu CMS accessible directly via your domain name, you should upload your files under the public_html directory.
In case you would like to have your Windu CMS in a subdirectory of your domain name you should create the subdirectory under your public_html and upload the Windu files and folders into the newly created folder.
If you are not sure which is your publicly accessible directory you may contact your hosting provider technical support team for additional information. You can upload your Windu files using your favorite FTP client following the instructions in our step by step FTP tutorials.
Access the Windu Install Wizard
When you have the Windu installation files uploaded access your hosting account via your browser to open the Windu Installation Wizard. You should see the following System Check report if your hosting server meets the basic Windu system requirements:
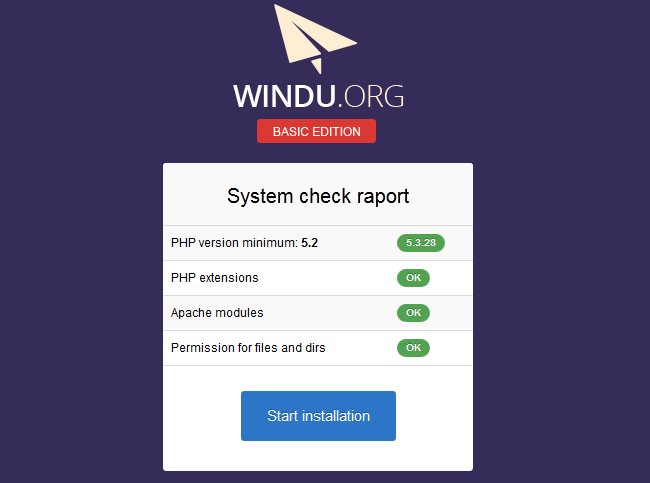
System Requirements
FastComet Hosting servers meet all Windu system requirements and are specifically optimized to provide optimal performance and security for Windu websites.
To proceed with the installation click on the Start Installation button. On the next page choose your language preferences. Windu comes with 7 different language packs. For the purpose of this tutorial we will proceed with the English version.

Now the installation process should be set to your preferred language. Hit the Begin Installation button to proceed.
On the next step you have the option to select your database storage engine. For websites under 10 000 pages SQLite provides better performance for Windu based websites. If you would like to use the MySQL version you will need to create a MySQL database first via your hosting account control panel.
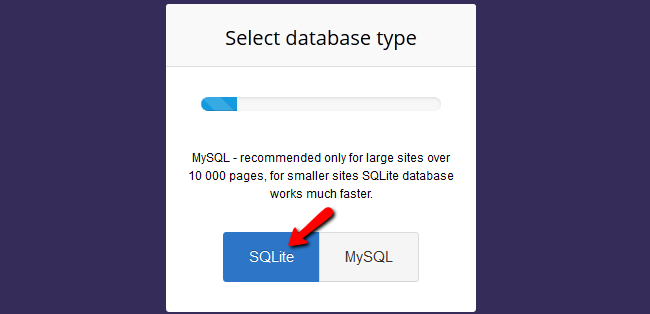
For the purpose of this tutorial we will setup the Windu CMS with SQLite.
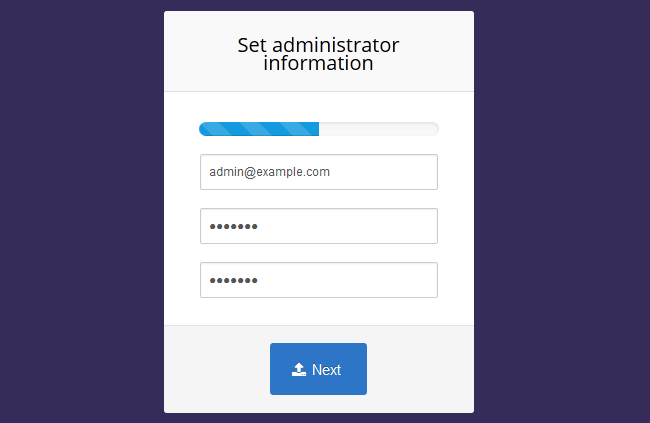
Next we need to setup the administrative username and password. For the admin username please fill your email address and input the desired password for your admin login credentials.
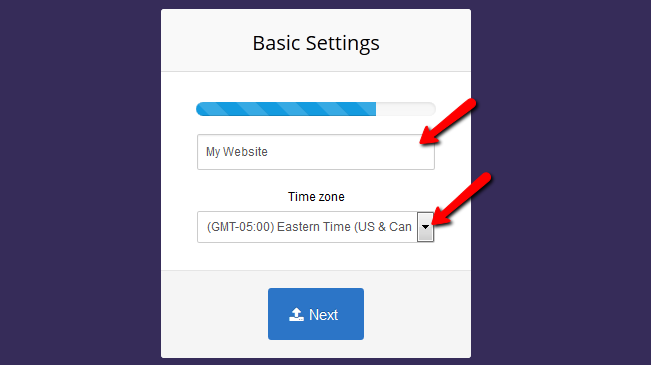
When you are ready proceed by clicking on the Next button. On the Basic Settings page fill in your desired website name and your local time zone. When you are ready proceed by clicking on the Next button
On the next page you have the option to go through the creator website configuration wizard or proceed to your Windu Administrative Dashboard.
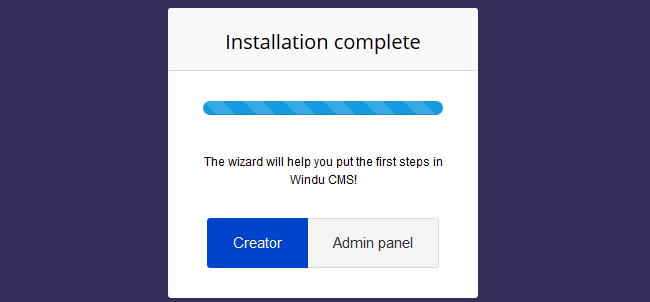
This completes the Windu installation process and your Windu CMS has been successfully installed. If you would like to start adding your content you may proceed to the Admin Panel.
On the other hand, the Windu Creator allows you to easily create a blog, forum, simple or advance website via the Windu CMS. We will review the Windu Creator setup process in the next chapters of our Windu Tutorial:

Windu CMS Hosting
- Free Windu Installation
- 24/7 Windu Support
- Free Domain Transfer
- Hack-free Protection
- Fast SSD Storage
- Free Windu Transfer
- Free Cloudflare CDN
- Immediate Activation