How to install b2evolution via Softaculous
Updated on Dec 10, 2015
b2evolution is available for an automated installation through the Softaculous auto-installer. The process is easy to complete and it involves three main steps that we will review for a better understanding on how it works.
To install b2evolution via Softaculous, please follow these steps:
step
Locate b2evolution in Softaculous
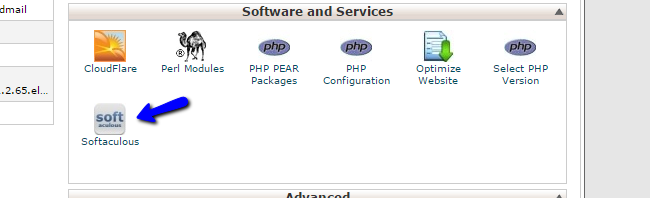
The first step of the installation process is to access the Softaculous auto-installer. This is easy, you simply need to access your cPanel account and then navigate to the Software and Services section. Locate the Softaculous icon in it and click to proceed further.
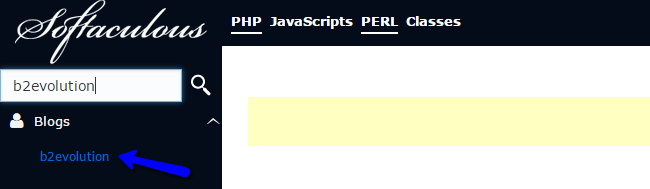
The next step is to search for the b2evolution application. The search bar is avaialble at the top-left corner of the screen.
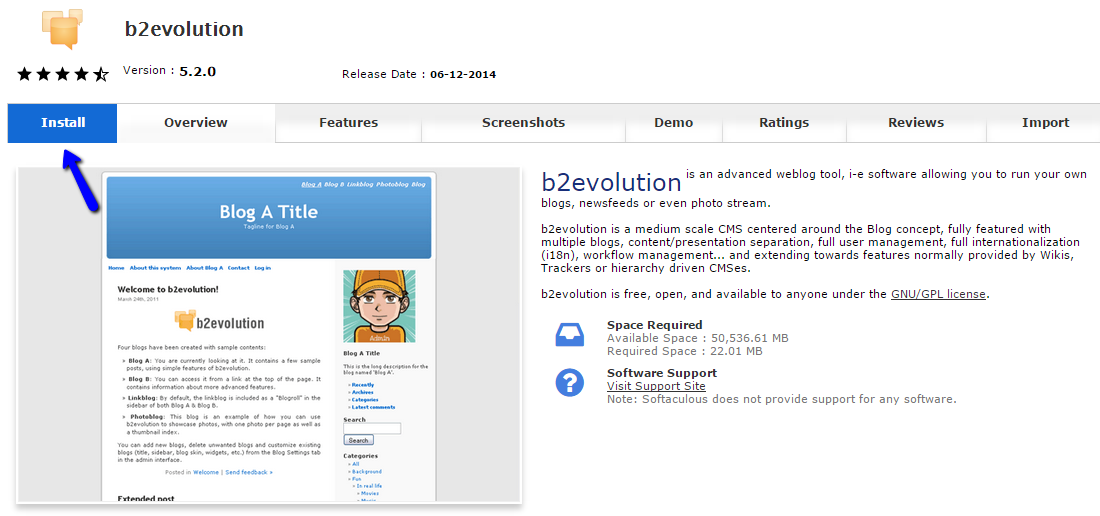
This will bring up the b2evolution application overview, provided by Softaculous. It includes a lot of different information that you can review for the script, such as a description, ratings, reviews and even a demo that you can test to make sure that this is the application that you wish to use for the development of your website.
To proceed with the actual installation, click on the Install button.
step
Configure the Installation Settings
The next step of the installation is the setup options that Softaculous provides for your new website. Such steps involve the creation of administrative account, the URL for your new website, the database it will be using and more.
We will review them one by one for you, in order to get a full understanding on what they offer.
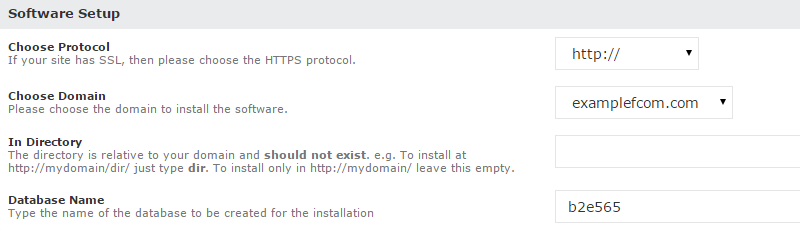
The first section is called the Software Setup. You will have to edit the following fields on it:
- Choose Protocol - The usual setup for this option is the http protocol. However, there are other options as well, but make sure that you do not select https if you do NOT have an active SSL certificate installed for your domain. If you do not have such an SSL certificate and you select https, your website will not be accessible after the installation.
- Choose Domain - Here, you can choose from the domains configured on your account. The usual choice is the main domain of your package, however, if you have any parked, addon or even subdomains, you will be able to select them from the drop-down box.
- In Directory - You can specify a subdirectory that you can use for the new installation. For example, to install the b2evolution script is a subfolder called "b2e", you need to write the name of that subfolder here. To install it in the ROOT directory of your domain, simply leave this field blank.
- Database Name - You can specify the name of the database to be used on your new installation. The system will automatically create it for you.
The next section is the Database Settings, which will set the database details that will be used when populating your new database with actual data. The available options include:
- Table Prefix - You can set a prefix for the tables on your database.
- Import Sample Data - This is recommended if you are new to b2evolution. The sample data will make it easier to review the different features of the application and then change them per your needs. If you are familiar with the application already, you can choose to install it without any sample data.

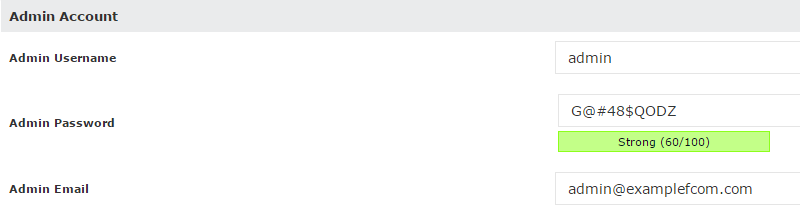
The next step is for the Admin Account configuration, which will create administrative user on your b2evolution website. This user account will allow you to manage any aspect of your website, manage the information on it, etc. Make sure that you take a note of the details that you enter for the following fields:
- Admin Username - Enter the administrative username that you wish to use on your website.
- Admin Password - Enter a password for the administrative user.
- Admin Email - Enter the email address that will be associated with the administrative user on your website.
step
Complete the Installation Process
When you complete the setup configuration above, you are ready to initiate the actual installation. Simply click on the Install button at the bottom of the page.

The system will initiate the installation and deploy a new instance of b2evolution on your account, following the instructions that you have specified in the previous step. Allow a few seconds for the completion of this process.
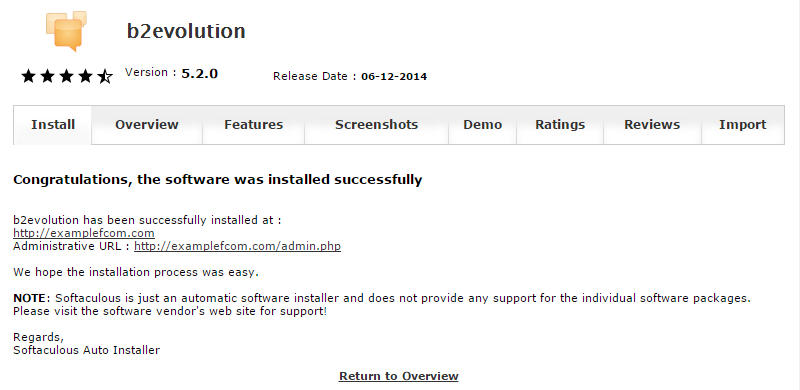
Congratulations, you have successfully installed b2evolution via Softaculous. You can now follow one of the two links depending on whether you want to visit your website's front-end or login in the back-end as an Administrator.
On this page...

b2evolution Hosting
- Free Installation
- 24/7 Support
- Free Domain Transfer
- Hack-free Protection
- Fast SSD Storage
- Free Windu Transfer
- Free Cloudflare CDN
- Immediate Activation