How to Manually Install b2evolution
Updated on Dec 10, 2015
This tutorial will follow the steps for a manual b2evolution installation. The process requires a few steps for a full completion and we will review them one by one to make sure you set up your website properly.
To manually install b2evolution, please follow these steps:
Download and Prepare the b2evolution Files
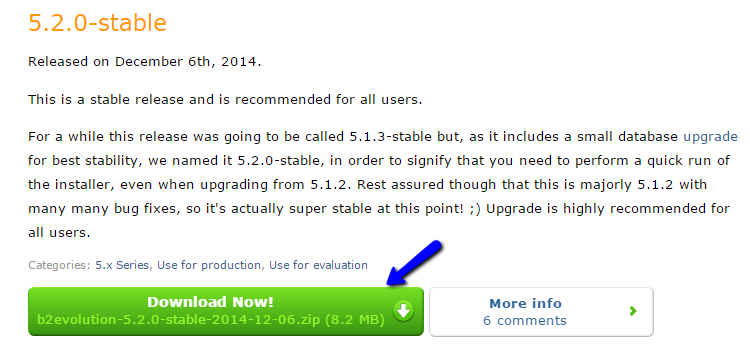
You can download the application directly via the b2evolution website. There is a list of releases that you can use for the development of your website. However, we recommend that you download the latest STABLE release.
After that you will have to preparate the files of the b2evolution installation and then upload them to the server. First, you need to extract the files on your local computer. This will create a b2evolution/ folder on it, which includes all of the files that you need for the installation. The files that you are looking for will be inside of the blogs/ folder.
Once you locate the files of the b2evolution installation, you will have to upload them to your account on the server. First, you need to decide where you would like to install the application. If the primary domain of your account is called example.com and you would like to install b2evolution directly on it, you will have to upload the files to the public_html/ directory of your account. However, if you would like to install the application in a subfolder of your account, for example called "b2e", you will have to create such folder within the public_html/ directory and then upload the files to it.
In our tutorial, we will upload the b2evolution application directly within the public_html/ directory and will install it on our main domain.
Upload Files
There are two ways of uploading your files to the server - using an FTP client, following our FTP tutorial, or uploading directly through your cPanel account > File Manager, following our cPanel tutorial.
Setup and Complete the Installation
Up until this moment, you will have a location on your account that contains the files of your new b2evolution installation. When this is all completed, you will be able to initiate the installation script and proceed with the actual setup of your new website.
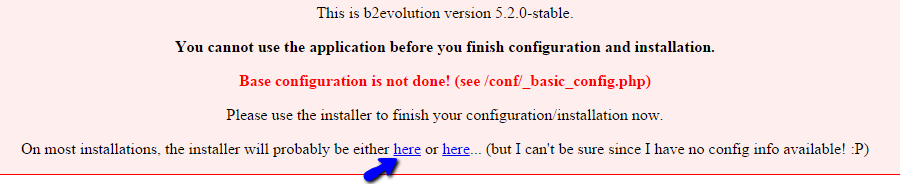
To call the installation script, you will have to access your new website via your web browser. For example, if you are installing b2evolution within the public_html/ directory of your account, you will have to access your domain name directly. The system will display a message saying that b2evolution is not installed yet. Click on the "here" link to call the installation script.
Once you get to the installation page, you can proceed with the actual setup of your new website. The first step will ask you to set the Language/Locale for it. We recommend using your language with utf8.

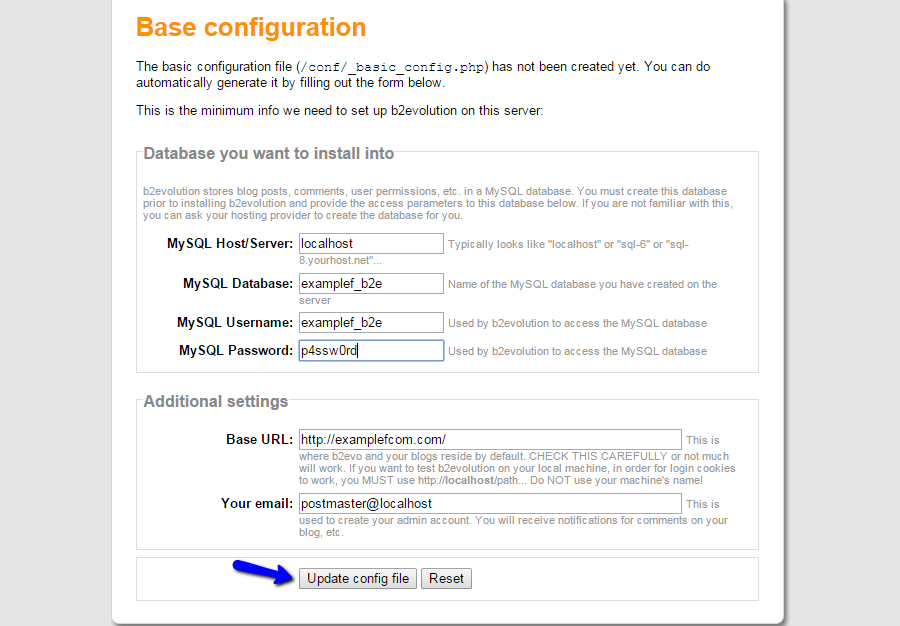
The next part will be the Base Configuration. Here, you will be requested to enter the details for the database that will be used on your website.
MariaDB Configuration
You can create a new database and a user assigned to it via cPanel. Simply follow our Database Wizard tutorial for information on that.
Once you create your new database and a user, you can edit the following fields on the installation screen:
- MariaDB Host/Server - Set "localhost" (without the quotes) if the database is located on the same hosting account.
- MariaDB Database - Enter the name of your database.
- MariaDB Username - Enter the user assigned to your database with full privileges.
- MariaDB Password - Enter the password for it
- Base URL - Enter the URL to be used for your new website. This will be automatically filled in by the system.
- Your Email - Enter the email that you wish to use for your website.
When you are ready with the details for the new website, click on the "Update Config File" button to proceed.
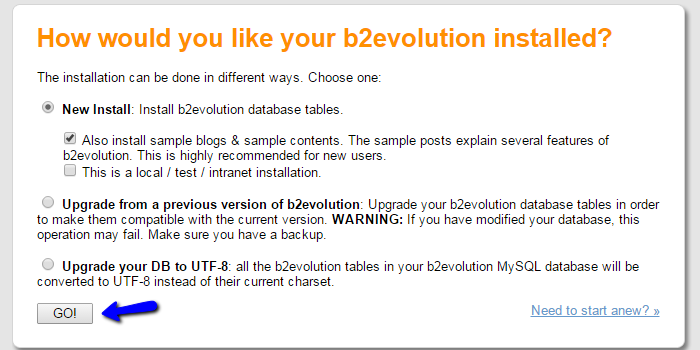
The next step will request more information about the new installation. Simply select the New Installation option and decide if you wish to add sample data on your new website. This is a recommended choice for new users that are not familiar with how b2evolution works.
When ready, click on the GO button to proceed.
The installation of the b2evolution application will now be automatically handled by the system. It will take a few seconds and then you will be presented with a report of the process and the changes that were made on your account. At the bottom of the page, the system will provide a direct link to the administrative area of your website, as well as the admin login details.
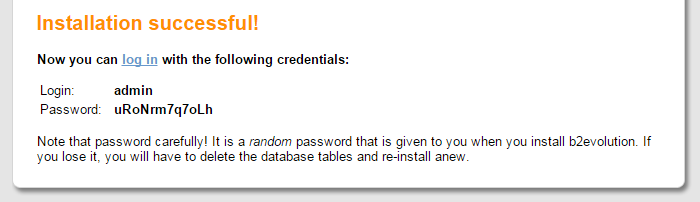
Keep a note of them as they will be required to access and manage the new b2evolution installation.

b2evolution Hosting
- Free Installation
- 24/7 Support
- Free Domain Transfer
- Hack-free Protection
- Fast SSD Storage
- Free Windu Transfer
- Free Cloudflare CDN
- Immediate Activation