Laravel 5.5 is Here! What’s New?
The wait is finally over! Version 5.5 of Laravel is now officially out and as expected the Laravel community is super excited about the new features of the new version.
Because this is a major release, it’s also jam-packed with good stuff and continues the improvements that were made in Laravel 5.4. Laravel 5.5 adds:
- Package auto-detection;
- API resources/transformations;
- Console commands auto-registration;
- Queued job rate limiting;
- Queued job chaining;
- Renderable Mailable;
- Job attempts that are time-based;
- More consistent exception handling;
- Renderable and reportable exceptions;
- Simpler custom validation rules;
- Improvements in database testing;
-
Route::viewandRoute::redirectmethods; - React front-end presets;
- On-demand notifications;
- “Locks” for additional Memcached and Redis Cache drivers;
- Convenient Blade shortcuts;
- Headless Chrome support in Dusk;
- Enhanced trusted proxy support.
This is not even the full list, but you get the point – there are A LOT of new and improved things.
Also, version 5.5 of Laravel corresponds with the Laravel Horizon release, with a beautiful new configuration system and dashboard for Laravel queues based on Redis, on which we have already shed some light.
So, with no further ado, let us see some of the things the version 5.5 has to offer.
Frontend Presets
Since version 5.3, Laravel has been coming along with the optional Vue.js and Bootstrap scaffolding with the goal to provide some help regarding the front-end stuff. Although we would be able to remove them and start from the beginning with our personal preferences, the suggestions used to be limited only to the Vue.js framework.
While the basic Vue scaffolding continues to be included in Laravel 5.5, there are multiple new preset frontend options available now. In version 5.5, there’s a brand new preset Artisan command, allowing us to replace out the default with other tools such as React, Bootstrap only, as well as removing all of it.
Custom Blade::if() Directives
Blade is one simple, but incredibly powerful template engine provided by Laravel. Keep note that long repetitive checks inside the blade templates could make our templates unappealing. We are now able to exclude all repetitive checks from the blade templates, optimize the structure, as well as the readability.
Laravel 5.5 Blade::if makes it much more convenient for repetitive abstract checks out of the blade templates, leaving every template to look cleaner and a bit more readable overall.
Automatic Package Auto-detection
Until now, to use third-party packages in any Laravel project, we would have to follow some steps:
- Install the package;
- Register the service provider of the package;
- Register facades in any.
Usually, Laravel packages are not at all hard to install, but it could even be simpler. With version 5.5 – now it is. Now, package developers will have the opportunity to include a new section to their composer.json files. This brand new section would give needed information to the framework about all service providers or facade aliases that have to be registered.
It’s simple – we can require the package:
composer require barryvdh/laravel-debugbar:dev-masterThis way the package’s service provider will be registered and enabled automatically. We can also disable the auto-discovery for certain packages.
Auto-registration of Artisan Commands
In version 5.5, we are not required anymore to register Artisan commands manually. Instead, the framework automatically scans the folder “commands” for us. Instead, there is a new load method that’s called from the commands method of our kernel, which scans the given directory for console commands, followed by registering them automatically:
/**
 * Register the commands for the application.
 *
 * @return void
 */
protected function commands()
{
 $this->load(__DIR__.'/Commands');

// ...
}
PHP 7 Now a Pre-Req
Laravel has been continuously a framework that’s not afraid to push forward. As it is with Symfony 4, Laravel 5.5 requires minimum PHP 7.0. The PHP 5.5 support has already ended with all security support for version 5.6 ending in 2018.
In addition to developer features, PHP 7 also includes some improvements in speed which would lead to dropping latency by 50% and decreasing the CPU load on the servers at least by half as well. So, we definitely need this upgrade. While using Laravel 5.5, making the upgrade would be one relatively painless process because it’s already running on the most current PHP version.
The Next LTS (Long Term Support) Release
For those who are not familiar with LTS, they are the special versions being feature locked on their release dates. Those versions don’t get additional features, but they constantly get bug fixes and security updates throughout their entire maintenance window. Laravel’s version 5.1 was the framework’s first LTS release and its two years of bug fixes are ending this year.
Laravel 5.5 is going to be the next LTS (Long Term Support) release. Just as the previous LTS, 5.5 will include two years of bug fixes, in addition to security updates for three.
Whoops is Back!
Version 5.5 is bringing the Whoops* package back, thus changing the method of displaying errors. With Whoops, each time we have an error in development, we will be able to see the line of code which resulted in the error in a screenshot form, in addition to the error message.
* Whoops is a PHP framework for handling errors. It comes pre-installed in Laravel 4, later to be removed with the release of version 5.0. However, with Laravel 5.5, Whoops is coming back and it’s again pre-installed.
Some of the features of Whoops include:
- Flexible, stack-based error handling;
- Stand-alone library with (currently) no required dependencies;
- Simple API for dealing with exceptions, trace frames & their data;
- Includes a pretty rad error page for your web app projects;
- Includes the ability to open referenced files directly in your editor and IDE;
- Includes handlers for different response formats (JSON, XML, SOAP);
- Easy to extend and integrate with existing libraries;
- Clean, well-structured & tested code-base.
Whoops has the function to make all the irritating PHP errors and exceptions a little less so. Whoops does that by changing the way those errors appear. With Whoops, each time we have an error in development we’d not only be able to see a screenshot form of the line of code that resulted in an error, but also the error message itself. You can see in the image that Whoops sports the lines of the file where the error or exception occurred, in addition to tracing back the operation until inception. What’s more, it has zero dependencies (currently(‘pre-laravel-55’)).
“vendor:publish” Gets a Provider Prompt
In previous Laravel versions, running the command vendor:publish publishes everything it finds, including configs, views, migrations, as well as other vendor resources. However, in Laravel 5.5, running this command without flags prompts us to select a provider or tag, which makes it a bit easier to publish only what you want.
We are able to bypass the prompt via using either the --all or --provider flag with the “publish” command. This means we still can use it in deployments that are automated and in our package instructions.

Support for Email Themes in Mailable
In Laravel ver. 5.4, Markdown emails were introduced, but there weren’t any customization options. However, some still prefer having custom styling in their email templates, especially when it comes to branding purposes.
In Laravel 5.5 we can achieve this by creating our own theme. If we want to use a custom theme for a particular Mailable, we need to start by generating a CSS file containing our custom styling at the following path:
touch resources/views/vendor/mail/html/themes/custom.cssAfter that, simply specify this filename as a property in the Mailable class:
class SendInvoice extends Mailable
{
protected $theme = 'batman';
...
}
This way, the email layout would be based on the styles that we defined in our custom.css file. The great thing about the approach is that we are able to have different themes for each Mailable.
Rendering Mailables to the Browser
It’s quite tedious to build and then test custom HTML email templates across all email clients, over and over again. There are some particular tools like Litmus that solve this problem, but the service is kind of expensive when it comes to this tedious but trivial task. Another way to test the email clients while developing is to render out the email to the browser so we can make instant changes. However, it definitely is not an easy task.
Luckily, all that is changing with Laravel 5.5 because the new version of the framework adds the facility to display them directly from your routes. Mailable can now be returned directly from routes, allowing you to quickly preview your mailable’s designs in the browser:
Route::get('/mailable', function () {
$invoice = App\Invoice::find(1);

return new App\Mail\InvoicePaid($invoice);
});
Introducing the migrate:fresh Command
Most of us have found ourselves in a situation that requires us to rebuild the database while it’s being developed. With former Laravel versions, we were able to achieve this by running the PHP artisan command migrate:refresh which rolls back migrations and then reruns them.
There is an improvement on this and it comes with Laravel 5.5 – a new migrate:fresh migration command that’s a great addition to help with creating a much cleaner database in its development. The migrate:fresh command drops all the database tables and then runs the existing migrations again. The difference between “fresh” and “refresh” is that the new fresh command drops all the down methods or the rollback via dropping the tables, then runs through the up methods.
Error Pages: Design Improvement
In Laravel 5.5, there is a new and improved design change for all error pages like 404 or 50* errors.
The default errors will extend from an errors::layout file and get some small design additions over the current style with flexbox and a vertically centered message.
Request Data From Validation
A new feature coming to Laravel 5.5 is the Validation which will now return the request data after validation. Now you can directly save the data after validation.
Custom Validator Rules
Laravel 5.5 is coming with a new feature for adding custom validation rules. Custom validation rules are nothing new but with Laravel 5.5 you can have a dedicated class to handle the validation. To define a custom validation rule, you need to create a class with two methods: passes and message. You can place this class anywhere like in the App\Rules namespace. The passes method accepts two arguments: attribute and value, which you can use to validate the field.
In addition to all features we’ve mentioned above, Laravel 5.5 comes with a host of exceptional features that could make every developer’s life a lot easier. Check out the official announcement for more details.
Installing Laravel 5.5
We can all see that there are a lot of cool and exciting things coming along with release 5.5.
Currently, Laravel 5.5 is unavailable in Softaculous for install, but you are still able to install it manually via Composer using the following command in /home/user/.composer directory:
composer global require "laravel/installer"
To create a new Laravel instance, you would need to go to your public_html and type:
composer create-project --prefer-dist laravel/laravel blog
Where “blog” is the folder name and will be created for Laravel to be installed in it. Now access the folder and execute:
find . -type d -print0 | xargs -0 chmod 0755 && find . -type f -print0 | xargs -0 chmod 0644
This will change the permissions to the needed ones which will allow the /public folder to be displayed correctly and we’d be able to open the website on our browser.
Upgrading from 5.4 to 5.5.0
As mentioned above, Laravel 5.5 requires PHP 7.0.0 or higher so before you proceed with the upgrade, you need to check if the needed version is set up.
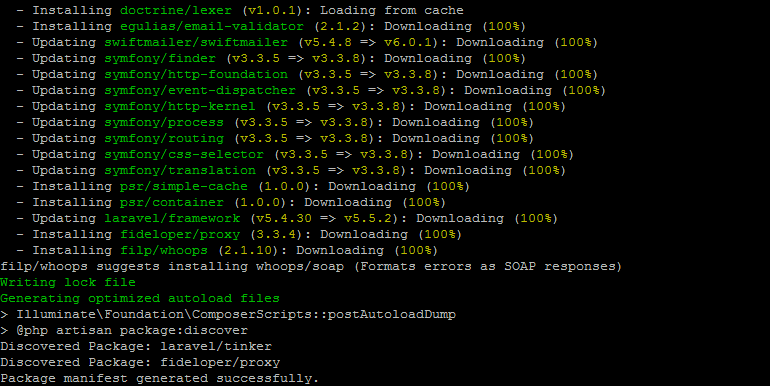
Log into cPanel and navigate to the File Manager. After that, move to the chosen directory for Laravel to find the composer.json file. Select all the lines in it and replace them with the following ones. Alternatively, you can also do all of this through a command prompt by utilizing vim. Once you are ready, you will need to update the composer using this command:
composer update
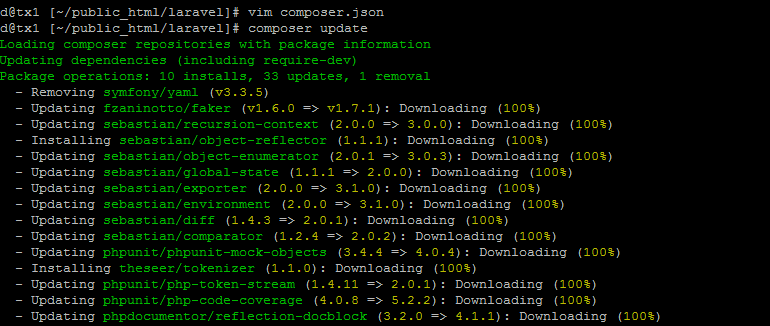
Note that this will upgrade Laravel and all of its packages to the latest version as well as add the ones missing, instead of just upgrade the version of the Laravel core to 5.5.x.
If you want to be sure the version has been upgraded, you can use:
php artisan --version
This will show you that the latest version is now available.
Furthermore, you can check if the different new packages are working but that has to be done one at a time. For example, in order to test the Whoops package, simply make a mistake in the code of your published page and the refresh that same page in your browser. Whoops will come up and provide you with the exact information on what has gone wrong in loading the page. Do note, that this can be done only with an active .env file. As a default, the installation comes with a .env.example file which will not activate Whoops.
Conclusion
Laravel 5.5 brings a lot of exciting new stuff. And the best of all is that the new version of the framework is fully supported on all FastComet plans. Hope you all enjoy the changes that were made in Laravel 5.5 release and Happy Coding!

The latest tips and news from the industry straight to your inbox!
Join 30,000+ subscribers for exclusive access to our monthly newsletter with insider cloud, hosting and WordPress tips!
Elena oversees all Marketing, Product Management and Community efforts for FastComet and is in charge of telling the brand's story. Always pitching, she’ll share the FastComet vision with anyone who’ll listen. Elena helps our customers make the most of their web sites' and focuses on our inbound marketing efforts; everything from developing new online growth strategies, content creation, technical SEO, and outreach within the FastComet community. Her background includes Sales and Customer Relationship development, as well as Online Marketing.


No Comments