Set up an IMAP email account on your iPhone
Updated on Mar 13, 2019
IMAP is a mail transfer protocol used for checking the incoming emails of your mail account. The protocol is particularly useful if you would like multiple users to access a single mail account due to the fact that the protocol does not download nor delete the emails in the mailbox.
In this tutorial we will show you how to configure your iPhone email client to use IMAP for the incoming emails of your mail account.
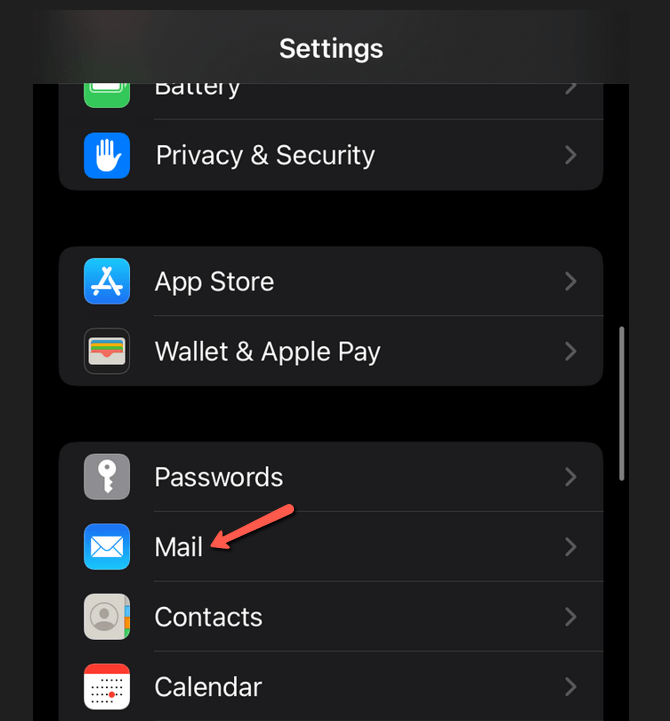
Let's begin by accessing the Settings feature of your iPhone. The feature is usually located in the apps list of your iPhone. The location of the feature might differ and you might need to slide your application list in order to find it. Once you find it and access it you will need to choose the Mail section.
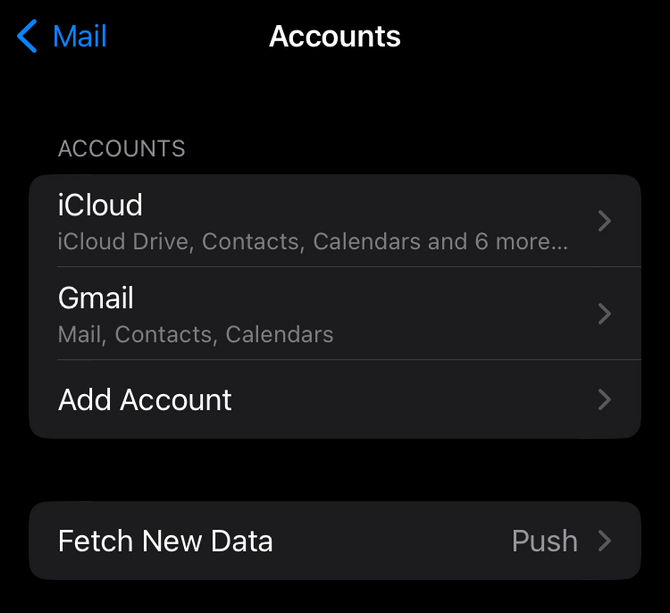
Now let's add a new account. You should be able to do so by selecting the Add Account option from the list in the Accounts section.
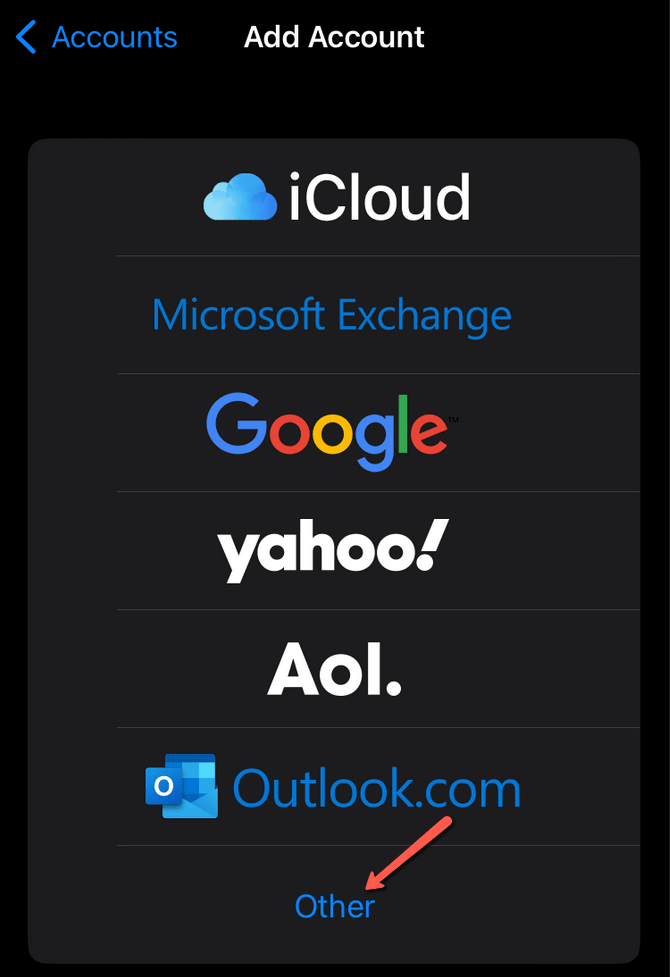
On the next screen you will notice how your iPhone offers you automatic settings for some of the more widely used mail providers. Since the email service we provide for our customers is not related to the suggested email providers you will need to choose the Other option.
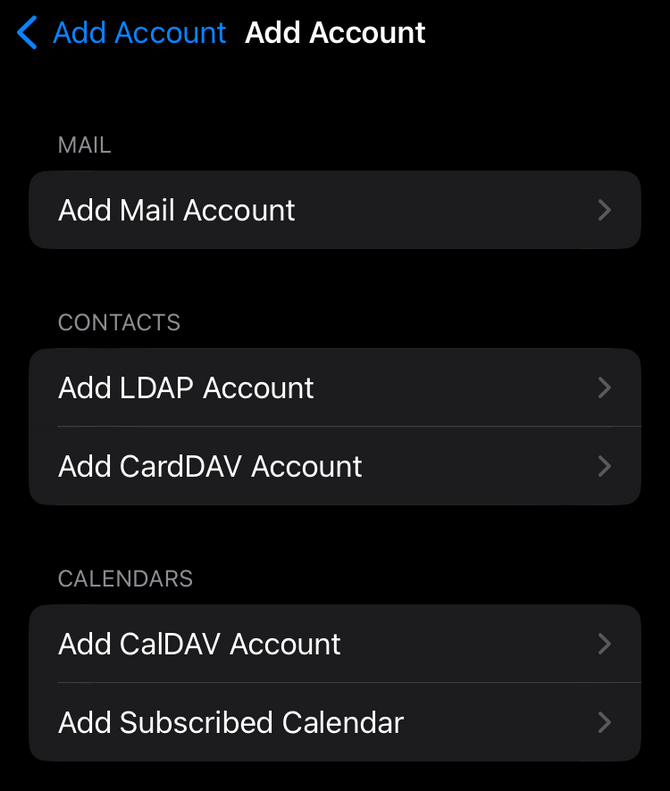
Now you will need to press the Add Mail Account option so you can begin configuring your mail account.
On the next screen you will need to fill your Name, Email Address, Password and a mail account Description.
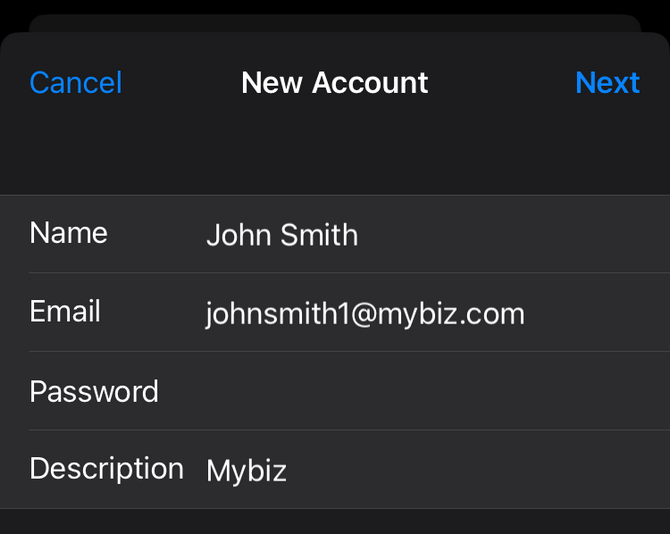
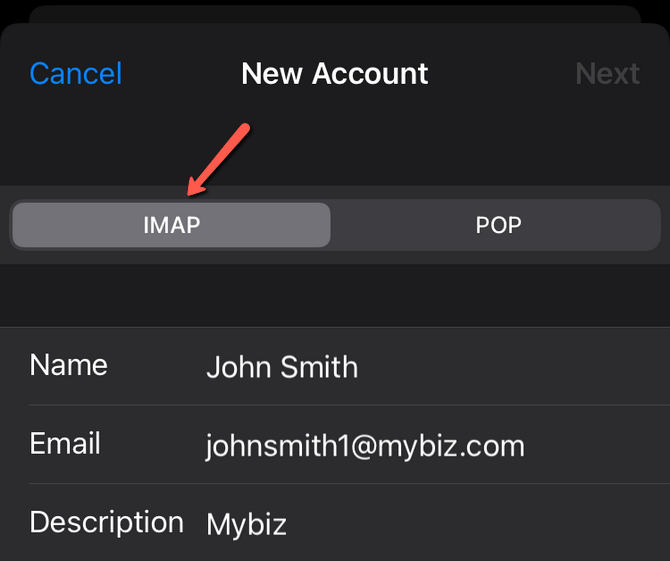
Once you are done writing these details click the Next button so you can proceed with the configuration further. On the next screen you will need to choose which type of protocol to use for incoming mails. Since this tutorial covers the IMAP protocol, choose the IMAP option button at the top of the screen.
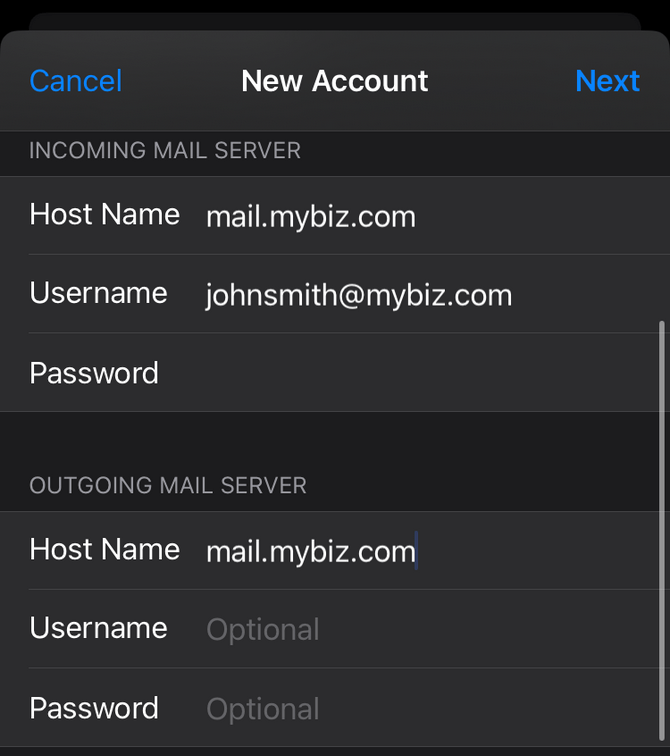
Next you will need to proceed with the configuration of the Incoming mail server which is presented in the Incoming Mail Server section. There you will need to input the Host Name of the mail server, the User Name for your mail account and the Password used by that email account. Then, you need configure the outgoing mail server. The Host Name, User Name and Password are the same as those you have used for your incoming mail server.
You can find the required settings by following these steps: cPanel → Email Accounts → Manage → Set Up Mail Client as shown below.

- Email Address - Your full email address
- Username - Your full email address
- Password - Enter the password for your email account
- Host Name - This is your domain name preceded by "mail." like mail.example.com. For SSL/TLS (which we recommend you always use) type in the Host Name of your server.
When you are done with these press the Next button so you can finalize the configuration. That is all you will need for the configuration of your email account with IMAP mail protocol.
You can check your emails by returning to the home screen of your iPhone and finding the Mail icon there. Tap it and you will be presented with the Mailboxes view where you will notice the Inboxes and Accounts sections. It contains the email accounts you have configured on your iPhone. In order to check the emails for the email accounts you will need to simply tap on the email account you would like to check and you will be presented with all of the incoming emails for that email account.
Congratulations! You have successfully configured your iPhone with the IMAP protocol for incoming emails!

Mail Hosting
- Free Domain Transfer
- Unlimited Email Accounts
- 24/7 Technical Support
- Fast SSD Storage
- Hack-free Protection
- Free Cloudflare CDN
- Immediate Activation
