How to set up an IMAP email account on iPad
Updated on Mar 13, 2019
IMAP is a mail protocol designed to steam the emails back to your device without deleting the mails from the server nor downloading those on your device. It is particularly useful if you would like to share a mailbox with more than one user due to the fact that the emails are nor deleted from the server where read from the users.
In this tutorial we are going to show you how to configure your iPad email client with your email account for the IMAP incoming mail protocol.
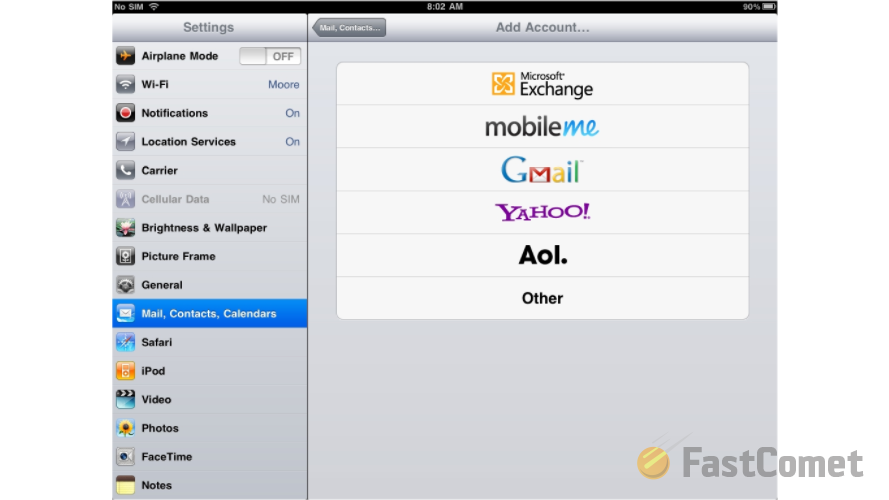
Let's begin by adding a new email account to your iPad mail client. In order to do so you will need to first access the Settings → Mail, Contacts, Calendars screen.

There you will notice few available options and you will need to choose the Add Account option so you can begin with the mail configuration.
The first screen from the configuration will present you with the natively supported by your iPad email providers. Since the email service we are providing you with have nothing to do with these providers you will need to choose the last option - Other.
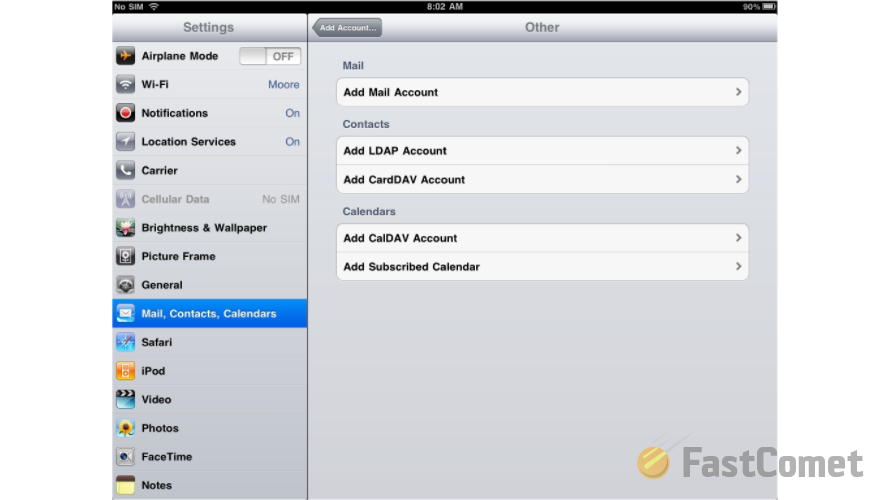
Then you will need to choose the Add Mail Account option so you can proceed with the configuration of your new email account.
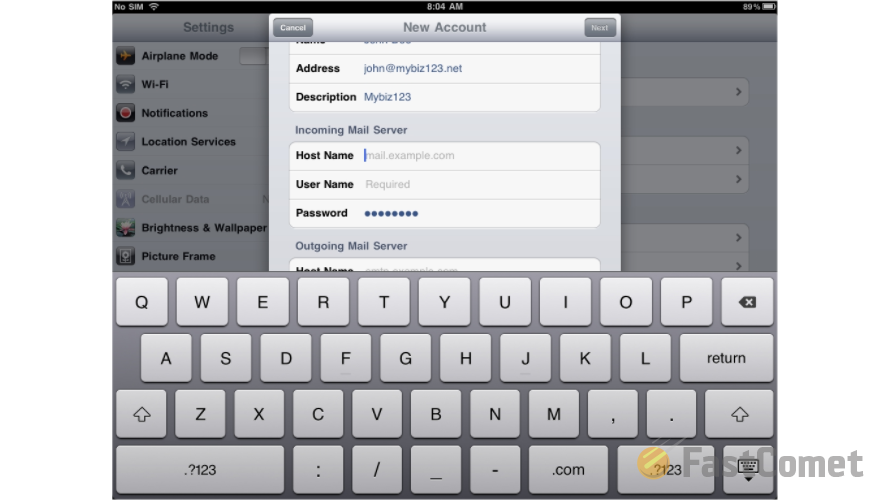
On the next screen you will need to fill the simple settings for your email account - your Name, Email Address, Password and of course few words as a Description.
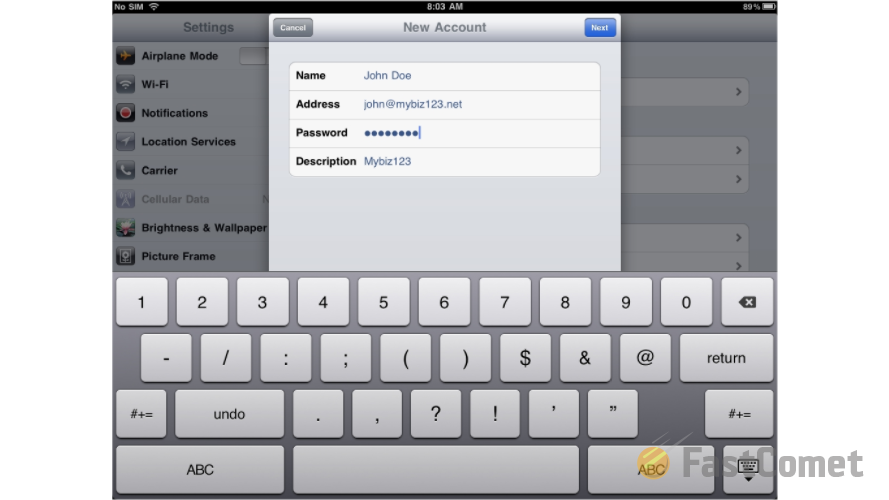
Once you are ready you should press the Next button so you can be redirected to the next screen where you will have to first choose the IMAP protocol from the two large buttons at the top.
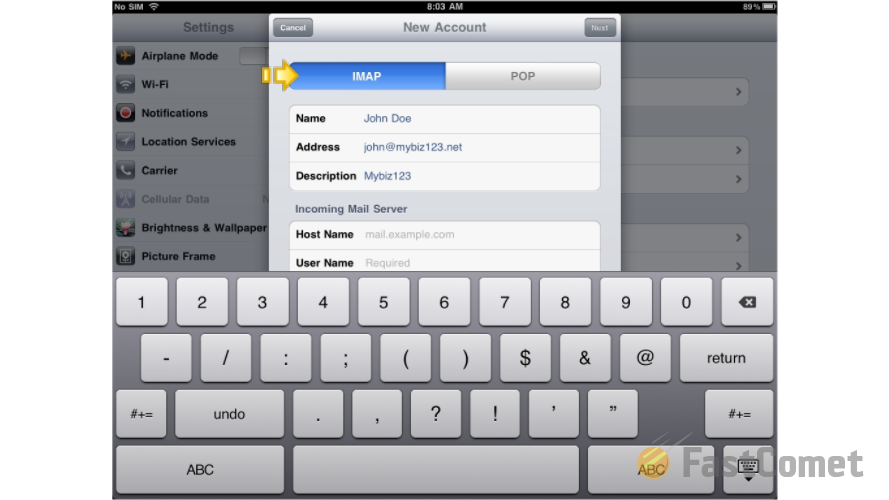
Once this is done please scroll a bit down and find the Incoming mail server settings. There you will need to fill the Host Name (usually mail.yourdomain.com where the substitution yourdomain.com should be replaced with your actual domain name), Username ([email protected] where the substitution yourdomain.com should be replaced with your actual domain name) and of course the Password for that email account.
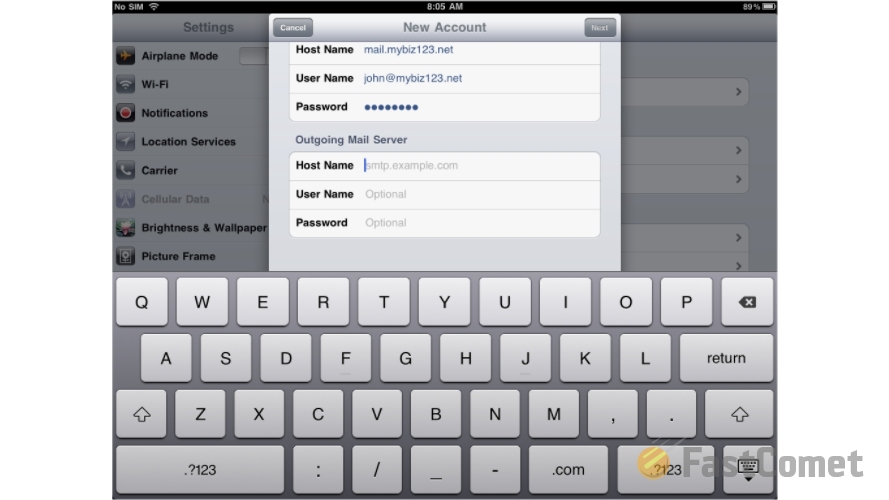
Now that you have configured the incoming mail server it is time to take care for the Outgoing Mail Server settings which are exactly the same as those you have used for the Incoming Mail Server.
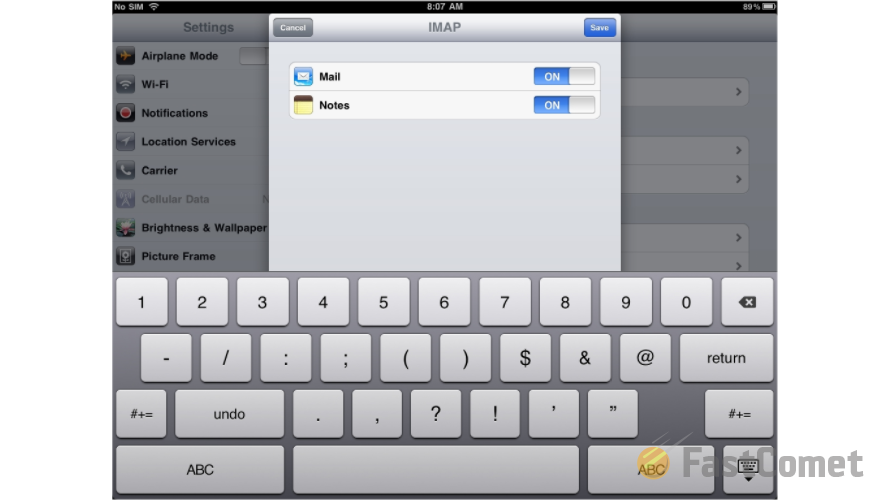
When you are finished press the Next button and then Save the configuration on the next screen.
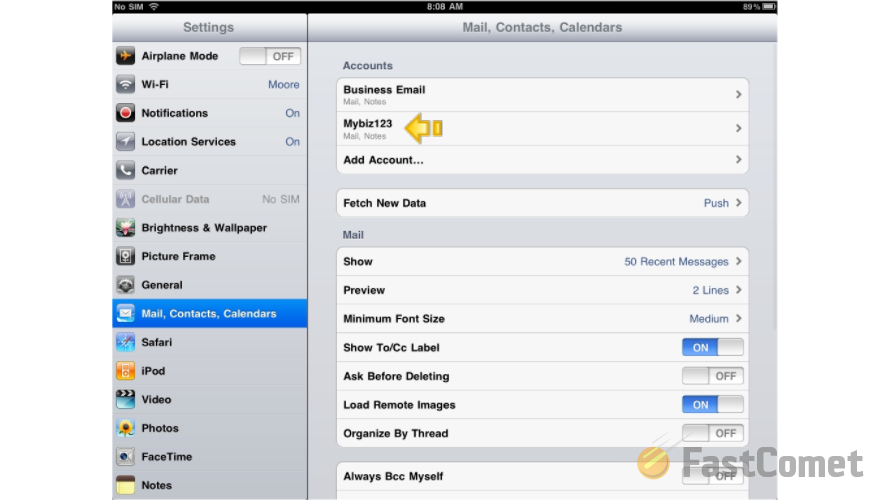
Then your email account will be added to your iPad email client and you will be able to verify that by simply checking the Accounts section on the next screen.
That is all you will need in order to configure and email account.
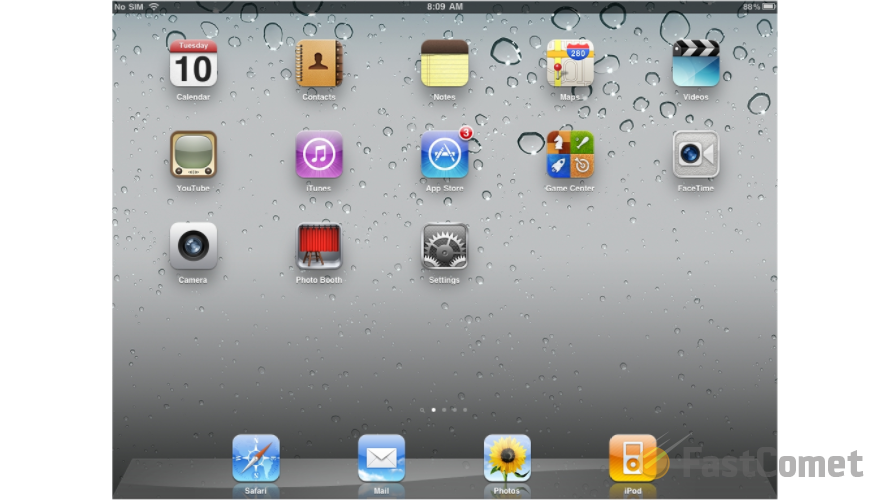
Now let's check the emails for that email account. In order to do so you will need to access the home screen of your iPad and next access the Mail feature.
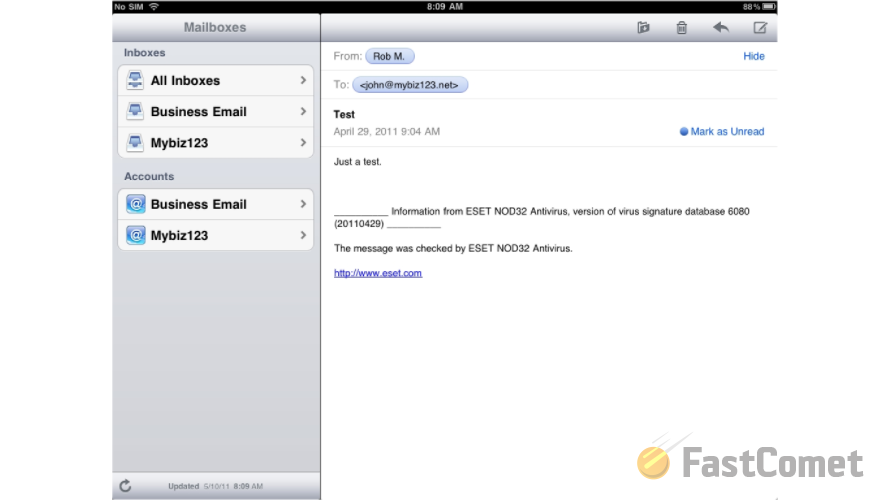
There you will notice the Inboxes and Accounts sections and under the second one you should be able to find the email account you have just configured. Please click on it so you can be presented with the emails on that email account.
Congratulations! You now know how to configure an email account for IMAP incoming mail protocol!
On this page...

Mail Hosting
- Free Domain Transfer
- Unlimited Email Accounts
- 24/7 Technical Support
- Fast SSD Storage
- Hack-free Protection
- Free Cloudflare CDN
- Immediate Activation
