Create and manage outgoing mail servers
Updated on Mar 13, 2019
Outgoing Server is a term referring to the server used for sending your emails to their recipients. In the next few lines of this tutorial we will show you how to create and manage outgoing mail servers on your Apple MAC mail client.
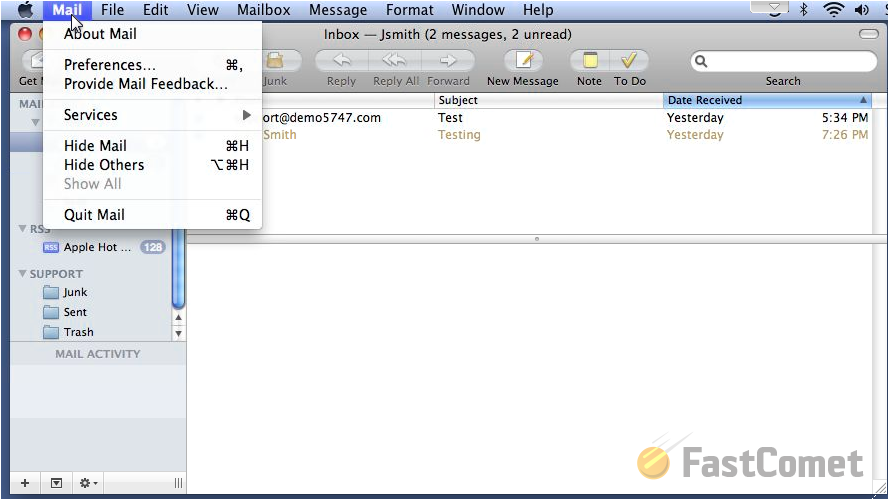
Let's begin by editing already existing mail server. In order to do that please navigate to Mail → Preferences.
The new window that will be opened will contain few tabs at the top and you will need to make sure that the selected tab is the Accounts tab.
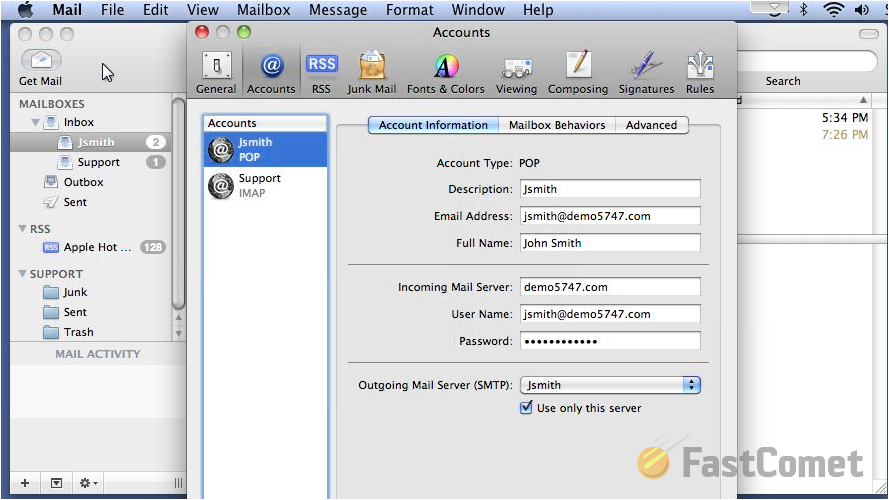
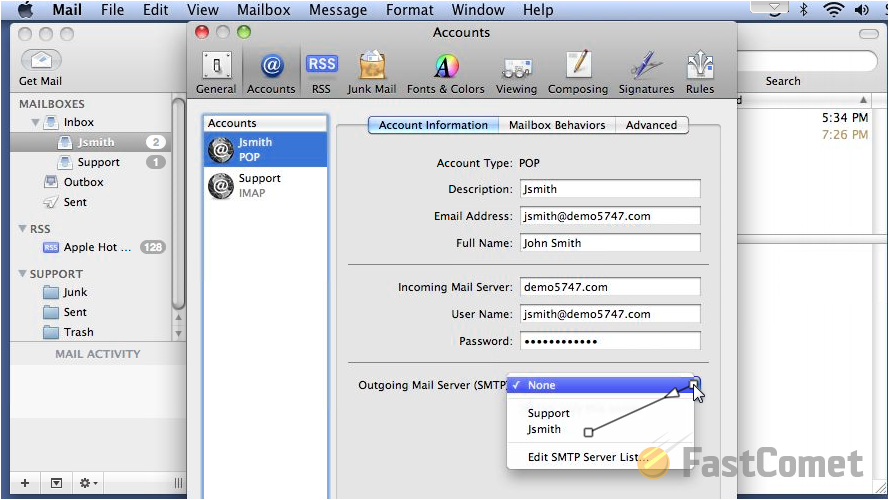
In the left part of the window you will notice a list of your currently configured accounts. Please make sure that the account you will be editing the outgoing server for is selected. Then at the bottom of that window you will notice the Outgoing Mail Server(SMTP) drop-down list which contains the already configured outgoing mail servers.
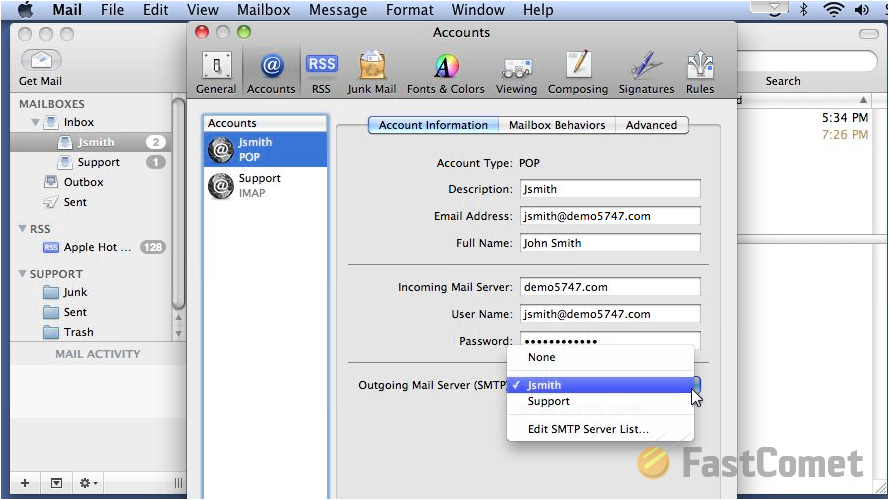
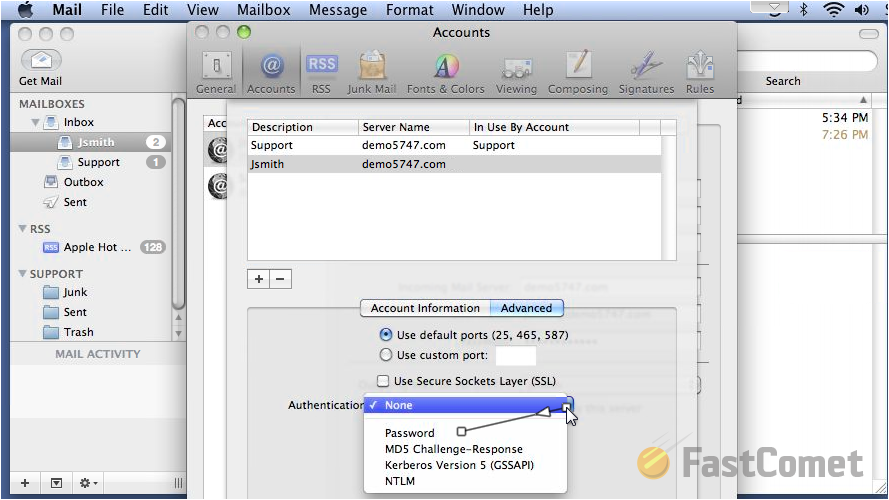
Now please select the last option which is Edit SMTP Server List so you can be presented with the editing interface for the outgoing mail servers. At the top of the interface you will notice a list of your currently configured mail server. Please click on the one you would like to edit and then select the Advanced tab located bellow the outgoing servers list.

There you will be able to edit the configuration about Ports, Authentication, Username and of course Password for your outgoing mail server.
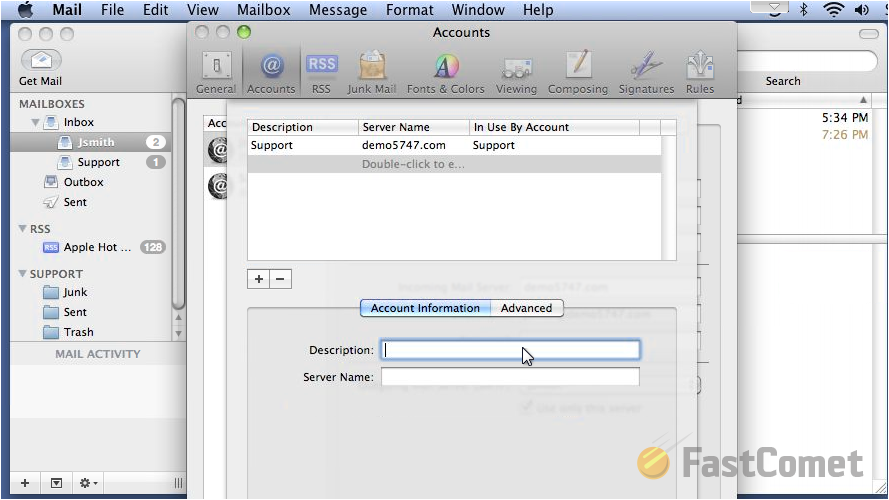
The deletion of a mail server is also a simple process and you should be able to perform it from the very same window you were until now. In order to delete an outgoing mail server please simply select the server and use the "-" sign bellow the outgoing servers list.

Now let's add a new outgoing mail server to that list. This can be also achieved via the same window you were until now. This time however you will need to click the "+" sign. Then you will need to type few words about the description of your mail server and also the Server Name which can be the hostname of your outgoing mail server.
Now click on the Advanced tab so you can configure the additional settings for that outgoing mail server. Please choose the Password authentication method so you can be presented with the Username and Password fields.
Once you are ready with the configuration please click the OK button at the bottom of that window so the settings can be saved. You will be returned to the Accounts interface where now you will be able to select the newly added Outgoing mail server.
Congratulations! You now know how to manage the outgoing mail servers for your Apple MAC email client!
On this page...

Mail Hosting
- Free Domain Transfer
- Unlimited Email Accounts
- 24/7 Technical Support
- Fast SSD Storage
- Hack-free Protection
- Free Cloudflare CDN
- Immediate Activation
