How to setup a mail account using IMAP
Updated on Mar 13, 2019
The IMAP protocol is a protocol which will allow you to read your messages in real time without these messages to be deleted from the server. This protocol is particularly useful when more than 1 person are accessing the same mail account.
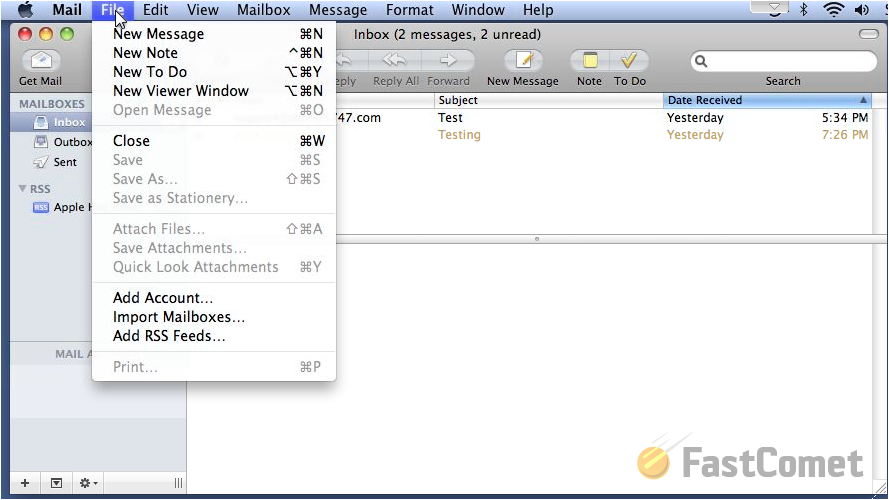
Let's begin by adding a new email account to your Apple MAC email client. In order to achieve that you will need to go to File → Add Account.
Next you will be presented with the first configuration window called Add Account where you will need to fill your Full Name, Email Address and of course your Password.
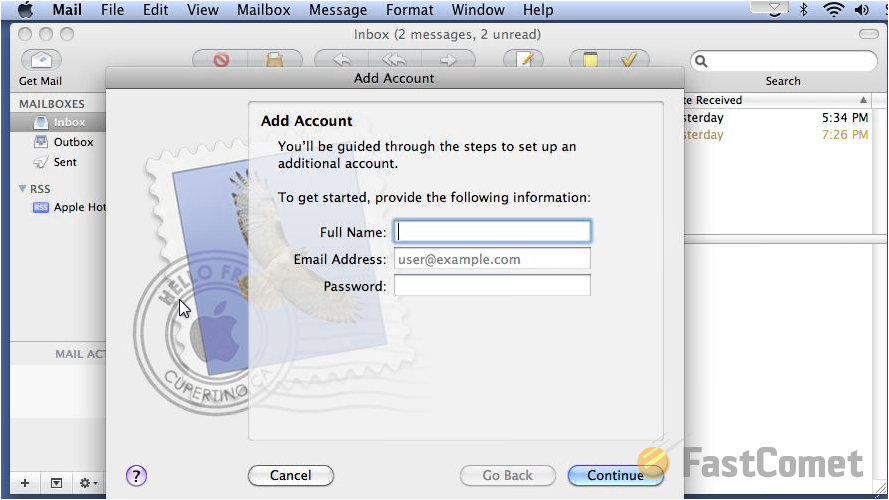
Once you are done with these please click on the Continue button so you can proceed with the setup.
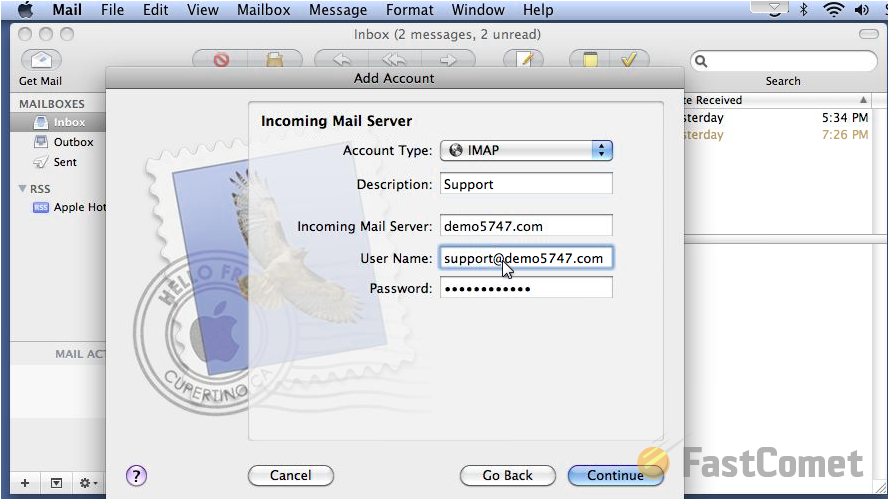
The next window is called Incoming Mail Server and as the name suggest it contains the configuration options for the Incoming mail service for your account. The configuration options here are:
- Account Type - Since this tutorial is for the configuration of your mail client with the IMAP protocol you will need to choose IMAP from this drop-down list
- Description - Few words about this incoming mail server
- Incoming Mail Server - The hostname of the incoming mail server
Hostname
The hostname of the mail server for your email account is mail.yourdomain.com where the substitution yourdomain.com should be actually replaced by your actual domain name. So for example if your domain is demo5747.com, the hostname of the mail server will be mail.demo5747.com.
- Username - The full email account you will be using for this type of connection
- Password - The password for that email account
When you have finished configuring these options please click on the Continue button so you can proceed with the setup.
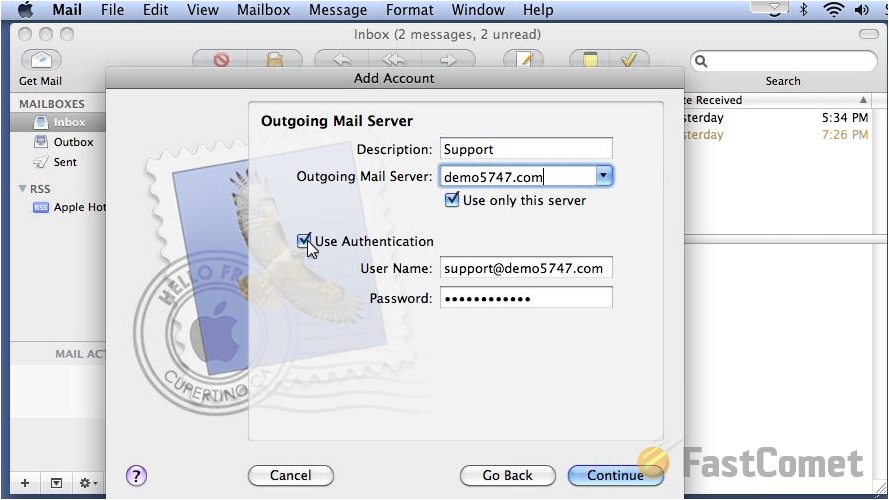
On the next window you will be presented with the options required for the configuration of your Outgoing mail server. The options here are similar to the Incoming mail server:
- Description - Few words about this outgoing mail server
- Outgoing Mail Server - The same hostname as the one you have used for your incoming mail server
- Use Only This server - Enabled
- Use Authentication - Enabled
- Username - The full email account you will be using for this type of connection
- Password - The password for that email account
As soon as you fill all of those fields please click on the Continue button so you can proceed with the setup.
In the final window called Account Summary you will notice a brief summary of the configurations you have already performed. Please verify those and if you would like to change something you can always us the Go Back button to bring back the previously configured windows.
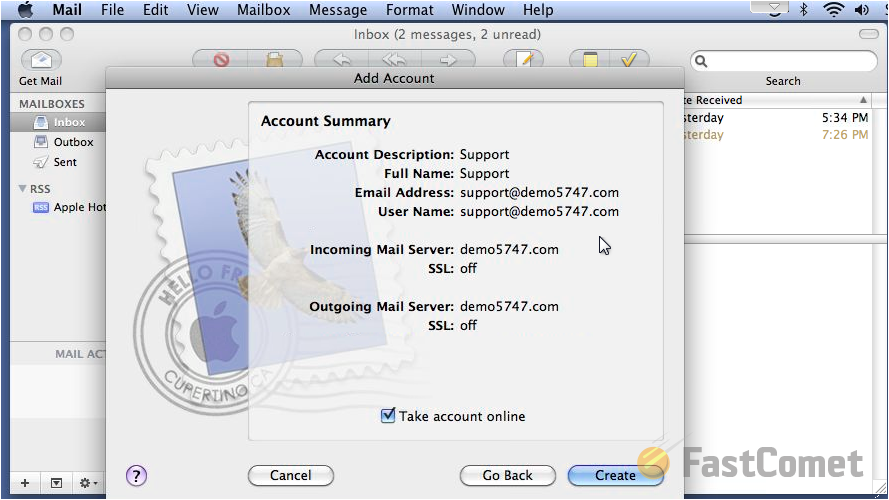
Congratulations! You have successfully configure your account with the IMAP protocol for the incoming mail service.
On this page...

Mail Hosting
- Free Domain Transfer
- Unlimited Email Accounts
- 24/7 Technical Support
- Fast SSD Storage
- Hack-free Protection
- Free Cloudflare CDN
- Immediate Activation
