How to Configure Taxes in Zen Cart
Updated on Dec 10, 2015
As most regions of the world have different Tax Rates, it is essential to know how to setup different Tax Classes and Tax Rates to these regions. In this tutorial, we will show you how to do that in Zen Cart.
To configure the taxes in you Zen Cart, you will need to:
Step 1 Define a Tax Zone
To define a new Tax Zone for your Store, you will need to log into your admin dashboard and navigate to the Locations/Taxes>Zones Definitions section from the main admin panel.
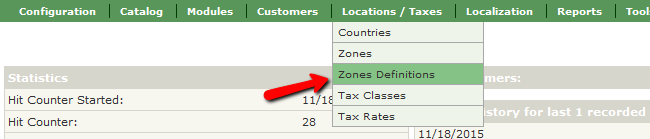
Now let us add a new Zone by clocking on the insert button.
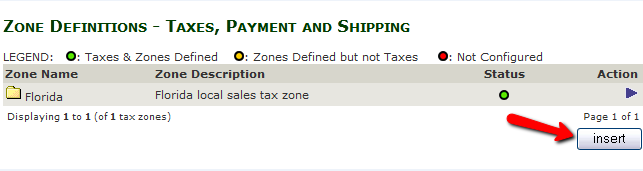
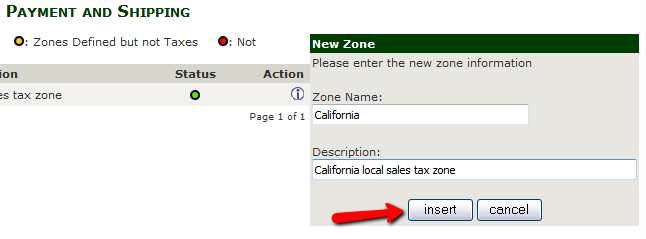
On the right you will see two fields in which you must fill the Zone’s name and a description for it if you so desire.
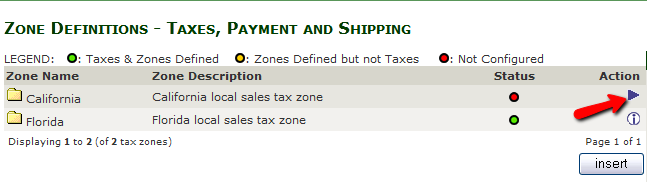
Now you will see the new zone in the Zone management section. From there you can enter the zone by clicking the Info/Play icon.
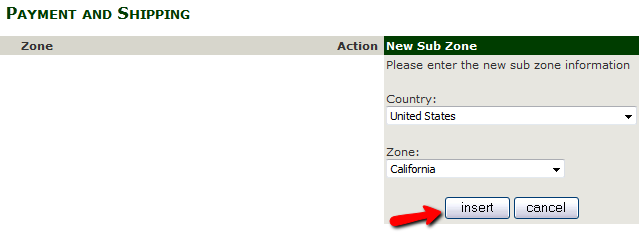
Here you will need to insert a subzone for this Zone containing the Country of and choosing the zone (in our case United States/California).
Follow the next two steps to add a specific Tax rate to this newly created Zone.
Step 2 Create a Tax Class
You can use Tax Classes if you sell products in different tax categories for example digital and physical products. To create a new Tax Class for your store you will need to navigate to the Locations/Taxes>Tax Class section of your main admin panel.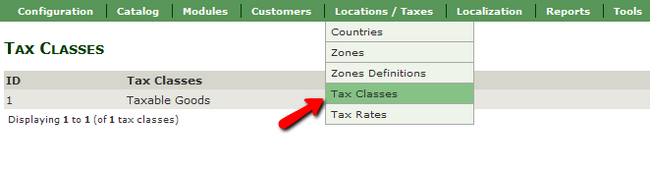
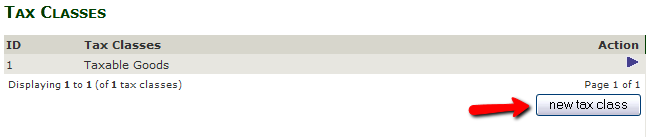
Note that Zen Cart comes pre-defined with one Tax Class for general goods called Taxable Goods. Click the new tax class button to add a new class.
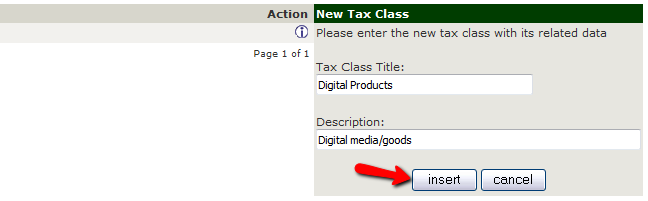
Here you will need to add a name and description of the new Tax Class.
Now you can use this new Class when creating a Tax Rating for a Zone
Step 3 Create a Tax Rate
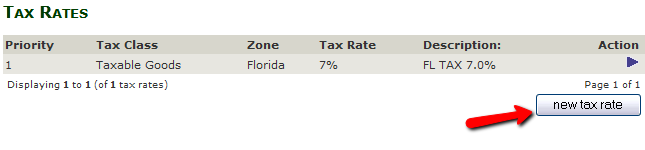
To add a new Tax rate, you will need to navigate to the Locations/Taxes>Tax Rates section from the main admin panel.

Here you can see the existing Tax Rates and add a new one by clicking the new tax rate button.
Now you will need to configure the tax rate itself:
- Tax Class Title – Here you can Select from the Tax Classes you have available on your store
- Zone – The Zone to which you want to apply this Tax Rate
- Tax Rate (%) – The Tax Rate’s amount (do not include % as it will be automatically added)
- Description – A short description of the Tax rate
- Priority – Set priority to the Tax
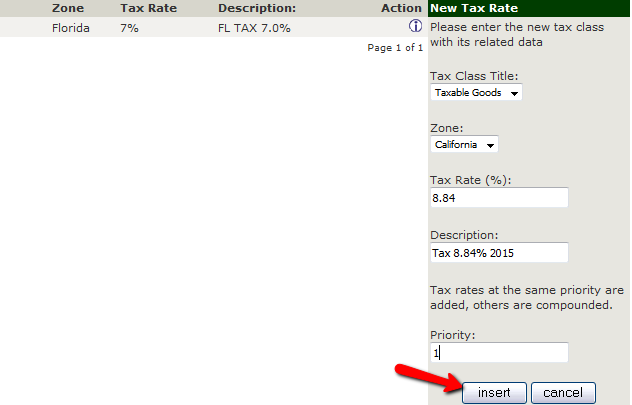
When you are done with the configuration, click on the insert button to create the Tax Rate.
On this page...

Zen Cart Hosting
- Free Zen Cart Installation
- 24/7 Zen Cart Support
- Free Domain Transfer
- Hack-free Protection
- Fast SSD Storage
- Free Cloudflare CDN
- Free Zen Cart Transfer
- Immediate Activation
