How to Manage Posts in WordPress
Updated on Dec 6, 2022
Making new posts and deciding how they should be presented on your website will be the primary methods of adding material to your WordPress website. This tutorial will explain and demonstrate how to add, edit, or remove posts using your WordPress installation's admin interface.
To manage your post in WordPress, you will need to know how to:
step
How to Access the Posts Page and Add a New Post
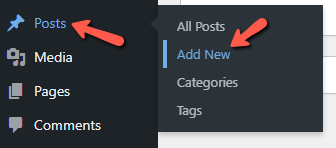
Logging into the WordPress admin area is the first thing you must do. After logging in, you must go to Posts → Add New.
You should be able to see the actual interface for adding a post after you are on the Add New Post page.
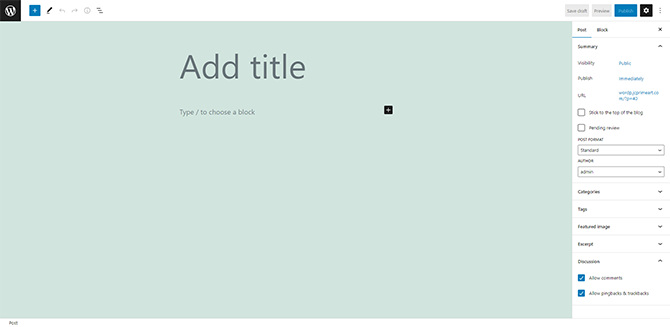
The components of that interface are the following:
- Title Field - Inserts the title you intend to use for your new article. This title will show up on the page where the post is located on your website, depending on how you have set up the display of your posts.
- Block Editor - Where you will enter the content for your post. You can opt to edit your post's text visually or as code.
- Add Block (+) - By pressing this button, you may quickly add from all the different types of blocks (images, quotes, galleries, etc.).
step
How to Configure Your New Post
The following elements of the page are shown using blocks from the right side of the page. These usually relate to the layout of the post.
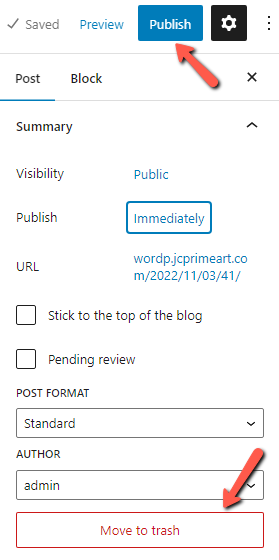
- Publish - This section contains details on the post's posting. When you are generating the post, you will first have the option to save it as a Draft. If you want your content to appear immediately on your website, change the value of the Status column in this block.
The post's visibility can also be altered. For example, if you want the post to remain private or password-protected, you can modify its visibility by clicking the Edit link (Public by Default) next to the Visibility option.
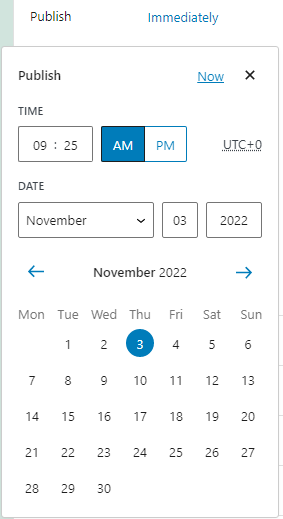
Of course, you may schedule the post's publication date, which is another amazing aspect of this block. This is made simple by the Edit button (Immediately by Default) situated next to the Publish option.
At the top-right corner of the page, you have a Publish button, while at the bottom of the post block, you have the option to Move to Trash.
- Categories - Your post can be categorized using this box. You have the option to manually create a new category or to use one of the already existing ones.
- Tags - You may quickly specify the tags to which your post can be categorized by using the tags block. Additionally, you have the choice to directly tag some of your website's most popular posts.
- Featured image - You have the choice to add a featured image to your article using this section. This image will be used either on your website's Post home page or somewhere else where the post should be fully shown.
- Excerpt - Add an excerpt taken from your post.
- Discussion - Enable/Disable Pingbacks and Comments.
The creation of your post is complete once you have set up all of the elements and published it.
step
How to Edit or Delete Posts
The procedure for editing or deleting a post is covered in the following section of this guide. You must go to Posts → All posts to edit or delete a post.
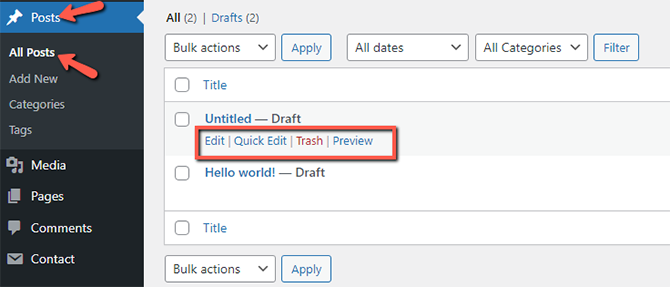
In the table view displayed in the middle of the page, you can review every post that has already been made.
A Post can be easily edited. You need to hover your cursor over a post for the edit link to display. After clicking it, you will be taken to the same interface where posts are added, where you should be able to edit the post.
Even more straightforward than editing or making one, deleting a post. Simply click the Trash option when you are hovering over the post you want to alter to send it straight to the trash.
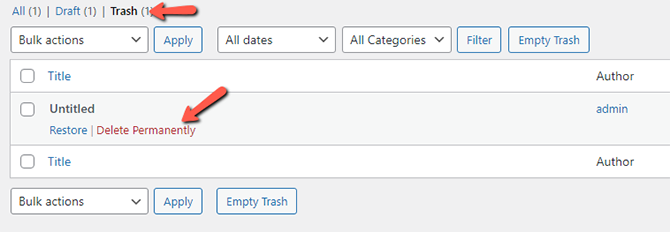
You must go to the Trash section and then hover over the post once more so that the Delete Permanently option appears if you want to permanently delete it.
Congratulations, you can now fully manage your posts!
On this page...

WordPress Hosting
- Free WordPress Installation
- 24/7 WordPress Support
- Free Domain Transfer
- Hack-free Protection
- Fast SSD Storage
- Free WordPress Transfer
- Free CloudFlare CDN
- Immediate Activation
