How to Configure General Settings in WordPress
Updated on Dec 6, 2022
The WordPress application allows a wide variety of settings you should start with right after the installation process. In this tutorial, we will explain what each of these options provide in terms of features. That way, you will be able to quickly determine what part of the configuration you need to change depending on your website.
For this tutorial we are using WordPress version 5.2.2 which is currently the latest available version.
To configure your WordPress, you will need to setup your:
step
General Settings
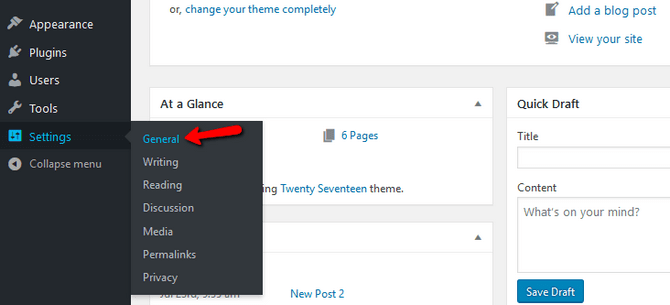
To begin reviewing and changing the setting of your application, you will need to login in the admin section of your WordPress application. Once you are there, navigate to Settings → General.
The first section which we are about to review in this guide contains some of the mandatory information for your website.
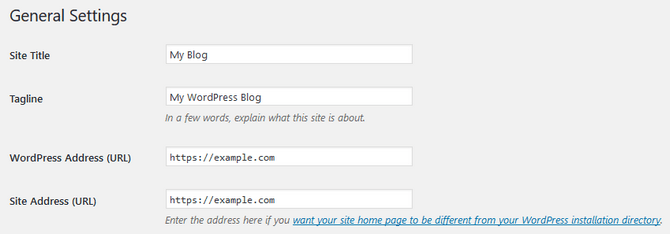
- Site Tittle - The title of your website will be displayed on the home page along with any other pages you would like to.
- Tagline - Brief explanation what your website is about.
- WordPress Address (URl) - The URL which the user will type in their browser to access your website.
- Site Address (URL) - Change this field only if you want your WordPress to be moved to a folder different from its original one.
The registration options are another essential set of fields.
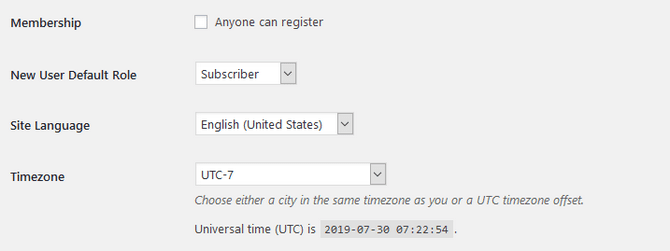
- Membership - Use this checkbox to allow the registration of users (of course if the visitors should be allowed to register).
- New User Default Role - Define the role/permissions of the newly registered users via the drop-down menu options.
Warning
Note that if you enable registration of new users on your website, you will have to ensure that the registration form is protected from bots. That can be done by using verification methods such as reCaptcha.
- Site Language - The default language for your website.
- Timezone - Here, you can choose your timezone by city/continent or by manual offset.
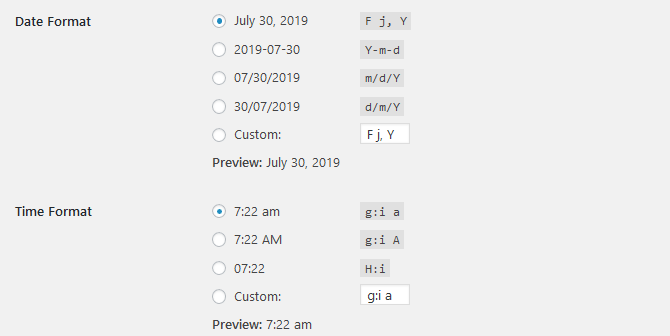
- Date Format - Select your preferred date format from a preset or create a custom one using the standardized PHP format characters. Those include the broadly known day/month/year -
d/m/Ybut also some more obscure characters likej(day of the month, e.g. 15),F(full name of the month, e.g. April) andl(full name of the day, e.g. Monday). - Time Format - The time format is just as important as the date one. Again, you can use the globally available PHP format strings to make your own unique timekeeping.
- Week Starts On - As per the international ISO 8601 standard, Monday is the first day of the week. However, in several countries, including the United States, Canada, and Australia, Sunday is considered the first day of the week.
Once you are done with the general settings for your application, click the Save Changes button located at the bottom of the page.
step
Writing Settings
The next section you should consider contains the Writing settings. These are available under your admin dashboard and navigate to Settings→Writing.

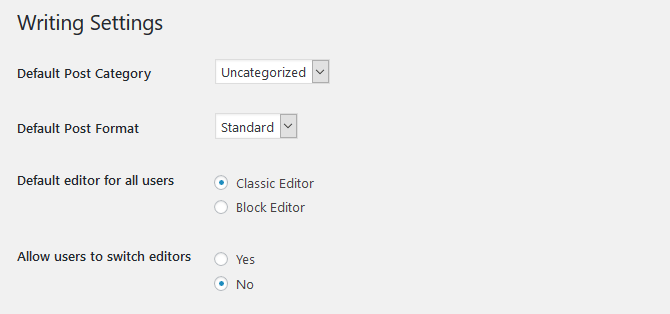
The first few entries on this list are related to the configuration of your posts.
- Default Post Category - This setting is used to define a category in which new post should be added to if there was no category selected for that post.
- Default Post Format - The default format shows how a post should be structured and displayed after being posted.
- Default editor for all users - You can choose if you wish to provide your users with the classic or Gutenberg editor as a default.
- Allow users to switch editors - If you want to enforce a unified way of editing, you can restrict users to only one editor.
Additionally on the same page you will find the settings for creating posts via the email service of the application.
Email Account
As the tip above suggest you will need an Email Account which you can easily create in your cPanel. If you are not quite sure how this should be achieved please check our "How to Manage Email Accounts" tutorial.
Note that the email account should be with secured name so it cannot be abused by spam since it will directly post literally ever received email.
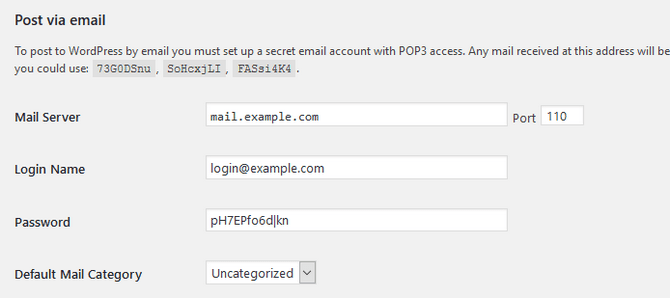
- Mail Server - The mail server for the created email account. Usually, this is the mail.yourdomain.com subdomain, which is taking care of the emails for your domain name.
- Port - The POP3 incoming email protocol. Usually, it is 110 (No SSL)
- Login Name - The exact email account you have created in your cPanel → Email accounts.
- Password - The password for that particular email account.
- Default Mail Category - The default category to which posts created this way should be added.
- Update services - If enabled, the update service will use the XML-RPC to ping listing services about a newly created or edited content on your website. All of the users who have subscribed to set services will see changes made on your website. By default, you are enlisted in the rpc.pingomatic.com service, but you can add other similar services like www.pingmyblog.com, bulkfeeds.net/rpc, and ipings.com. For a complete list, check the official Update Services codex.
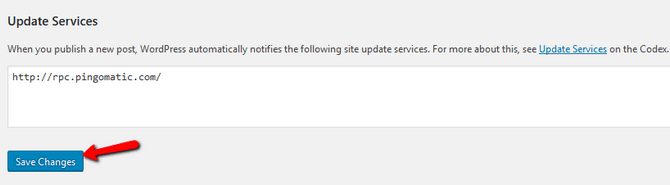
Once you have completed editing the configuration, hit the Save Changes button so the configuration can persist.
step
Reading Settings
The next section of settings is the Reading section, which you should be able to find in your admin area by going to Settings → Reading.

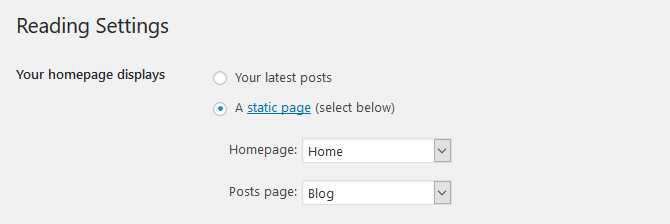
This section is for configuring how the elements on your pages will be displayed and also how the information should be perceived.
- Front page displays - What your home page should be displaying. The available options here are:
- Your latest posts - The posts you have recently posted sorted by the post date in descending order.
- A static page - A static page which you have created. By selecting this option, you will need to define Front Page and Post Page.
- Blog pages show at most - The number of posts that will be shown on your blog page.
- Syndication feeds show the most recent - The maximum number of items that can appear in the RSS feed for your website.
- For each article in a feed, show - The content you would like displayed for your posts in the RSS feed.
- Search Engine Visibility - This setting is if you would like the search engines to index your website or not.
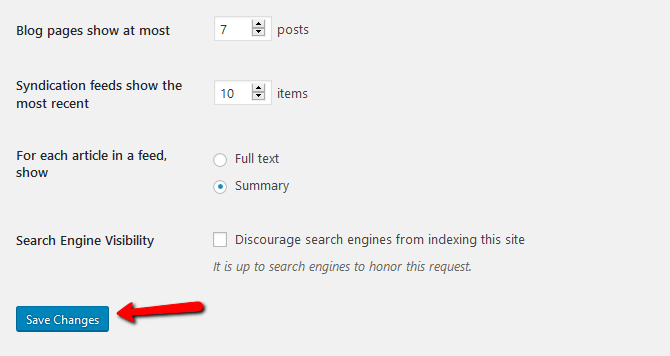
Once you are done with all of the settings in this section, hit the Save Changes button so your changes can be saved.
step
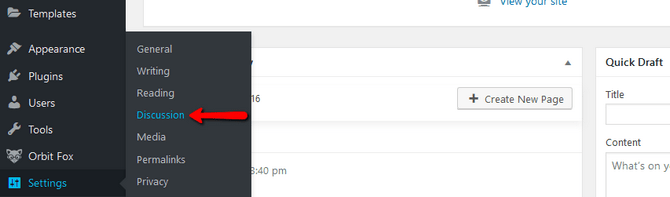
Discussion Settings
The next section of settings we will review is called Discussion, and it is available by logging into your admin dashboard and then navigating to Settings → Discussion.
As the name suggests, this section includes settings related to the communication options for your blog. That includes avatars used by the members and even for blacklisting certain words if you do not want them displayed in the comments.
The settings from this page you might want to use, and we are recommending are:
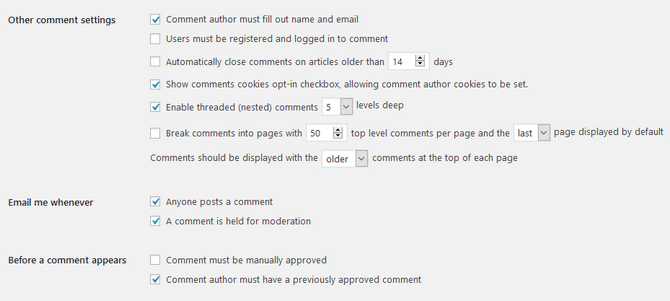
- Other comment settings - The settings you will need to consider as mandatory due to security purposes are:
- Comment author must fill out name and e-mail -This option will help you keep track of the comments origin on your blog.
- Users must be registered and logged in to comment - To reduce spam and increase credibility, enable this option.
These settings will ensure that the one writing a comment is human and not a bot. If you leave these options unchecked, you are allowing anyone to write comments on your articles or blogs.
- Before a comment appears - These field will allow you to choose when a comment should appear. Usually, you would like the comments to appear only if you approve them:
- Comment must be manually approved - With this you can make sure the content on your website is curated.
- Comment author must have a previously approved comment - With this option, if a visitor has an already approved comment, his sequential comments will not be held for moderation as long as he uses the same email address.
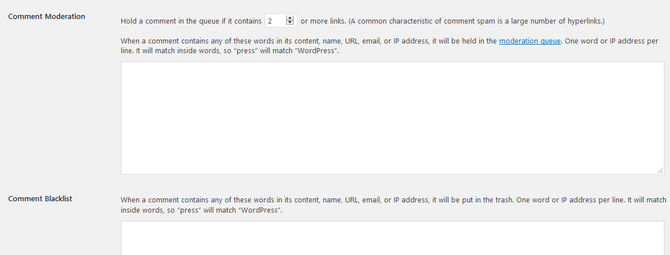
- Comment Moderation and Comment Blacklist - These two settings are made to work with each other. The comment moderation setting will only stop comments containing specific words, number of links, emails, and IPs from being published until your approval. The comment blacklist function, on the other hand, will move matching comments directly to the trash.
The other settings on that page are related to the avatars for your users, and you should be able to configure these based on your preferences.
![]()
You can also select a default avatar for your customers so they still get a visual representation on the website.
![]()
Once you are done setting this section, please press the Save Changes button in order for the changes to be saved successfully.
step
Media Settings
Next, we will explain the Media settings section available under your admin area → Settings → Media.
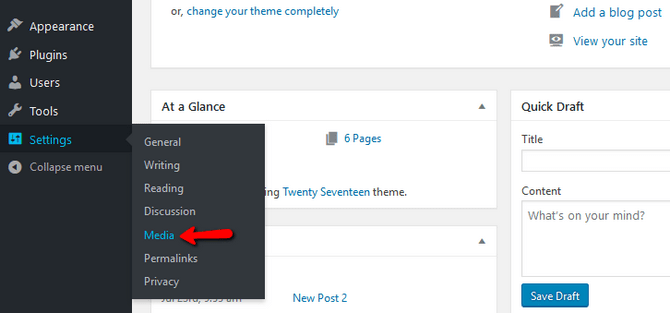
This section contains settings mainly related to the media types you are uploading on your application. Please take some time to configure these based on your needs.

All of the options are pretty much self-explanatory, and you will be able to edit them easily.
Once you are done, please use the Save Changes button to save the changes you have performed.
step
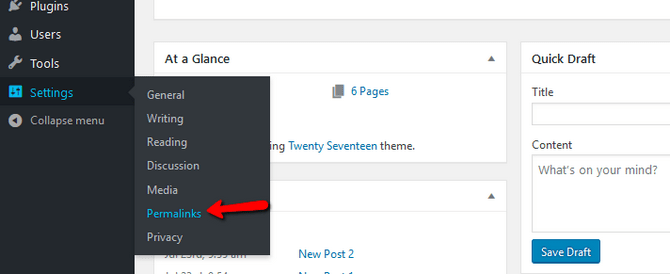
Permalinks Settings
As soon as the settings on that section are saved, you can move to the last part of settings called Permalinks. It is usually available in your administrators' area located in Settings → Permalinks.
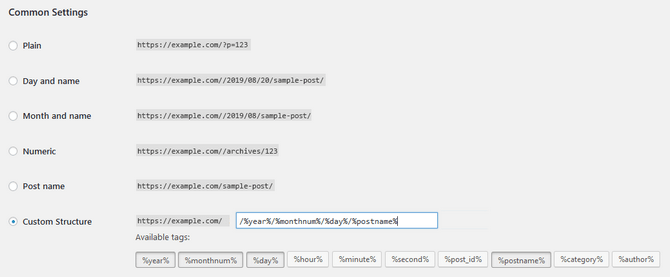
This section serves for the configuration of the links and URLs on your application. By default the application has a plain permalink structure.
However, based on your needs and personal likes, you can set the Permalink structure to any of the provided in that configuration option. You are also provided with the option to specify your Custom Structure.
However, to use any Permalinks structure different than the default one, you will need to ensure that the .htaccess file of the WordPress application is present. The file will also have to contain the following lines:
# BEGIN WordPress
<IfModule mod_rewrite.c>
RewriteEngine On
RewriteBase /
RewriteRule ^index\.php$ - [L]
RewriteCond %{REQUEST_FILENAME} !-f
RewriteCond %{REQUEST_FILENAME} !-d
RewriteRule . /index.php [L]
</IfModule>
# END WordPress
Common Settings
With a permalinks change, you will be able to switch the way your URLs look, making them more readable and SEO friendly. That makes it easier for your users to navigate the content of your website. One of the most used permalink types is "Day and Name" or as it could be made in the custom field:
/%year%/%monthnum%/%day%/%postname%/
You can also add %category% before the %postname% tag to specify the category of the post or %author% if you want to have your authors credited in the URL.
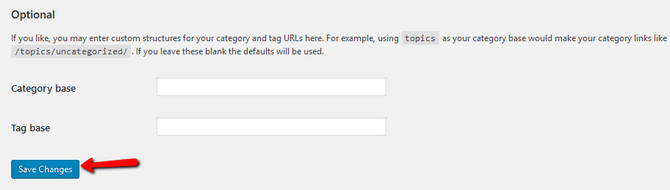
Optional Settings
In WordPress, both categories and tags are used to sort posts and increase the ease of navigating the content on your website. By default a post in a category shows like this:
https://example.com/category/news/big-news-today
If the same post contains the forecast and has a "weather" tag, the URL to the list of posts using this tag will look like this:
https://example.com/tag/weather
However, if your website is more oriented towards a particular theme, you can change the base values - category and tag.
For example, if you have an online class oriented website in which you teach and provide materials for different classes, instead of /category/time-management you can have /classes/time-management.
Another example could be if you have a programming oriented blog with different levels of advancement. Instead of having /category/novice and /category/expert you can have /level/novice and /level/expert.
In such cases, all you have to do is change the category base to one corresponding to your website's theme.
For tags, the situation is almost the same. However, the tag base is rarely changed due to tags having to be very precise if the base itself is more specific. If we take the programming oriented blog from the above-mentioned example and say you are teaching multiple languages, you can change the tag base from /tag to /language. That way, you will be able to use tags to differentiate posts for Python, PHP, C++, C#, JavaScript, etc while keeping your category base (/level).
That can also be used to avoid subcategories which are not always the best way to go when sorting content. The issue with using such a narrow scope of tags is that it won't make sense to add additional ones to further cover the content of each post. So, in this case, tags such as variable, array, login form, table, etc. will not sound logical.
step
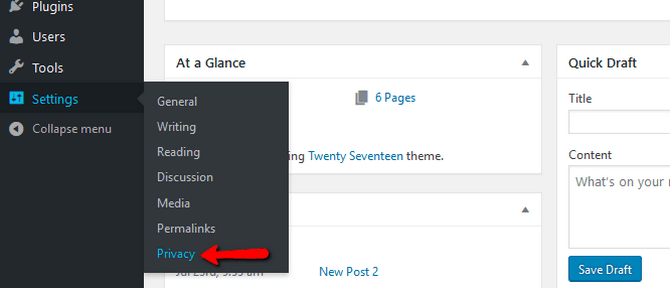
Privacy Settings
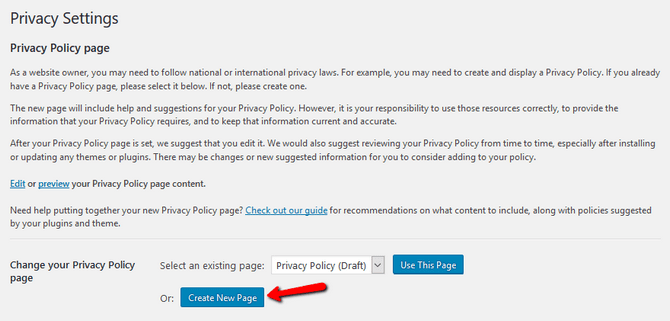
The newest addition to the multitude of settings you can configure in WordPress is the Privacy section. Introduced in WordPress 4.9.6, the Privacy → Settings option allows Administrators to create a new Privacy page or specify existing ones as Privacy Policy pages of the site.
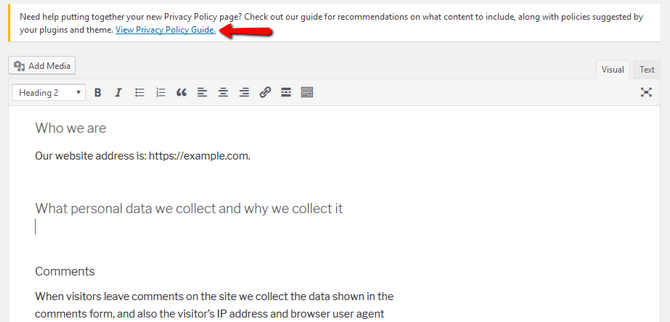
Once you click on Create a New Page, you will be redirected to the Pages menu and in the creation window of a new page. The page will have the Privacy Policy template ready for you to complete. Here you have to only add the cases which apply to your website. If you are ever lost, you can check the official Privacy Policy Guide provided by WordPress.
The template itself is not very long, and the guide is easy to follow. Meaning, it won't take you more than 10-15 minutes to complete your website's Privacy Policy.
Don't forget to publish the page when you are ready, as this time there is no Save Changes button.
With this, you have completed the configuration of your general settings in WordPress. Your website is ready to grow and expand!
On this page...

WordPress Hosting
- Free WordPress Installation
- 24/7 WordPress Support
- Free Domain Transfer
- Hack-free Protection
- Fast SSD Storage
- Free WordPress Transfer
- Free CloudFlare CDN
- Immediate Activation
