How to Manually Install Thelia
Updated on Dec 10, 2015
This tutorial will review the process of installing Thelia manually on your account. This allows you more control over the installation process than the automated Thelia installation via Softaculous.
Automated Installation
There is an easier way to install Thelia, which is fully automated. For more details on that, check out our tutorial on the Softaculous Thelia installation.
To manualy install Thelia, you need to:
step
Download Thelia
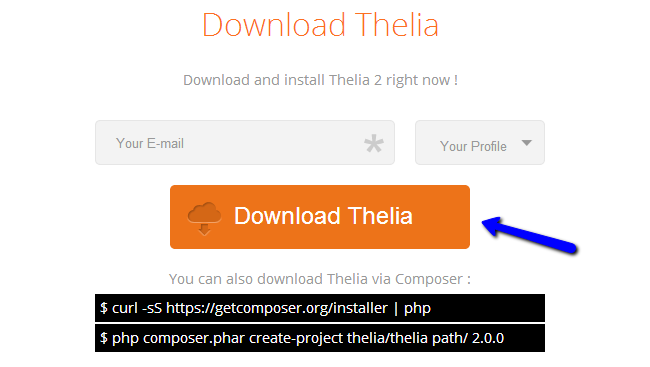
The first step of the process is to download the latest stable release of the script on your local computer. You can achieve that via the official Thelia website.
Once you download the script’s archive on your local computer, you need to extract it’s contents. You can do so using any available software, such as WinRar.
step
Prepare and Upload the Files
Up until this moment, you will have the extracted files and folders of Thelia on your local computer. It is time to upload them on your account on the server. Also, it is important to make sure that you upload the contents of Thelia into the correct directory, where you want to install the script. When you extract the Thelia archive on your local computer, this will create a folder called:
Thelia_x.x.x
The x.x.x part is the actual Thelia version that you have downloaded. Within this folder, you will notice all of the contents of the script and you need to upload them all to the location on the server, where you would like to install the script. There are three available options for that and we will review them all so you can see which one suits your needs and then proceed further.
For the purpose of our examples, we are assuming that your domain name is called example.com. However, you can substitute that with your actual domain so you can get the same result using your details.
- Install Thelia in ROOT - The first option is to upload Thelia directly within the public_html/ directory of your account. This will make all of it’s files accessible directly via your domain.
- Install Thelia in subfolder - This option is for the uploading and installing Thelia in a subfolder of your account. For example, if you would like to install and access your website via the following:
example.com/thelia/
This means that you need to create a /thelia subfolder within the public_html/ directory of your account. Then, you need to upload the contents of your installation within the new subfolder.
- Install Thelia on subdomain - This option is for uploading and installing Thelia on a subdomain of your account. For example, if you would like to install and access your website via the following:
thelia.example.com
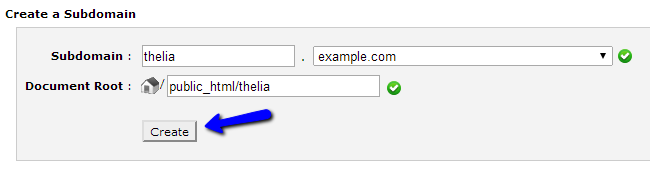
This means that you first need to create that subdomain. You can do that via your cPanel. Locate the Domains section and then click on the Subdomains icon.

Now, you will have to enter the new subdomain that you want to use. The system will auto-generate the path to the directory used for that subdomain. This is usually a folder of the same name within the public_html/ directory of your account.
This will create a folder with that name within the public_html/ directory of your account and you need to upload the Thelia contents in it.
Upload Files
There are two ways of uploading your files to the server - using an FTP client, following our FTP tutorial, or uploading directly through your cPanel account → File Manager, following our cPanel tutorial.
step
Initiate the Installation
Once you complete the uploading of your script to the directory, where you wish to install it, you can initiate the installation of the script. To start the install script, you need to access the location of the script, followed by web/install/. For example, if you have uploaded Thelia to the public_html/ directory of your account and your domain is example.com, you need to access the following:
example.com/web/install/
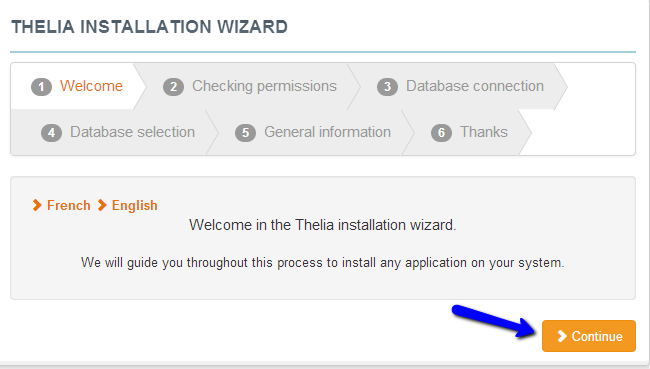
The first screen will display a welcome message. Click on the Continue button to proceed.
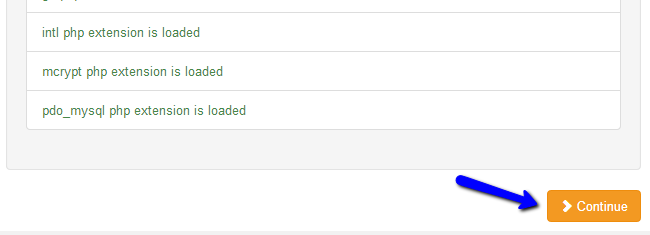
The second screen of the installation process is a system requirements check. Thelia will check if the server meets all of the requirements for the new installation and display the result on the screen. As our servers are fully optimized for the script, you will not have any issues on this step. Click on Continue to proceed.
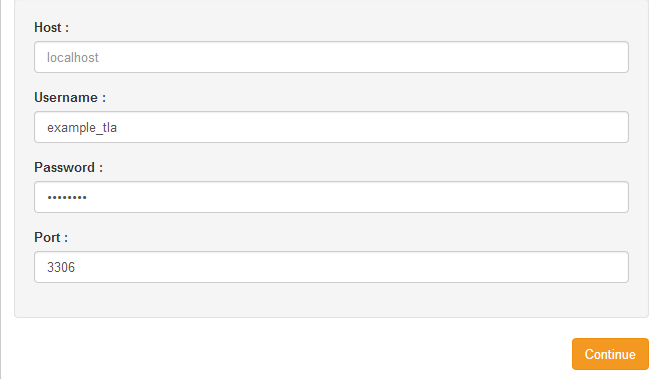
The next step is a Database Connection. This will request the database details that will be used for the new installation. Enter the following details:
- Host - Enter "localhost" without the quotes
- Username - Enter the database user that you have created
- Password - Enter the password that you set for it
- Port - Enter the default 3306 port.
MySQL Configuration
You can create a new database and a user assigned to it via cPanel. Simply follow our MySQL Wizard tutorial for information on that.
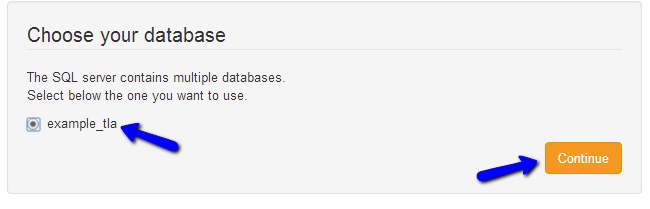
The next step is the Database Selection. The system will use the details you have entered in the previous step and then pull up the database, for which the user has privileges. Then, those databases will be displayed in this step, allowing you to choose the one that you would like to set for your website. Select your database and click on Continue to proceed.
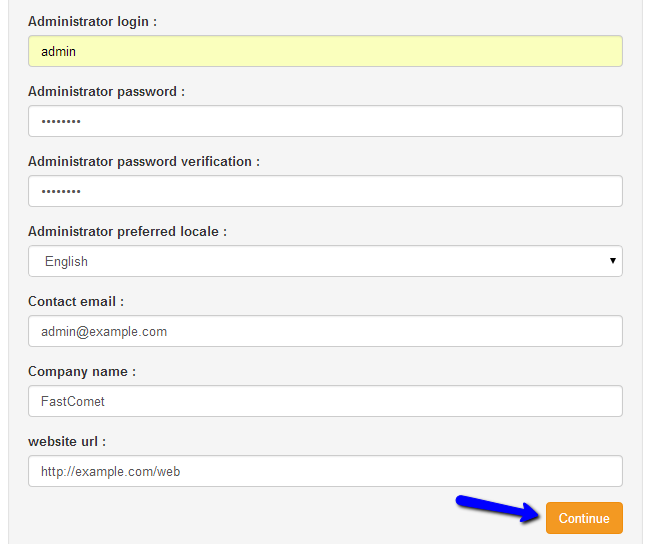
The next step is called General Information and it will allow you to create the administrative user on your website and set some of the basic information for it. Edit the following:
- Administrator Login - Enter the username for the main administrator on your website
- Administrator Password - Enter the password for it
- Administrator Password Verification - Enter the password again for verification
- Administrator Preferred Locale - Enter the preferred locale for the admin user
- Contact Email - Enter your email address
- Company Name - Enter your company name
- Website URL - This option will be pre-defined by the system. However, check to see if this is the correct URL before proceeding
When you enter the details above, simply click on Continue to proceed. Make sure that you take a note of the admin login details for your website as you will need them to manage your website after the installation.
step
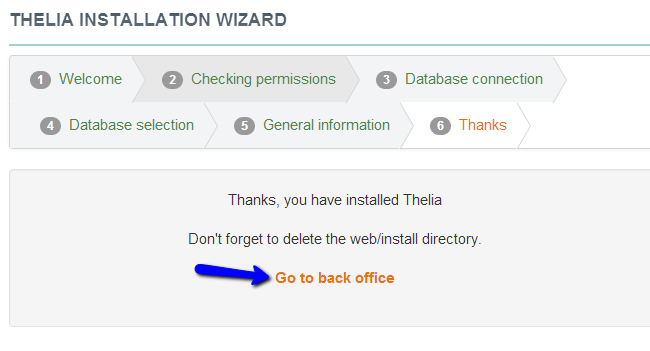
Complete the Installation
The Thelia installation is now completed. You need to remove the web/install/ directory from your account for security reasons. For example, if your website is located within the public_html/ directory of your account, you need to remove the following:
public_html/web/install/
Then, you can proceed to the administrative area of your website by clicking on the Go to back office button on the screen.
Congratulations! You have successfully installed Thelia without softaculous by following our tutorial.
On this page...

Thelia Hosting
- Free Installation
- 24/7 Thelia Support
- Free Domain Transfer
- Hack-free Protection
- Fast SSD Storage
- Free Thelia Transfer
- Free Cloudflare CDN
- Immediate Activation
