How to Clear the Cache in Pagekit
Updated on Dec 10, 2015
When you develop your Pagekit website and make changes to it, you will want to see the immediate effect of those changes. However, most of the time, the cache of the application will prevent you from doing that. To solve this problem you will need to clear the cache of your Pagekit based website.
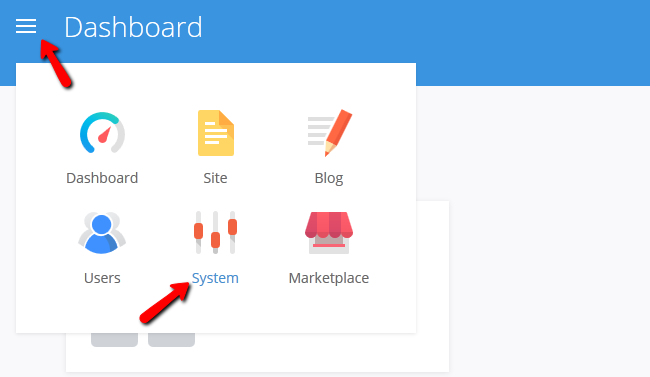
To clear the cache on your website, you will first need to log in the admin dashboard and select the System menu.
Now navigate to the Settings → Cache section of this panel.
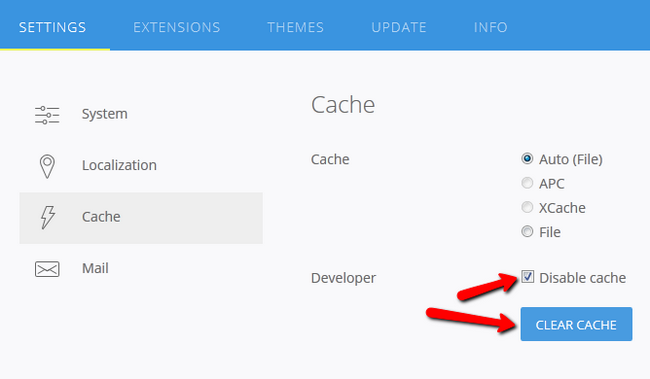
Here you will see the caching options for your website:
- Auto(File) - Choosing this make Pagekit determine the best possible caching method
- APC - Pagekit will use APC cache if available
- XCache - Pagekit will use XCache cache if available
- File - Pagekit will use a file based cache
- Disable Cache - If you check this box you will disable the caching of your website (recommended in development state)
At the bottom of the options you will find the Clear Cache button. Click it if you wish to remove all cache and/or temporary theme files.
On this page...

Pagekit Hosting
- Free Pagekit Installation
- 24/7 Pagekit Support
- Free Domain Transfer
- Hack-free Protection
- Fast SSD Storage
- Free Cloudflare CDN
- Free Pagekit Transfer
- Immediate Activation
