How to Install Open Atrium
Updated on Mar 13, 2019
Since the Open Atrium Platform is build on Drupal, the installation process is almost the same as the Drupal application installation. In the next lines of this tutorial we will show you how to install the platform manually on your website.
To install Open Atrium, you need to complete the following steps:
Step 1 Download and prepare the Files
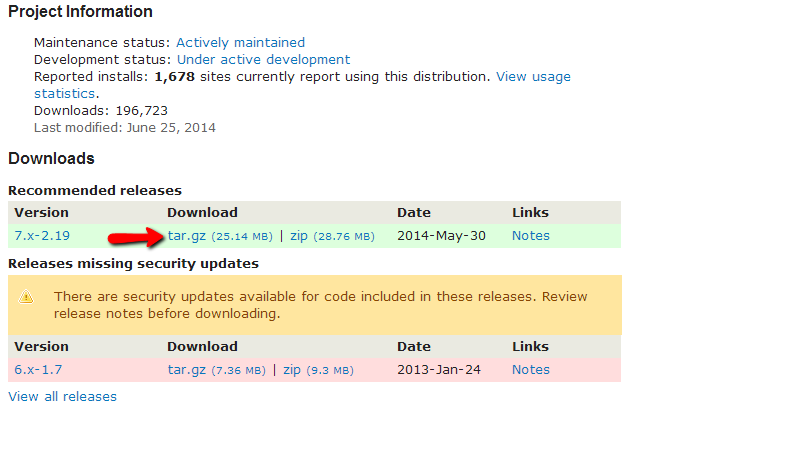
You can download a complete installation archive of the platform at the official project page of the Drupal website.
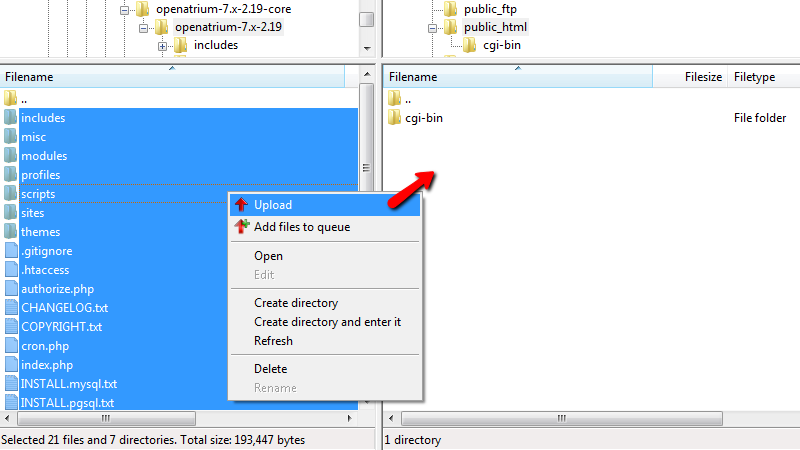
Once you download the archive please extract it on your local computer. After the extraction process you should receive a folder with all of the installation files for the platform.

Please connect to the FTP service for your account and upload the content (all files and folders inside) of the received folder in the desired location on your account. If you are not sure how to use the FTP service for your account you should check our FTP Tutorial Series for further information on the matter.
Once the files are uploaded you are ready to proceed with the installation procedure which we will review in the next step of this tutorial.
Step 2 Install the Application
Now that you have uploaded all of the installation files for the platform it is time to start the actual installation wizard. Please navigate to the location you have uploaded the installation files at. Usually if you have uploaded the files directly into the public_html folder of your hosting account with us this will be your primary domain name (yourdomain.com).
The installer will begin asking you to choose a language. The only language available is English at this point.
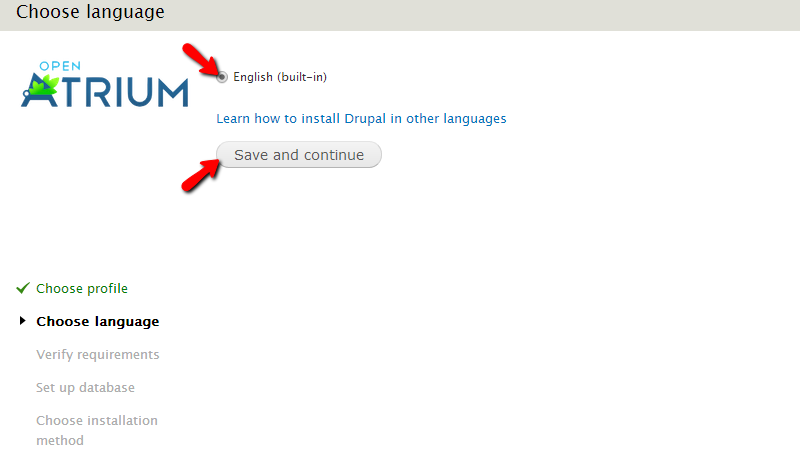
Please press the Save and Continue button so you can proceed with the installation. The next page from the installation process is Verify Requirements but it will be skipped if all of requirements are met. Since the platform is supported on every single hosting package we offer it is natively supported by the environment and you will not be presented with the requirements verification page. In case that page is displayed at all there will be a warning if certain requirement is not men and we are advising in such cases to contact our Support Team so they can check what is causing the warning.
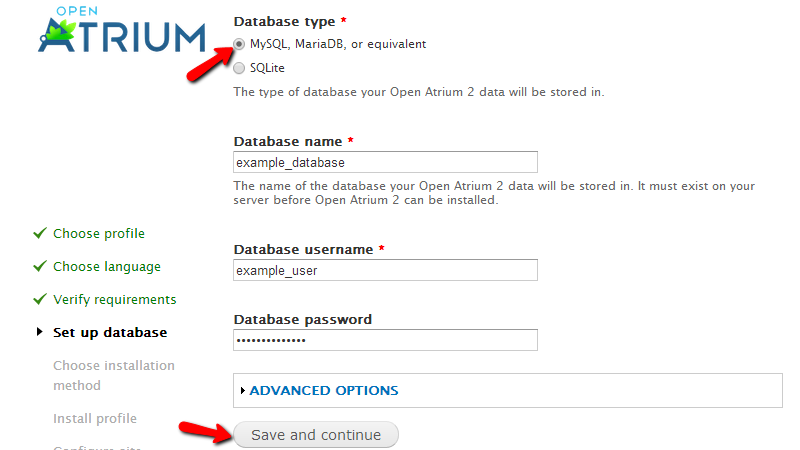
On the next installation screen called Database Configuration you will be presented with the required fields for the database connection of the platform. In order to fill all of the mandatory fields on this page you will need to create a database and assign a user to operate with it via your cPanel>MySQL Database Wizard.
Next you will need to choose the Database type. The default value is MySQL, MariaDB or equivalent and you should leave it as it is.
In the next fields you will need to fill the Database name, Database username and of course the Database password. Once you are ready with these please click the Save and continue button so you can proceed with the setup.
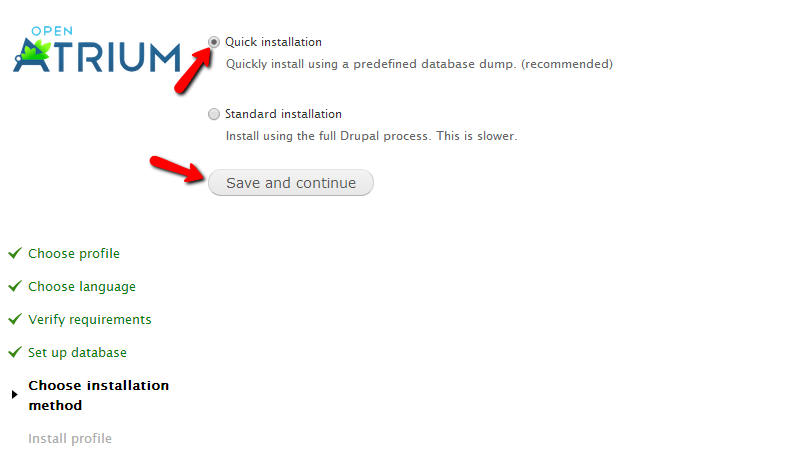
On the next screen you will need to choose the installation method of the platform. If you are looking for less customization and you would like to have faster install process please select the Quick installation option and click on the Save and continue button so you can proceed further.
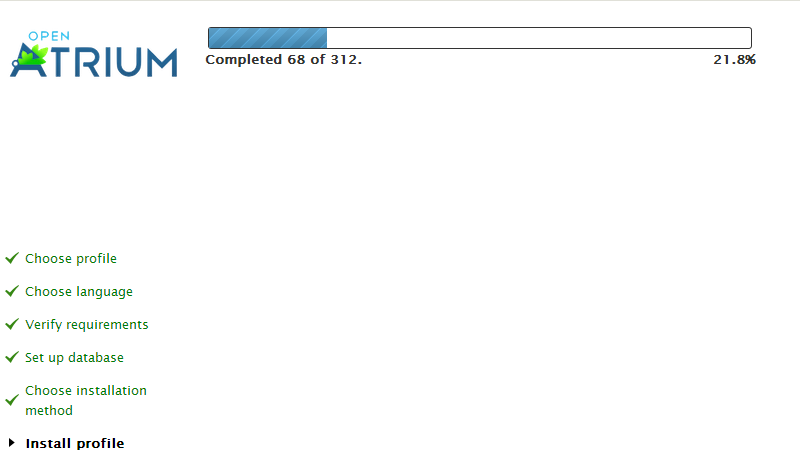
The next page will present you with the progress of the installation via a status bar displayed at the top of the page.
Once the installation process is finished you will be presented with the Configure Site page where there will be few sections displayed. You will need to fill the required information in these sections in order for the installation process to be finished.
Let’s begin with the Site Information section. There you will need to fill the Site Name and the Site e-mail address.

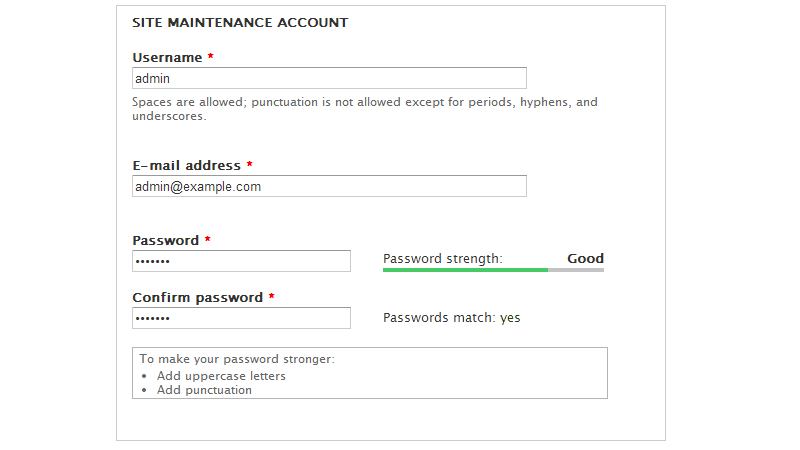
Step 3 Create an Admin Account
The next section is called Site Maintenance Account and there you will need to fill the admin Username, E-mail address and of course the Password that user will be using in order to login into the platform once installed.
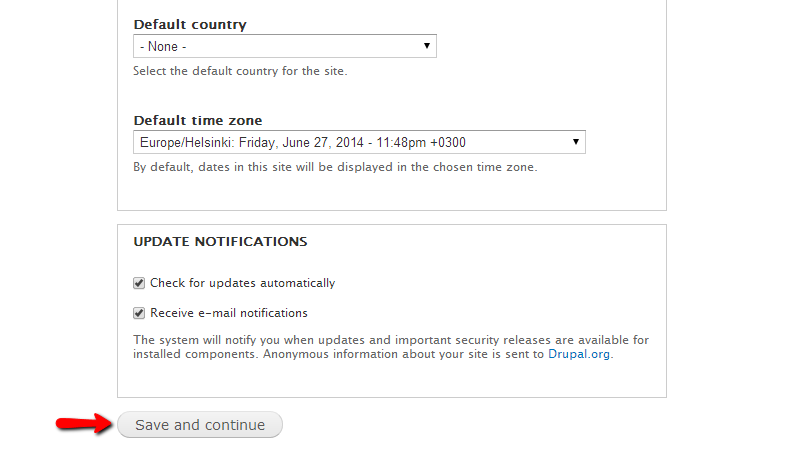
The final two sections are related to the Server Settings where you will need to choose the Default Country, Default time zone options and also to the Update Notifications. Once you are done with these please click on the Save and continue button so you can finalize the installation process.
Once the process is finished you will be presented with a message indicating the successful installation and you will have the option to visit your newly installed Open Atrium.
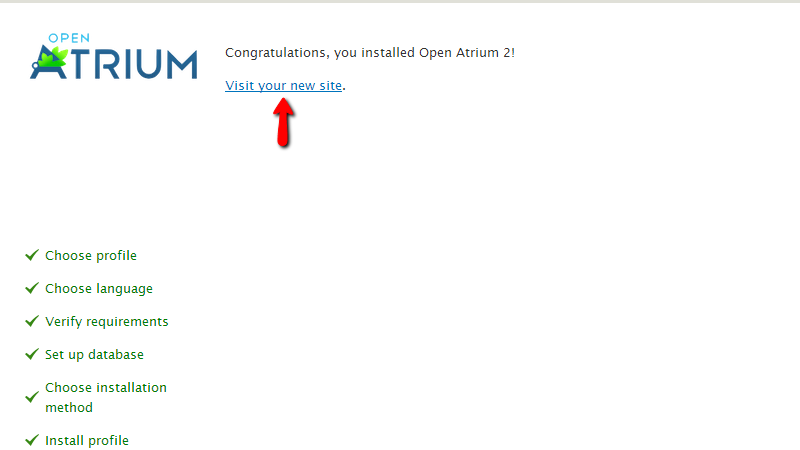
Congratulations! You have successfully installed Open Atrium on your hosting account with us!
On this page...

Open Atrium Hosting
- Free Open Atrium Installation
- 24/7 Open Atrium Support
- Free Domain Transfer
- Hack-free Protection
- Fast SSD Storage
- Free Cloudflare CDN
- Free Open Atrium Transfer
- Immediate Activation
