How to upload files using WinSCP
Updated on Dec 10, 2015
This tutorial will review the process of uploading/downloading files to and from a server using WinSCP. This is important as it will allow you to upload your website to the server easily.
FTP Configuration
We are assuming that you have already downloaded and configured your WinSCP FTP client and you are connected to your account and website on the server. If you did not, please follow our tutorial on How to configure WinSCP.
To Upload Files
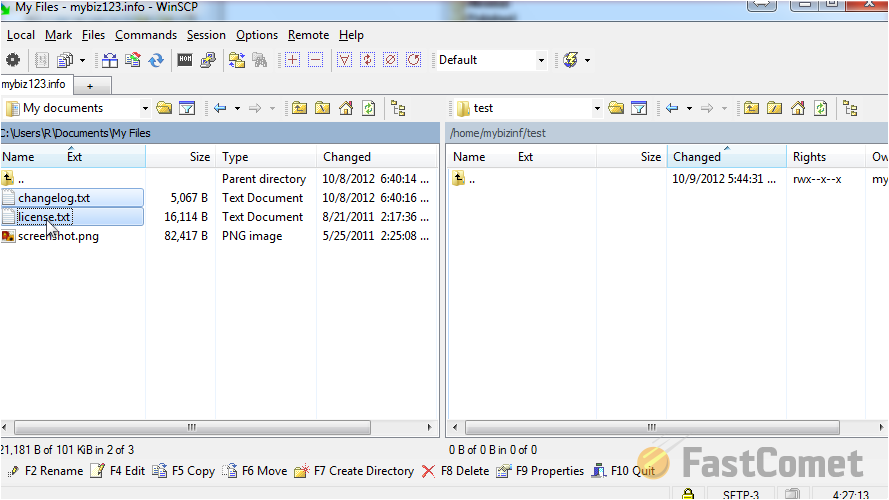
The first step is to select the file/s that you wish to upload to the server. Note that you can select multiple, holding the Ctrl button on your keyboard, while selecting them.
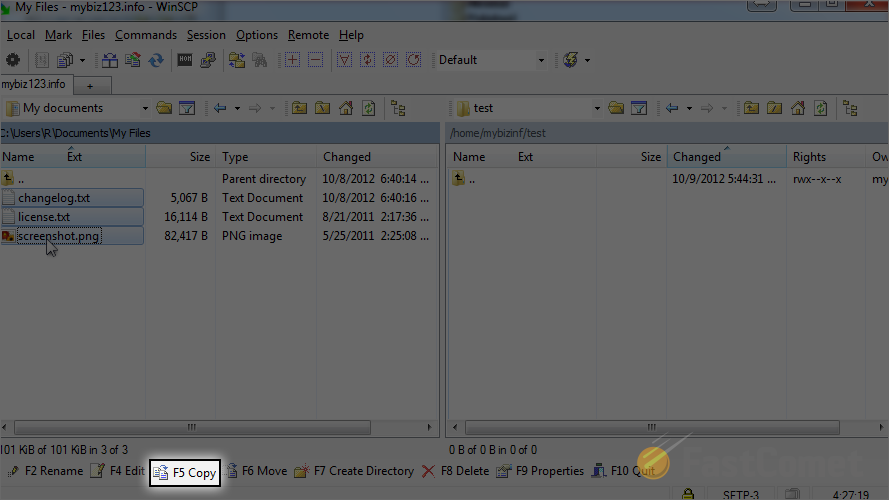
Click on the Copy button from the options at the bottom.
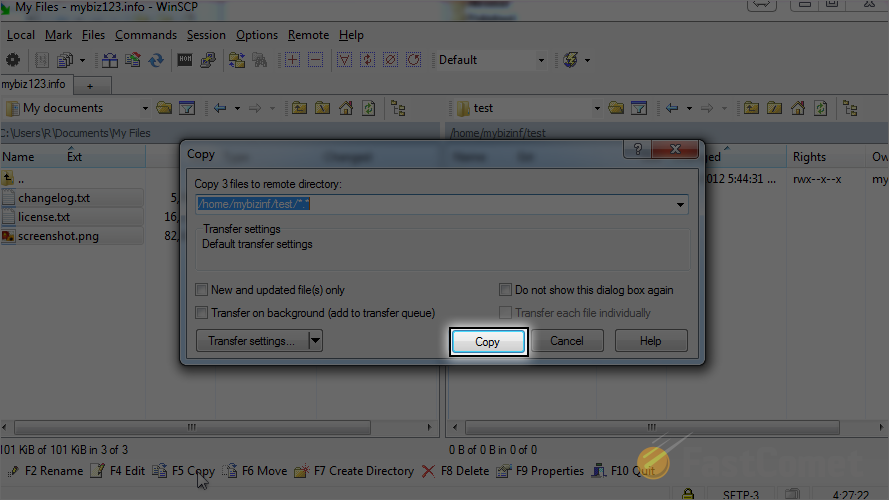
WinSCP will display information about the process that is about to be completed. Click on Copy again to proceed with that.
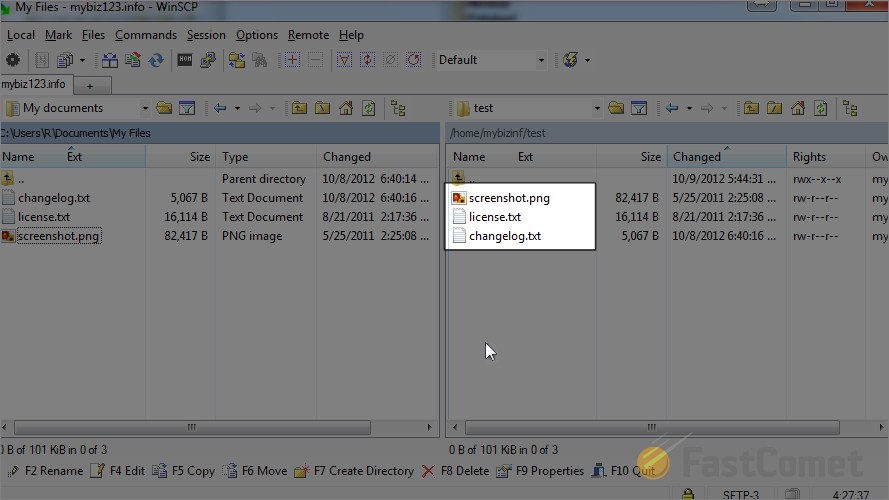
The upload is now completed. The files are being upoaded to the location of the server that you selected and you will be able to review them.
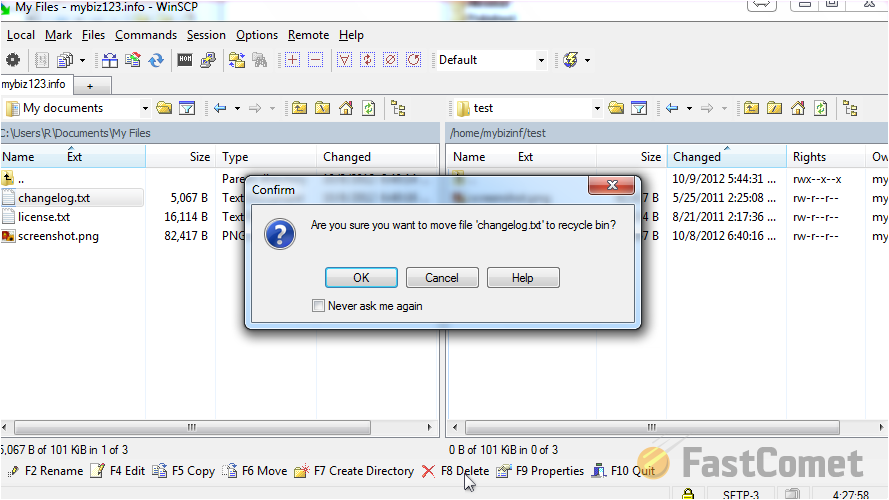
To Download Files
To download a file using WinSCP, we will first remote a file from our local computer. Simply select the file that you wish to remove and click on Delete.
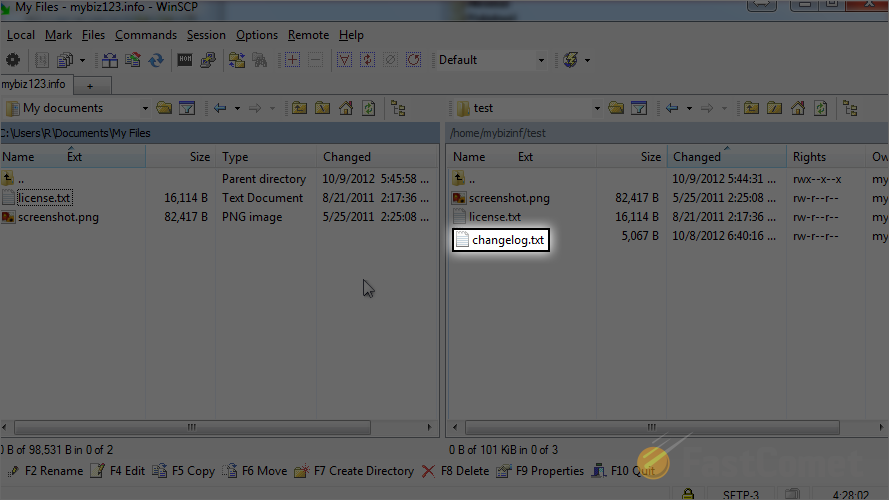
Now, we are ready to proceed with the download of the file from the server. You need to select it first.
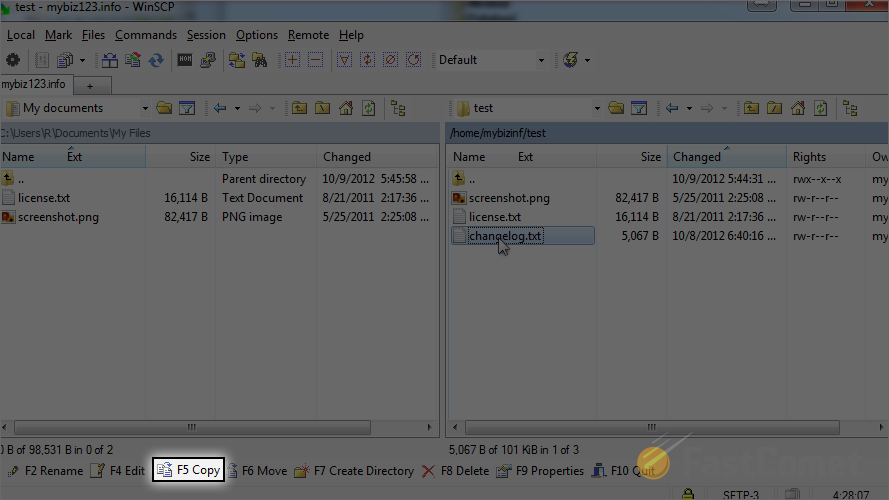
Click on the Copy button at toe bottom of the screen.
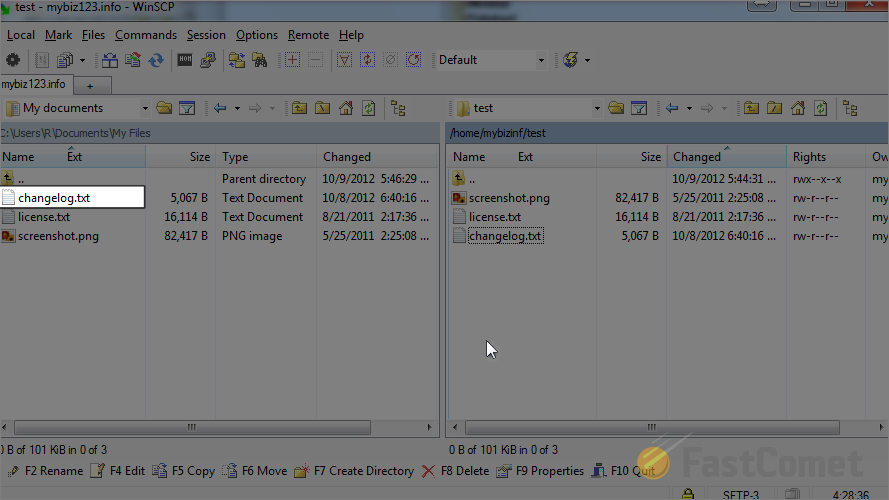
That is it! You will notice that the file will be downloaded to your local computer successfully.
On this page...

FTP Hosting
- Free Domain Transfer
- 24/7 Technical Support
- Fast SSD Storage
- Hack-free Protection
- Free Script Installation
- Free Website Transfer
- Free Cloudflare CDN
- Immediate Activation
