How to Manually Install CS-Cart
Updated on Mar 13, 2019
This tutorial will review the installation of CS-Cart manually on your account. The process is a bit more complicated than the Softaculous CS-Cart install, but it will provide more advanced configuration options for your new website.
To Manually Install CS-Cart you will need to:
step
Download CS-Cart
The first step that you need to consider is to download the latest CS-Cart release. This will download an archive on your local computer, which contains all of the files that you need for the manual installation.
The important thing here is to download the latest version, as it will provide the latest features of CS-Cart and the latest bug fixes. It is always good to keep up-to-date with the application as you will use it's full power for the development of your website.
To download the latest release, you need to access the official CS-Cart website. You can scroll down and click on the Download CS-Cart button.

On the next page, click on the CS-Cart button to proceed with your download.

step
Prepare the CS-Cart Files for Installation
Once you download your CS-Cart installation archive, you can extract the files on your local computer. This will extract all of the files and folders you need to perform the process on your account. You will then simply need to upload them all on your server.
The important thing here is to decide where you wish to install CS-Cart. For example, if you would like to install the application directly on the primary domain of your account, you will have to upload the contents of your CS-Cart website to the public_html/ directory of your account. However, this may differ, if you wish to install CS-Cart on a subdomain, subfolder, etc.
Upload Files
There are two ways of uploading your files to the server - using an FTP client, following our FTP tutorial, or uploading directly through your cPanel account > File Manager, following our cPanel tutorial.
step
Complete the Installation
To initiate the installation process, you need to access the location of your CS-Cart installation files through your web browser. As the application is not installed yet, the system will display a message for you to inform you about that. Click on the Install button to proceed further.

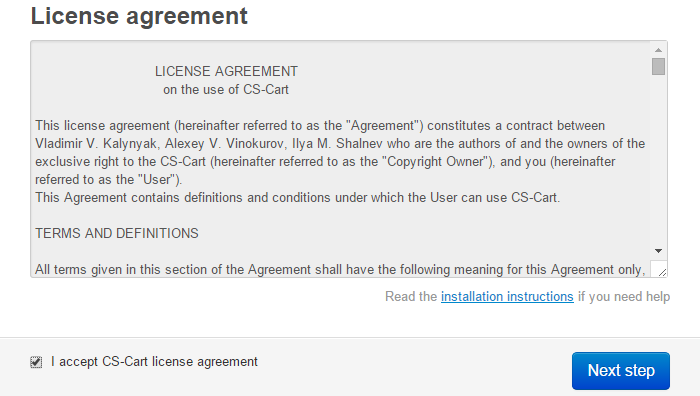
The first step is the license agreement for the CS-Cart use. You need to accept the license and click on the Next Step button to proceed.
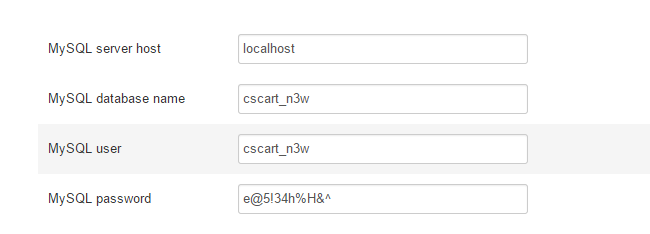
On the next page, you will be able to edit the MySQL information for your domain. You need to create a new and empty database and a user assigned to it with full privileges.
MySQL Configuration
You can create a new database and a user assigned to it via cPanel. Simply follow our MySQL Wizard tutorial for information on that.
The options that you have are:
- MySQL Server Host - Enter "localhost" without the quotes;
- MySQL Database Name - Enter the name of the database you created;
- MySQL User - Enter the user assigned to it;
- MySQL Password - Enter the password for it.
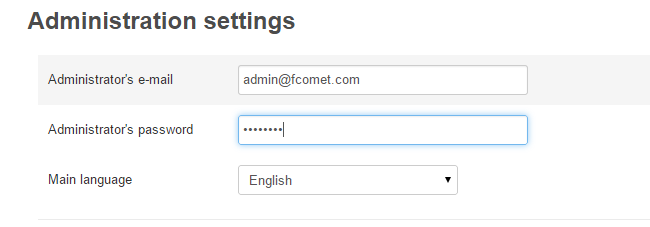
Enter the details for the administrative user of your website. The user will allow you to edit/manage your new website so keep those details safe. The options are:
- Administrator's Email - Enter the email of the admin user;
- Administrator's Password - Enter the password for the admin user;
- Main Language - Choose the language the admin user will use.
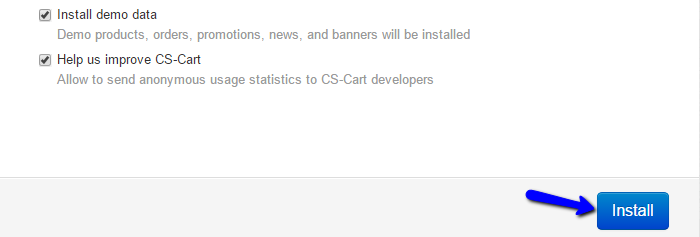
Also, you can choose if you would like to install sample data on your website. Also, choose if you wish to report statistics to the CS-Cart suppor team in order to improve their product. When you are ready, click on the Install button to proceed.
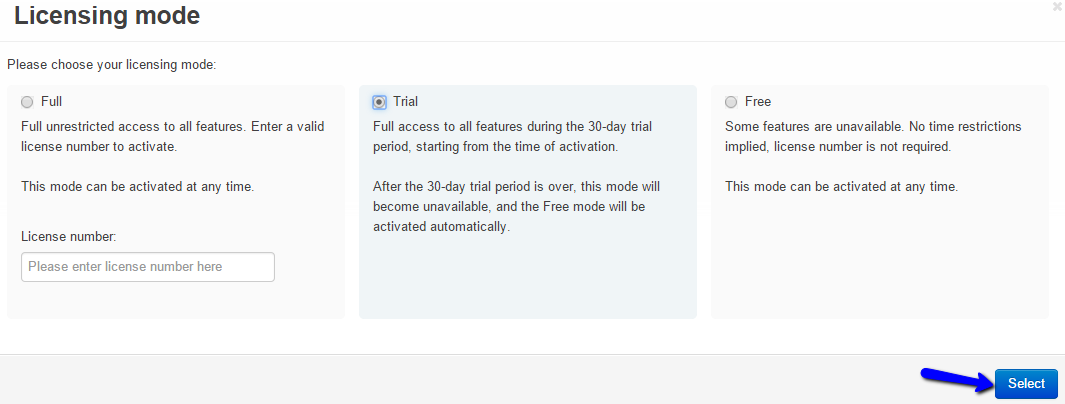
The system will initiate the installation automatically for you and apply the details that you have entered so far. It will also request that you choose the license for your store. There is a Paid, Trial and a Free license that you can choose from.
The manual installation of CS-Cart on your account is now fully completed. You will be presented with links to your front and backend.
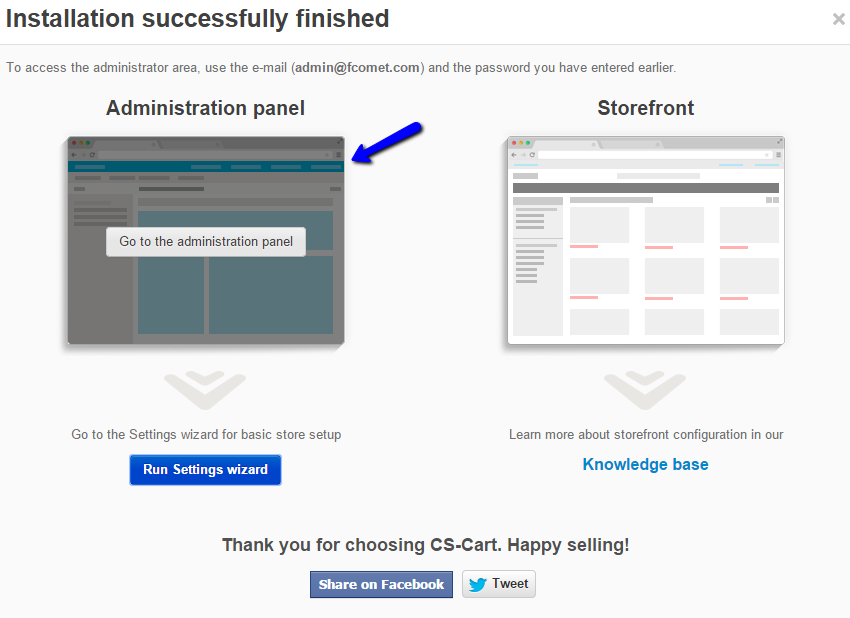
You will also be able to run a setup wizard that will allow you to configure your store easily. Either way, all of the available options in the wizard can be changed later.
On this page...

CS-Cart Hosting - free features
- Free CS-Cart Install
- 24/7 Expert Support
- Free Domain Transfer
- Hack-free Protection
- Fast SSD Storage
- Free CubeCart Transfer
- Free Cloudflare CDN
- Immediate Activation
