How to enable full caching in Concrete5
Updated on Dec 10, 2015
The current tutorial will follow the steps of enabling full caching on your Concrete5 website. This is a good way of improving the load time of your website and the objects on it.
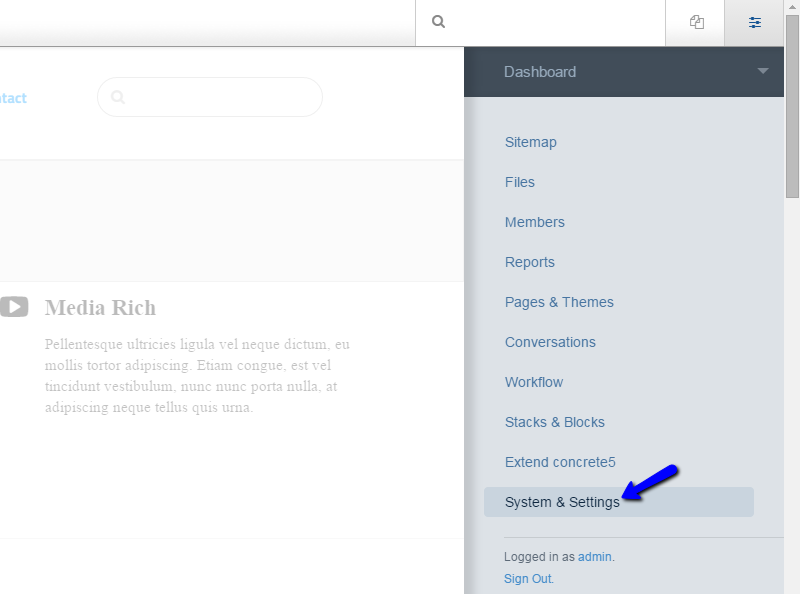
To enable caching in Concrete5, you need to log into your website as administrator. Click on the Dashboard button at the top menu and then click on System & Settings.
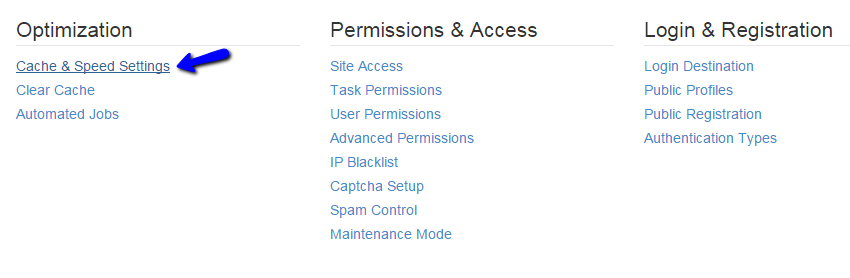
Locate the Optimization section and click on the Cache & Speed Settings option.
In the Full Page Caching section, click on one of the following options:
- On - If blocks on the particular page allow it.
- On - In all cases.
The option you will choose depends on the way you have developed your website so it is up to you. You can, of course, test both options and see which one suits your needs best.

When ready, simply click on the Save button to keep the changes. The system will configure your website automatically for you, using the preferences you have specified above.
On this page...

Concrete5 Hosting
- Free Installation
- 24/7 Support
- Free Domain Transfer
- Hack-free Protection
- Fast SSD Storage
- Free Transfer
- Free Cloudflare CDN
- Immediate Activation
