How to Manage your Websites
Updated on Mar 13, 2019
Cloudflare offers a great way to manage all the domain you have configured to use their services. You are provided with access to your own Client Area where you will be able to perform large variety of actions in order to take full advantage of the great services Cloudflare provides.
To manage your domains with Cloudflare, you need to:
step
Configure a Domain with Cloudflare
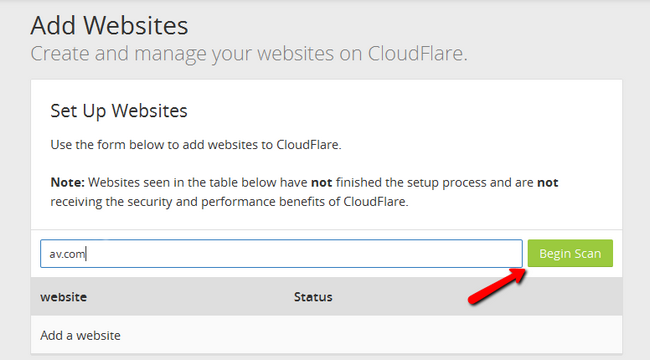
If you are logging into your Client Area with Cloudflare for first time you will probably be prompted with the Add Site form where you will be able to configure a new domain. Then Cloudflare will initiate a process of adding your domain to your Client Area.
You will have to specify the website which you want to add and click on the Begin Scan button.
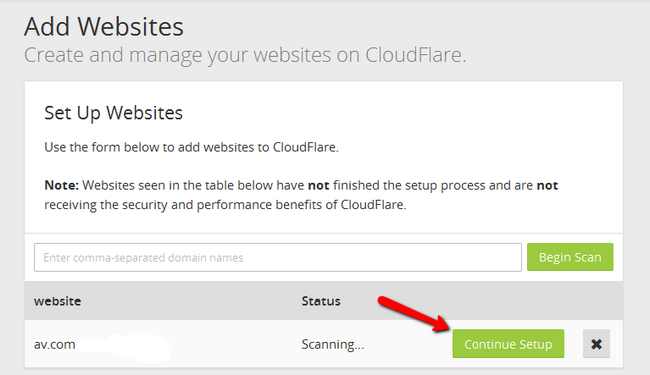
Once the scan has been completed you will be able to click on a newly available Continue Setup button.
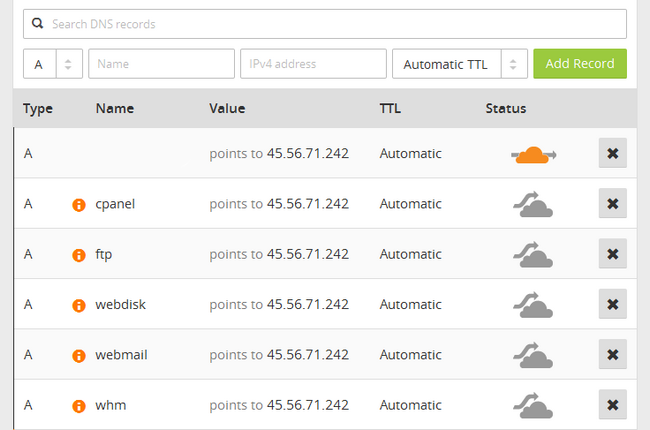
This will land you on the Configure your DNS records page where you will be able to configure all the DNS records for your domain name. Once you are done you will need to scroll down to the bottom of the page and use the Continue button.
On the next page you will need to choose a plan for your account. You can select between a free and different tiers of payed plans. Click the Continue button once you are ready.

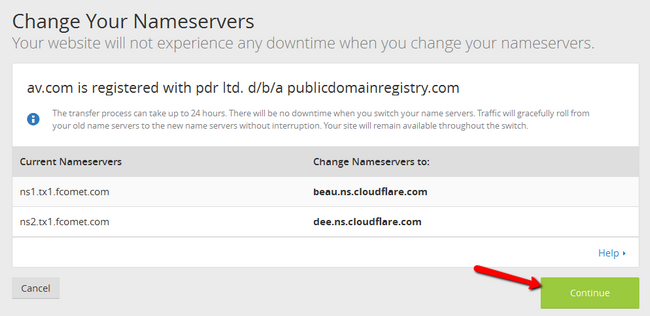
Next you will be presented with the Change your Nameservers page where you will see instruction on how to update the Nameservers pair of your domain name.
step
Change the Nameservers in your Client Area
This should be done outside the Cloudflare Client Area and more precisely where your domain is registered. Each Registrar supply their clients with a control panel for managing their domain names and there you will be able to change the nameservers your domain will be using.
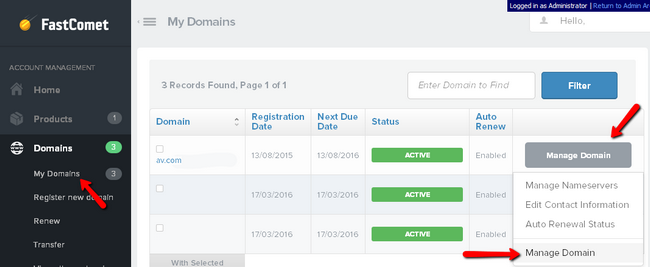
If you are FastComet customer the change of the nameservers associated with your domain name should occur in your Client Area → Domains → My Domains → Manage Domain → Nameservers.
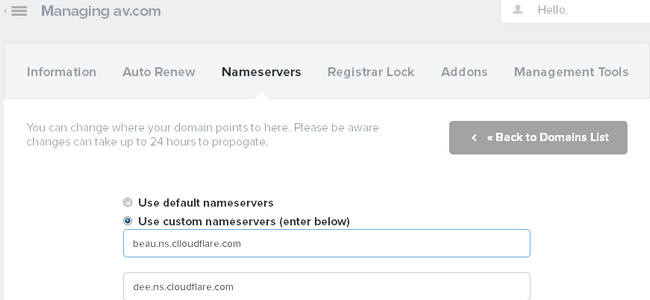
Apply the Cloudflare Nameservers and click on the Change Nameservers button at the bottom of the page.
Once the nameservers are changed you will need to allow up to 24 hours for the propagation period after that change to pass. Note that this period does not depend on you nor on us and there is not much you can do to speed it up.
Now that you have updated your nameservers please go back to the Cloudflare Client Area where you will need to click on the Continue button which will send you to the Overview page. There you will notice that your domain will be properly added to the Cloudflare service and it will be listed in the table view at the bottom of the page.
step
Remove a Domain from Cloudflare
Removing a domain from the Cloudflare service is also an easy procedure. Once the domain is added and then respectively listed you should be able to access it via the arrow at the top left of your Cloudflare Client Area.
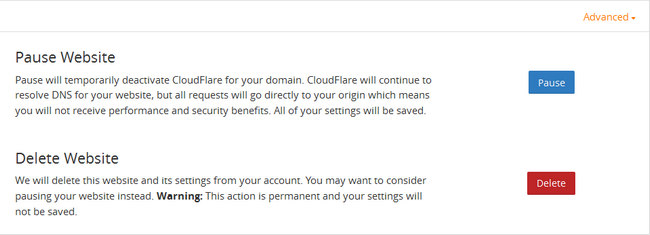
If you click on it and select the advanced options for the domain you will see a Delete Domain feature. Click on the Delete button to remove the domain from Cloudflare.
You will be then asked for confirmation and once you confirm the deletion your domain will be successfully deleted.
That is all you need to know for accessing your Cloudflare Client Area and managing the domains you have with the Cloudflare service!
On this page...

CDN Hosting
- Free Domain Transfer
- 24/7 Technical Support
- Fast SSD Storage
- Hack-free Protection
- Free Script Installation
- Free Website Transfer
- Free Cloudflare CDN
- Immediate Activation
