How to configure the Language Settings of ClipBucket
Updated on Mar 13, 2019
Clip Bucket provides with the option to use whatever language you would like to. Additionally each of the existing languages can be edited in order to fit your needs. In this tutorial we are going to review the Language Settings of the Clip Bucket application.
This tutorial assumes that you have already logged into the admin area of your Clip Bucket website.
To complete this tutorial, you will need to:
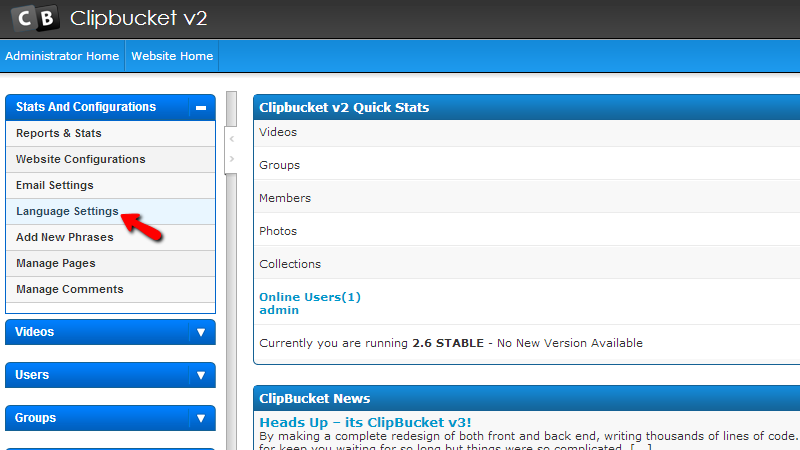
Step 1 Access the Language Settings page
The Language Settings page is located in the Stats and Configuration menu section and you should click on it once you access your admin area.
Next you will be redirected to the Language settings page where you will notice how there are two sections displayed.
Step 2 Edit Existing languages
The first section of that page is an actual table view with all of the currently installed languages. The default language your application is currently displayed in will have a tick in the Default column of the table view.

The available options for each language pack are displayed as links in the Language column of the table vie for every language you have installed.
Let’s begin with the Recreate pack option. It allows you to completely recreate the language pack you are using in case of some links or texts being displayed improperly.
The second option is called Recreate from pack and this option will recreate the language pack to its defaults.
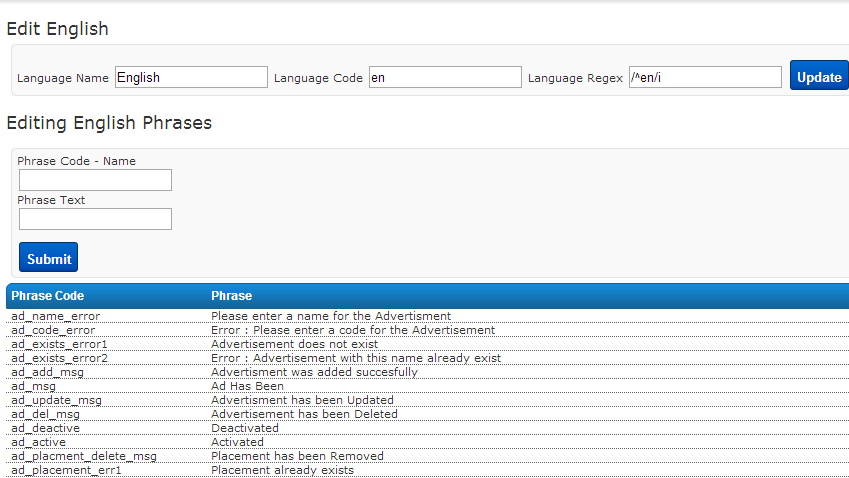
The third and the forth options are Edit Phrases and Edit. No matter on which of these options you will click you will be redirected to the same page - Edit Language page. This page is separated on two sections – Edit Language and Edit Language Phrases.
In the first section you will be able to edit the basic configuration for the language you have chosen while in the second section you will be able to fully edit the phrases of that language.
Let’s proceed with the Language Settings page and the options you have for each language. The next two options are Delete and Export. The delete option will respectively delete the language pack while the export option will export it as .xml document on your local computer.
The last option is called Deactivate and by using it you will be able to deactivate the language pack.
Step 3 Add a New Language Pack
The second section of the Language settings page is the Add New Language section where you will be able to install new language to your website. Assuming that you have downloaded the .xml file for the language you would like to install you will need to simply click on the Choose File button and point the path to that .xml file.

Once you have chosen the language pack file please press the Add Language button in order to install the language pack.
Congratulations! You now know how to configure the languages on your website and also how to add new languages to the same!
On this page...

ClipBucket Hosting
- Free Installation
- 24/7 ClipBucket Support
- Free Domain Transfer
- Hack-free Protection
- Fast SSD Storage
- Free ClipBucket Transfer
- Free Cloudflare CDN
- FFmpeg Support
